Introduction to vBoard.
Designed for Tutoring and other forms of online teaching
Group Management
Managing the students is easier by working with groups
Creating a group
The quickest way to create a group is right on the Home page: type a name in the field at the top and click Start new group. The group opens straight on the board, where a single link invites everyone in.
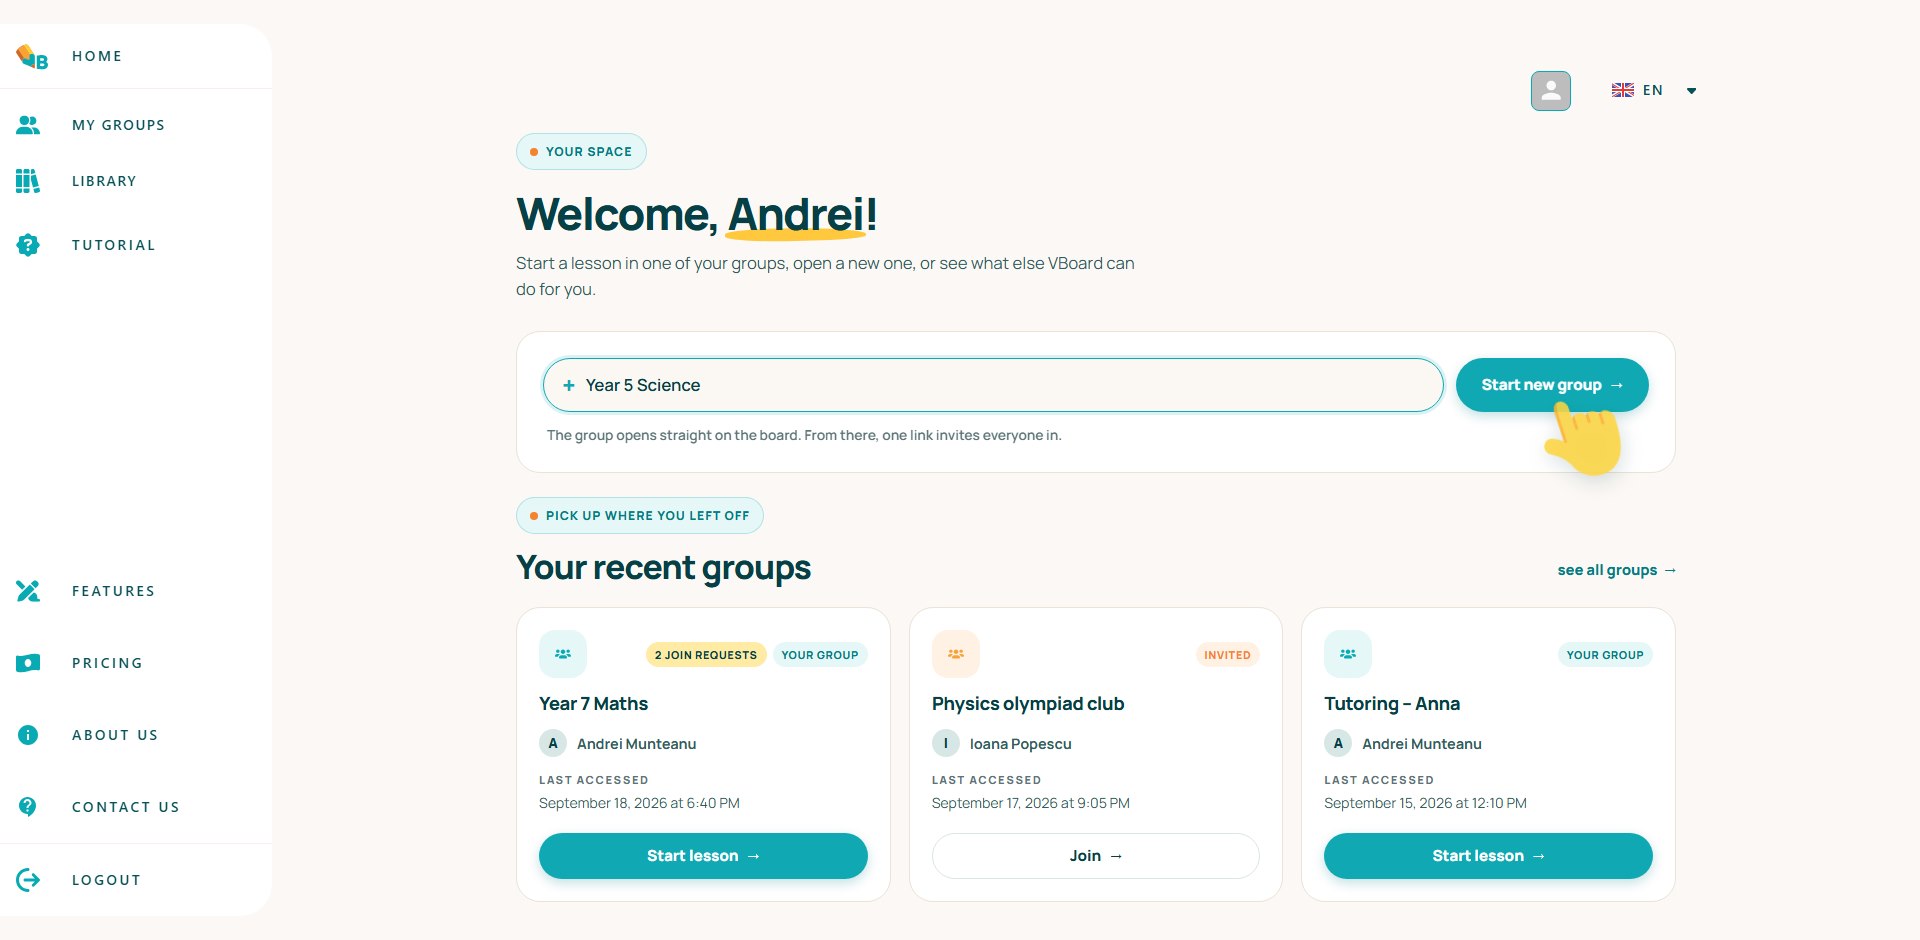
Creating a group can also be performed from the My Groups page. On the page, above the group listing there is a Create Group button. By clicking this button we will be redirected to a group creation form
My groups
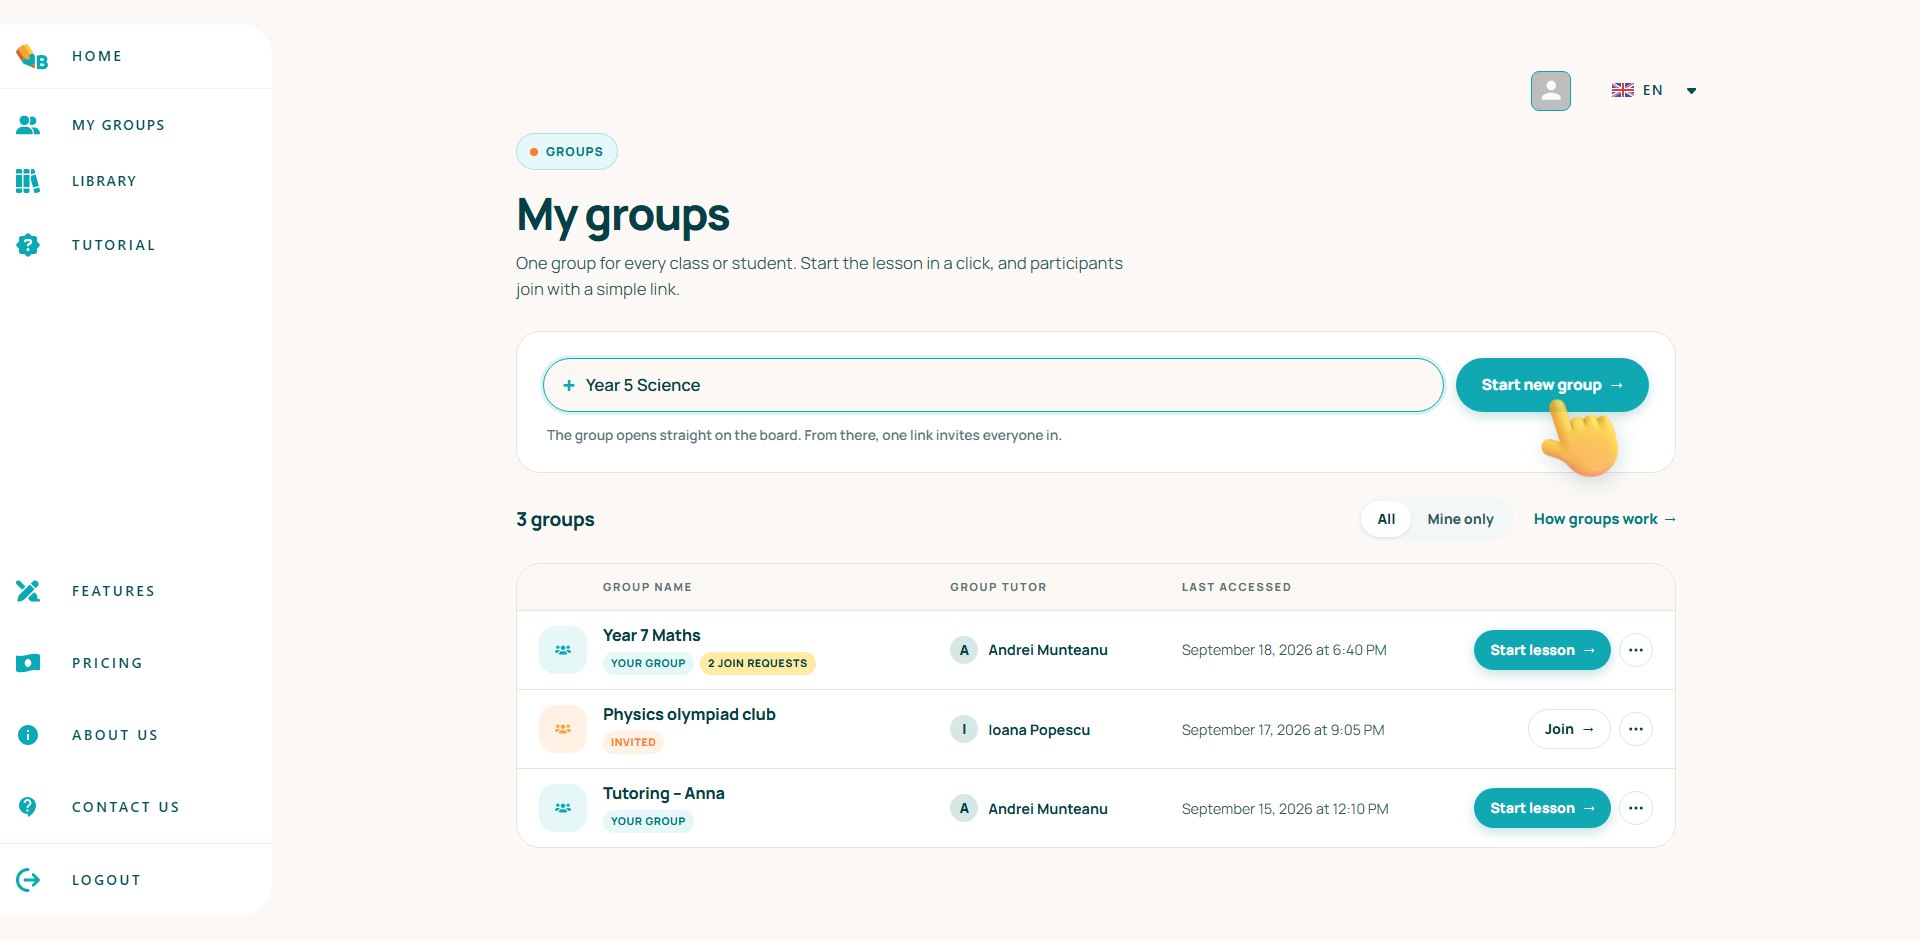
The ‘My Groups’ page can be accessed from the side menu by clicking the ‘My groups’ option
In the ‘My Groups’ page, we will be provided with a table listing for all the groups we have created. To start a lesson we go to the desired group row and click on the Start button.
Starting a lesson with a group by clicking Start.
Editing a group by clicking Edit.
Removing a group by clicking Delete.
Editing a group
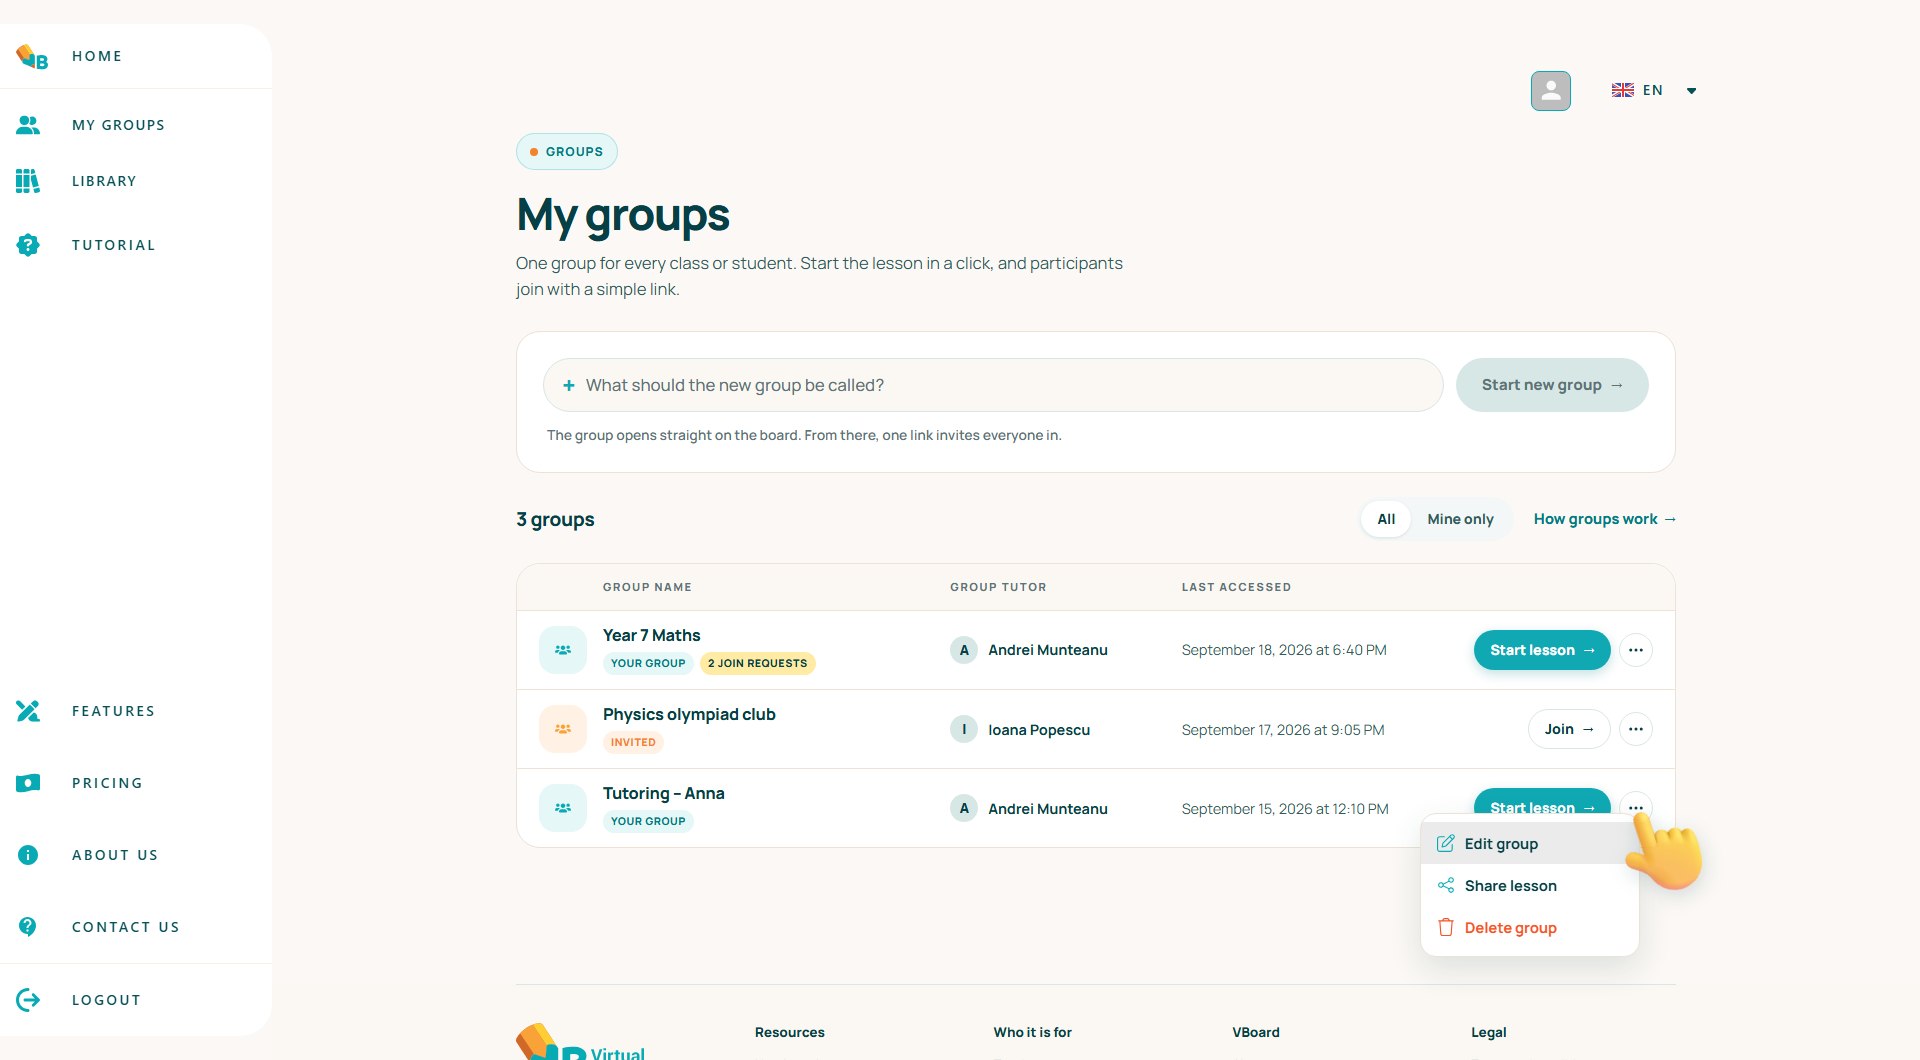
This page allows us to update various properties for our groups
This page contains the following options:
The SHARE LESSON button triggers the lesson sharing dialog
The START LESSON button
General settings for the group name and description. Changes save when you leave the field or press Save changes.
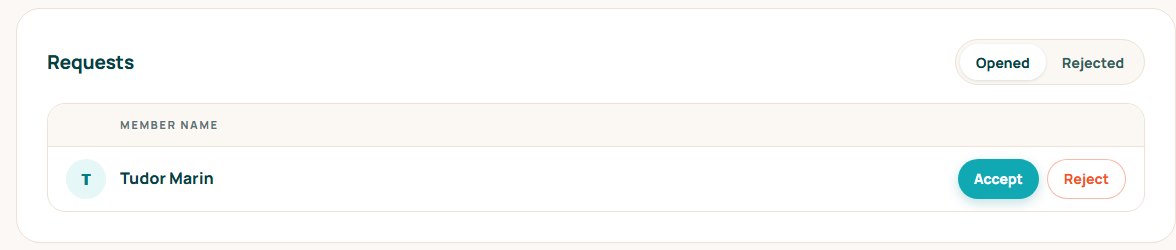
Updating open requests
This section shows us who wants to join the lesson and allows us to take the appropriate steps to:
ACCEPT the user in the group
REJECT the request explicitly
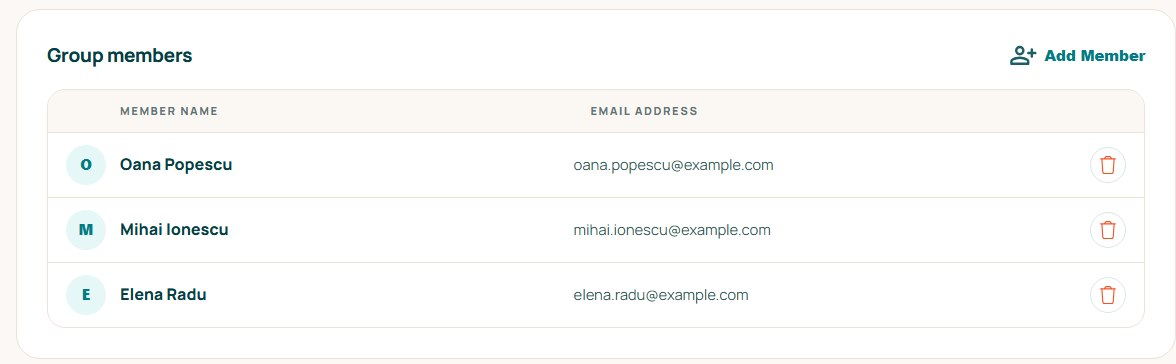
View group members. In this screen we can also remove the users we no longer desire in our group.
Managing a lesson
In this paragraph we will present all the options available during a lesson
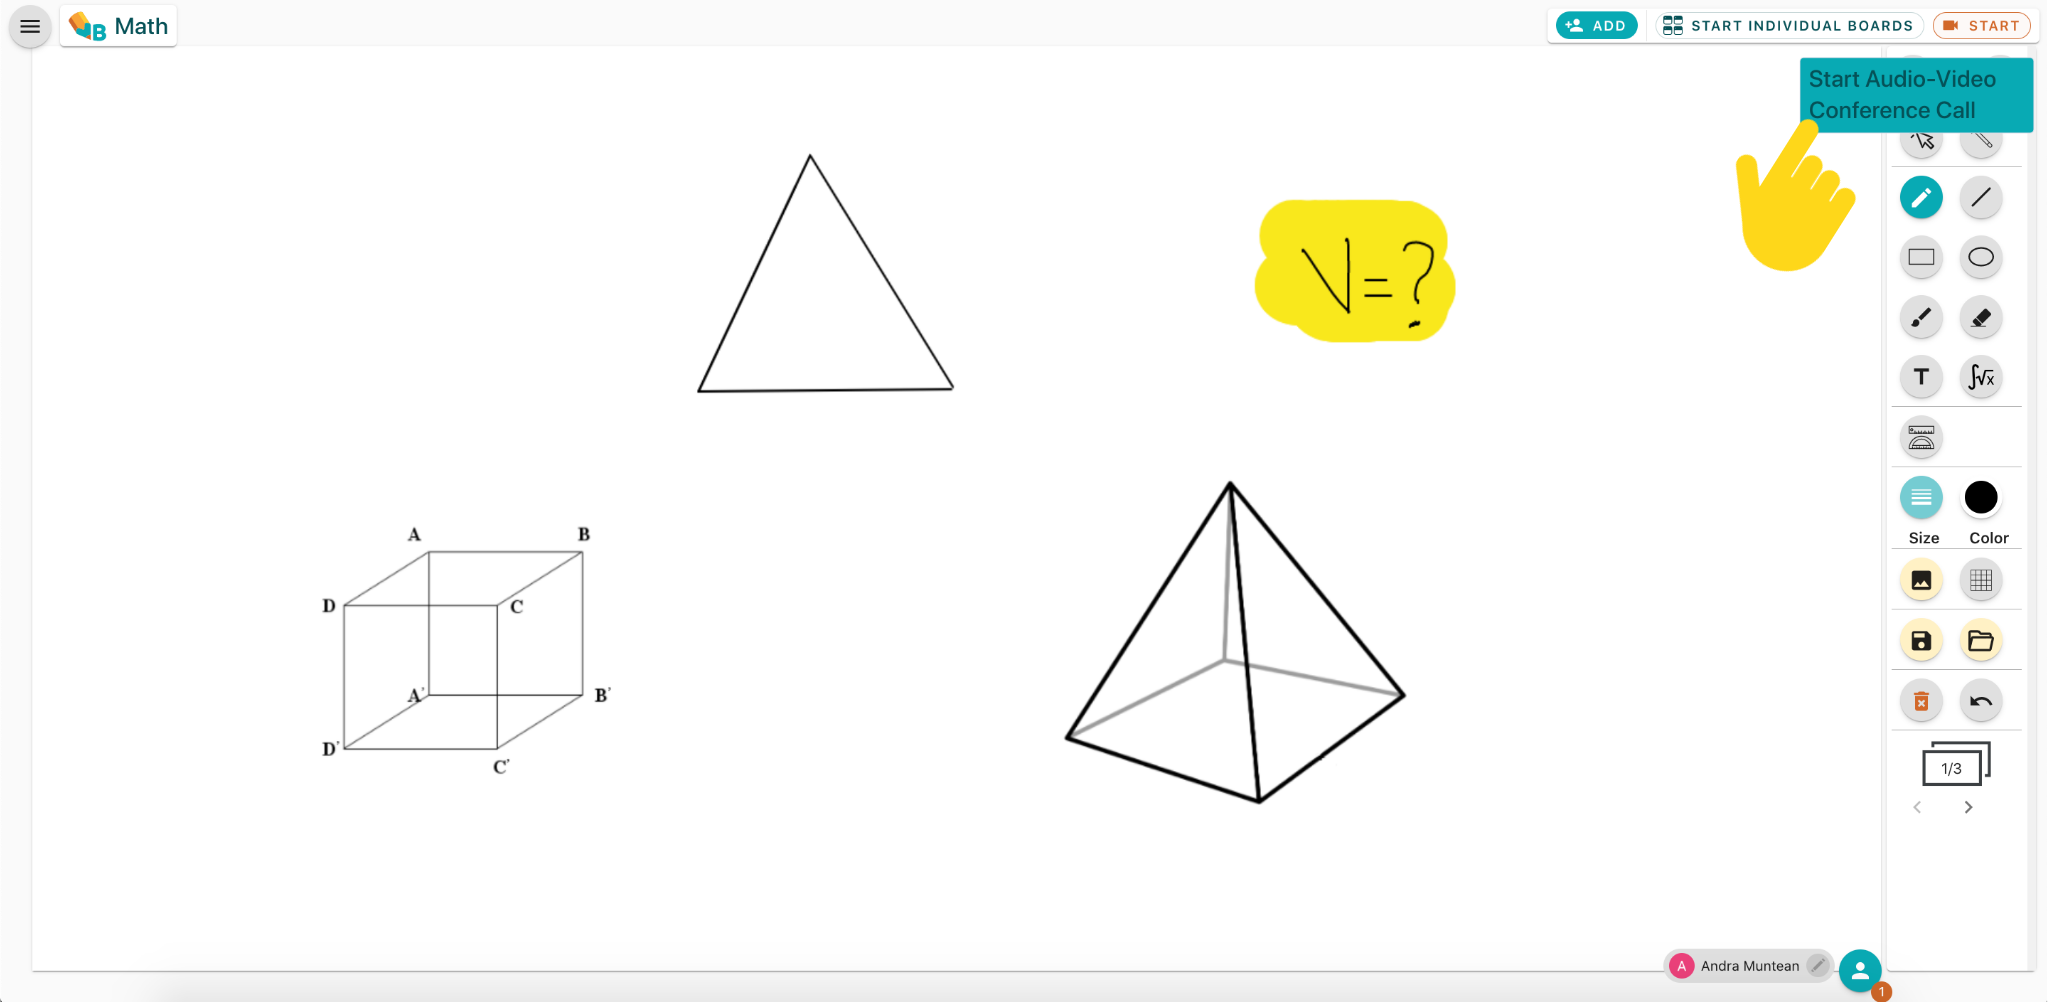
Audio/Video
This option allows initiating audio/video calls for the participants for a better communication
Start Call/Join Call
This button allows the teacher to initiate the audio/video call. Once the call has been initiated, the students will be able to join the call by clicking the join call button which will be made available.
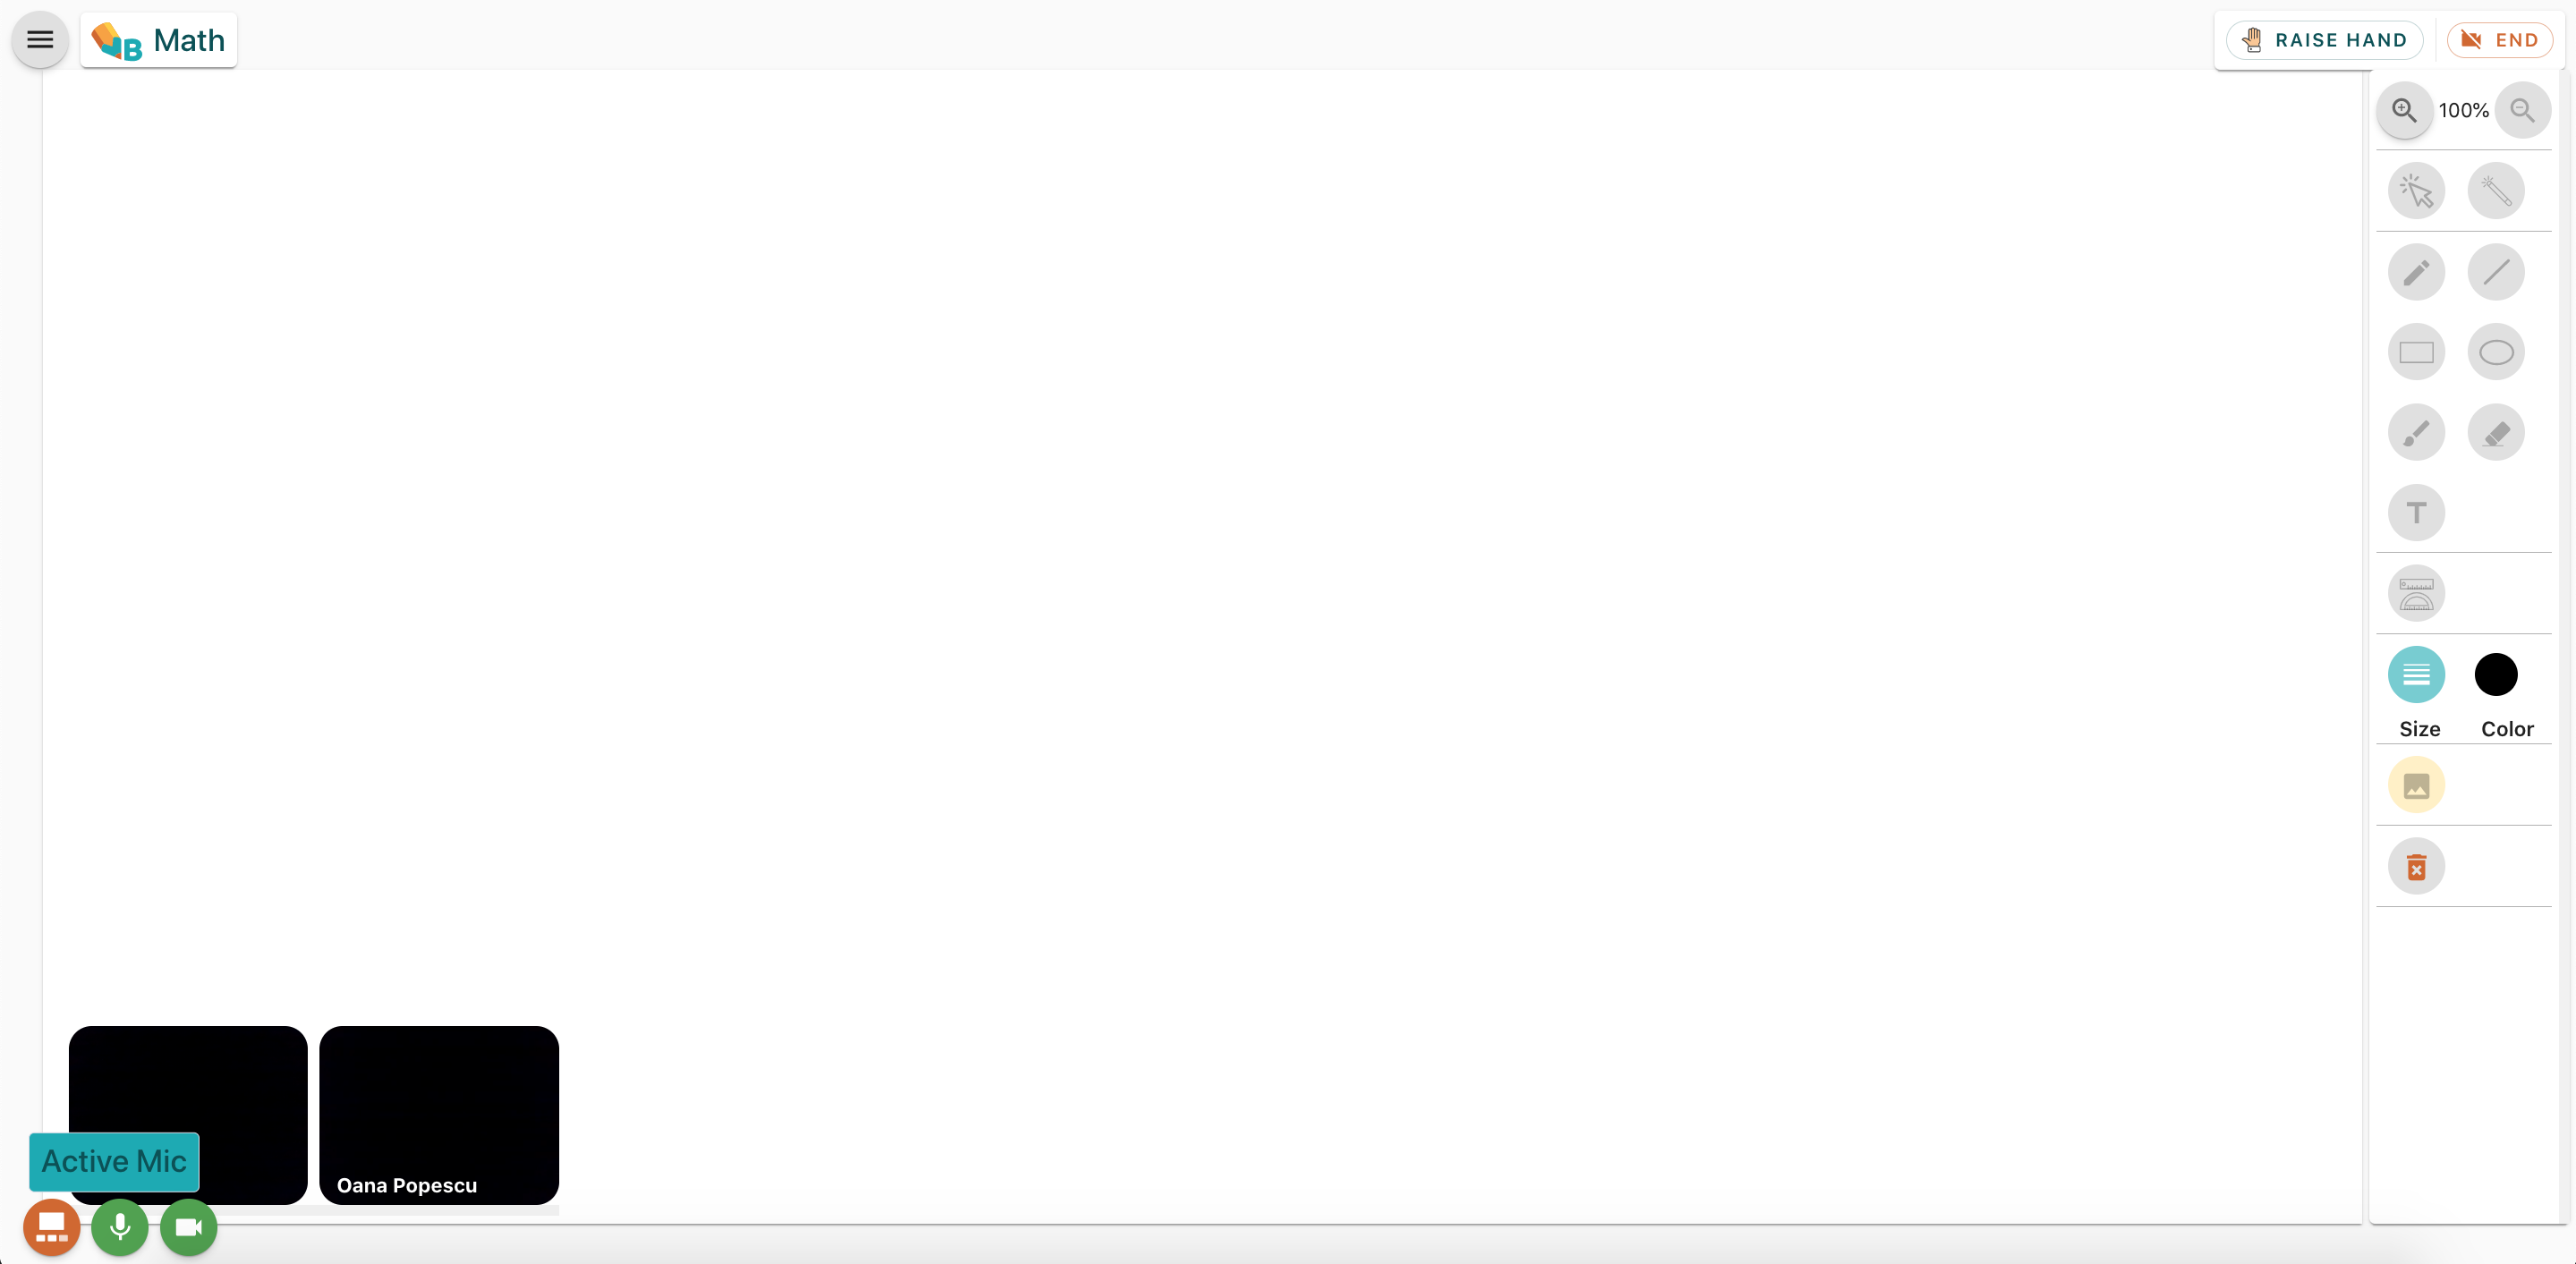
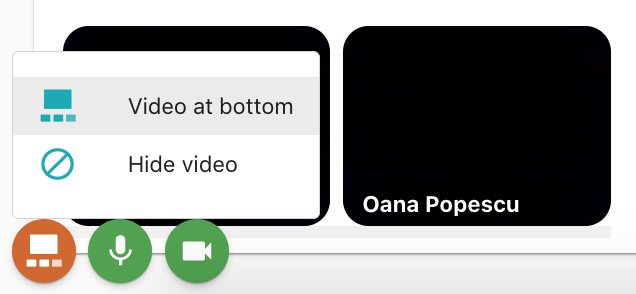
Show/Hide user videos
This button allows the users to view or hide the participants videos
Mute/Unmute
This button allows muting/unmuting our microphone during a call. If the microphone is not available this option will be deactivated
Enable/Disable video
This button allows the user to turn on or of their own camera feed
The Main Menu
This menu controls various aspects of the lesson
It can be accessed by clicking on the hamburger icon
Managing a lesson
Leave class
Leaving the current lesson
Share lesson
Using this option we can share the lesson and allow other people to join
Join Requests
This option shows us the currently opened requests to join this group. Every time a user tries to join the group during a lesson this dialog will pop up
Individual board activities
The admin can see the individual board activities saved for this class
Member list
This list shows all members present in lesson and provides the following options:
Ability to allow or block the student from writing on the table
Ability to mute or unmute the members microphone
The ability to see if a member has a raised hand
Changing the language
This button changes the interface language
Raise hand
This option is only for the student and allows raising their hand
Instruments
During a lesson we will have the following instruments:
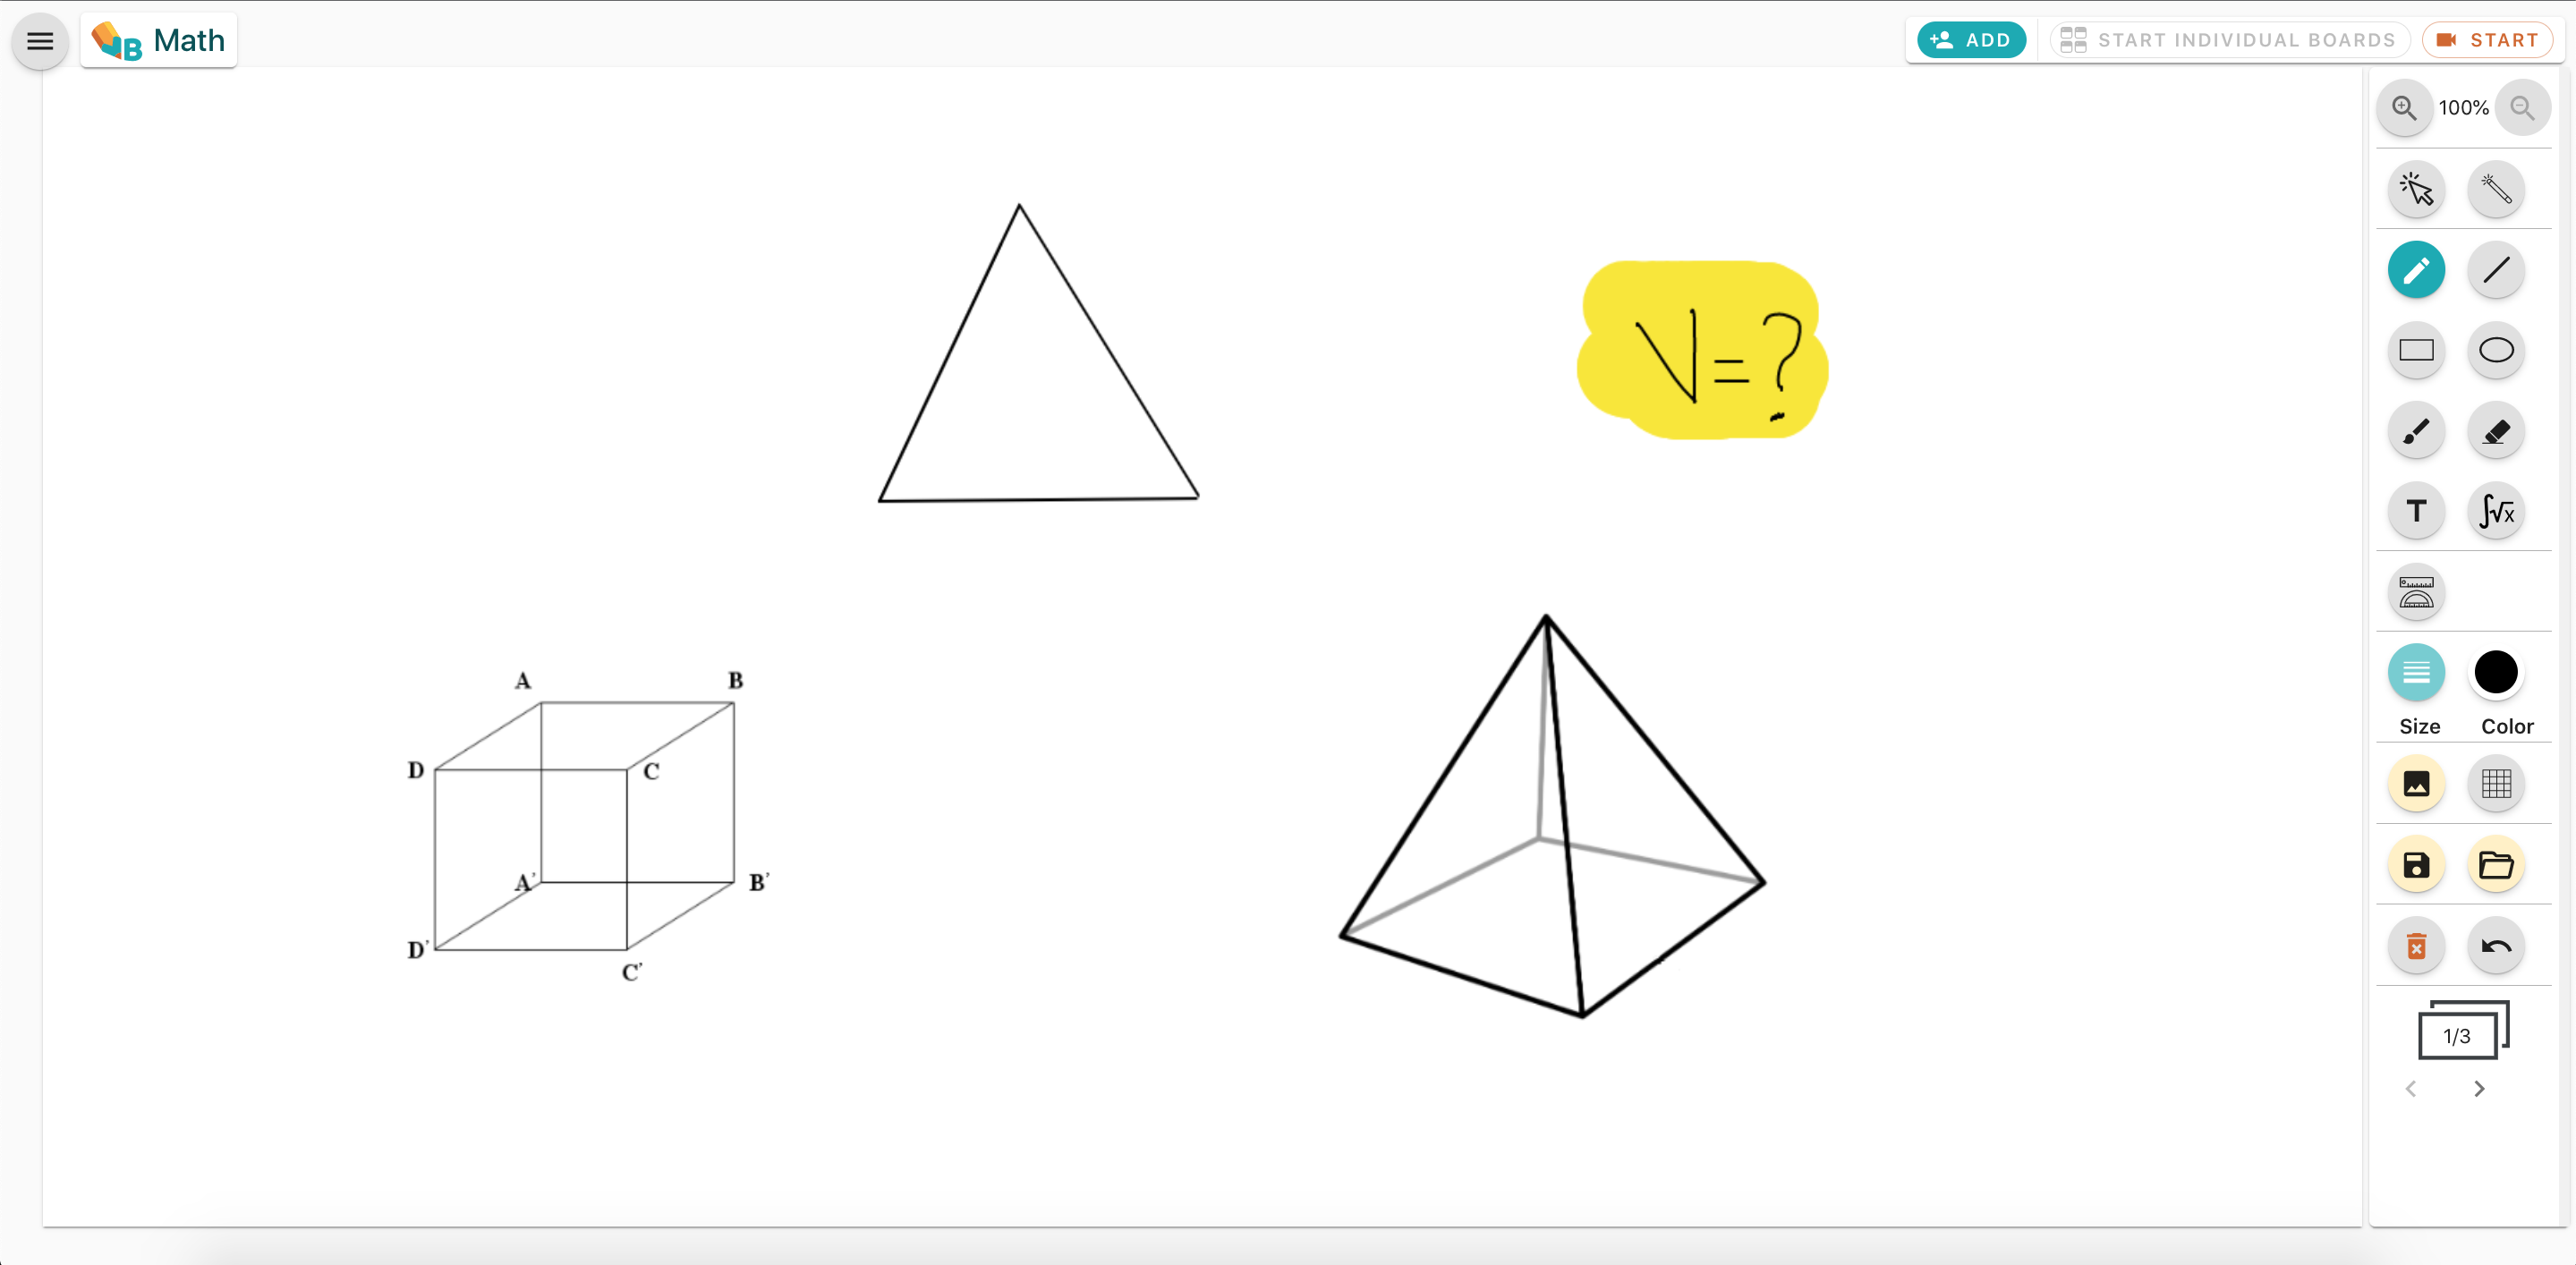
Pen
We can easily write complex formulas using a mouse, graphic tablet, stylus or finger (depending on the device we are using)
Line
We can draw straight lines to describe geometric shapes
Rectangle
Drawing a rectangular shape
Ellipsis
Drawing an ellipsis
Brush
Drawing with a brush
Eraser
Allows us to erase what we wrote on the board using an eraser of various sizes
Text
Writing text of various sizes using the keyboard
Text can be of different sizes, it can be moved and you may write on several lines.
Added text can be moved, edited or deleted by using the selector toolClear board
This button cleans the current board and resets the lineage to none
Size
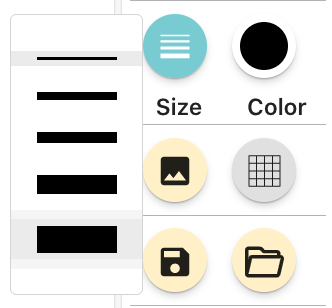
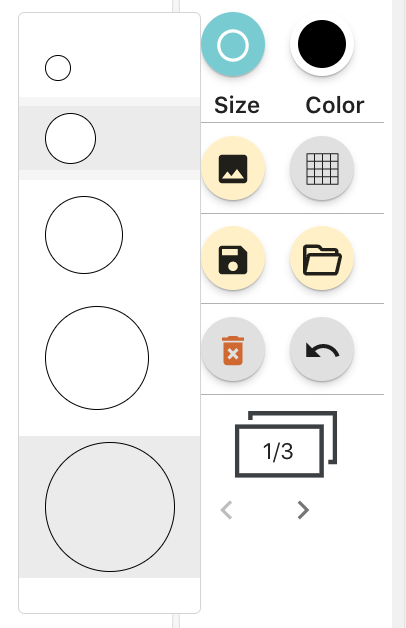
We can select the width of the line we are writing with, the size of the eraser, or the size of the text. The line width applies to the pen, line, rectangle and ellipsis.
Color
We can select the color for our drawings. The color applies to the pen, line, rectangle and ellipsis.
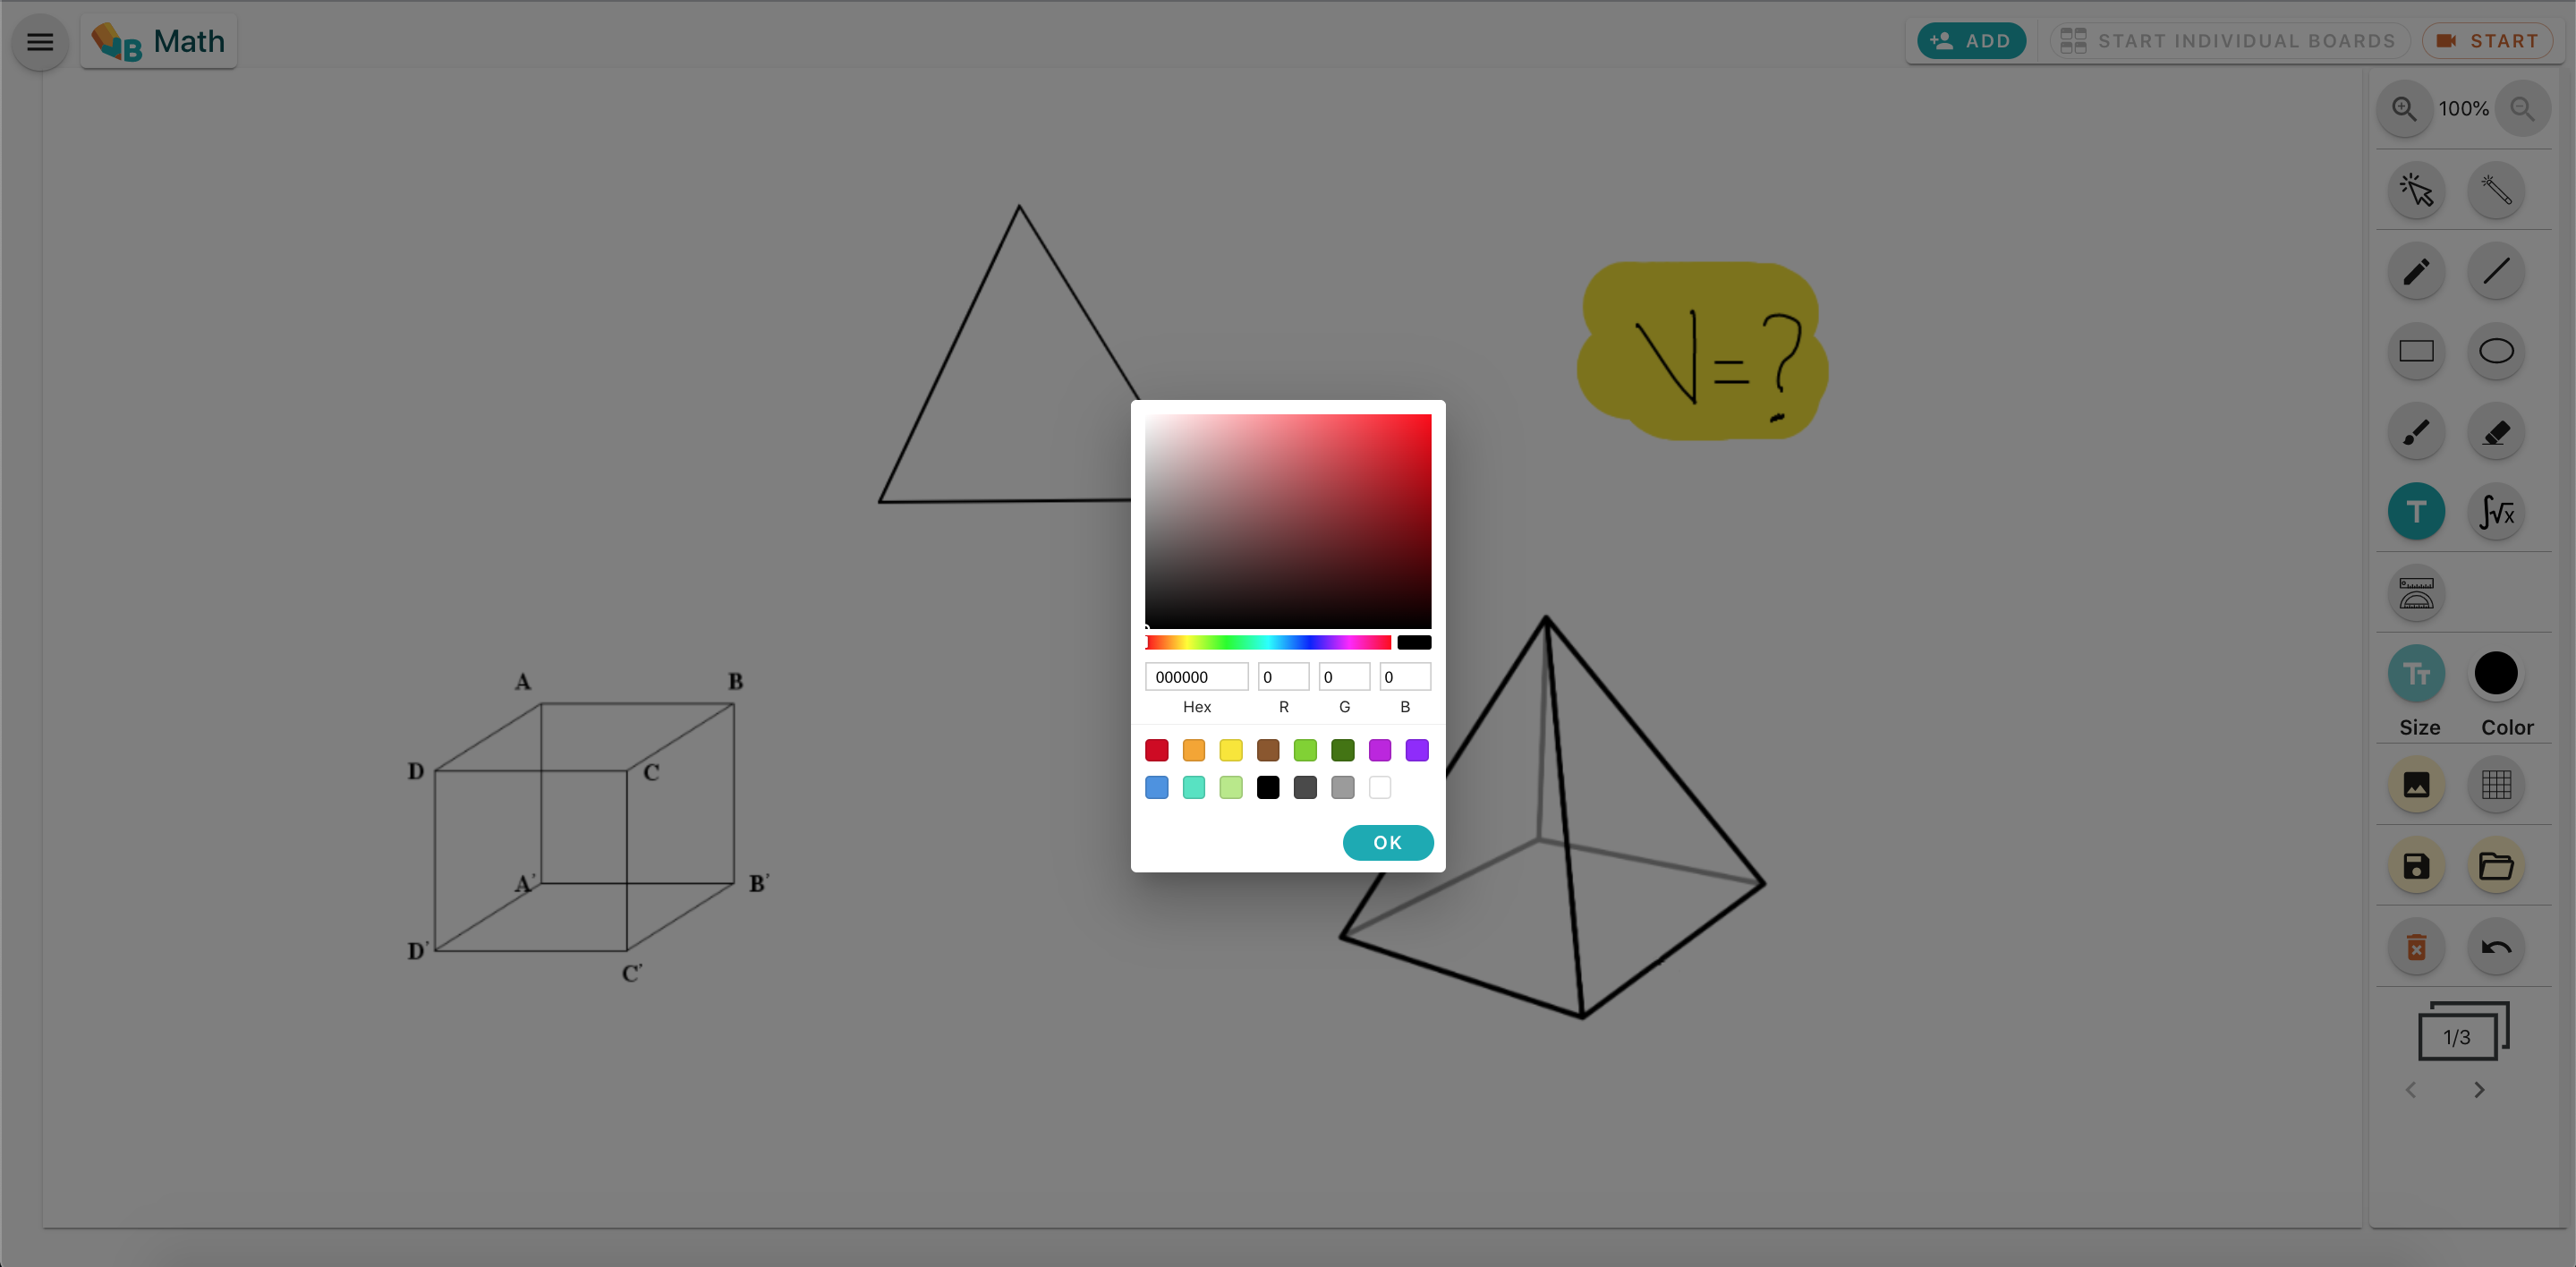
Connectors
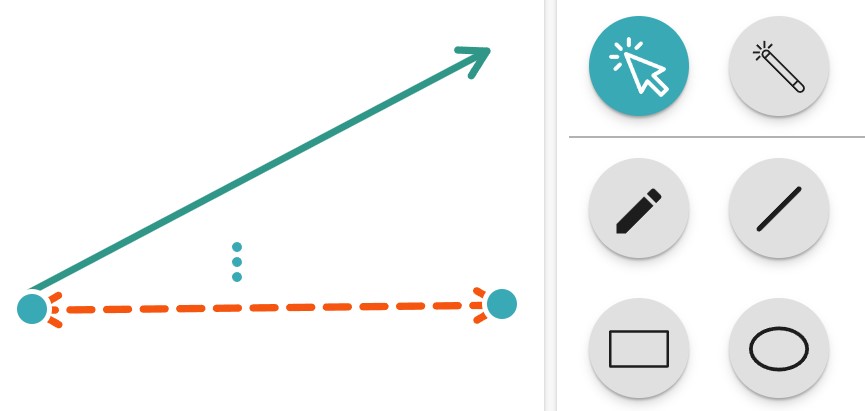
The connector tool allows you to draw lines and arrows between elements on the board.
Connector tool — click the connector icon in the toolbar to open the type selector.
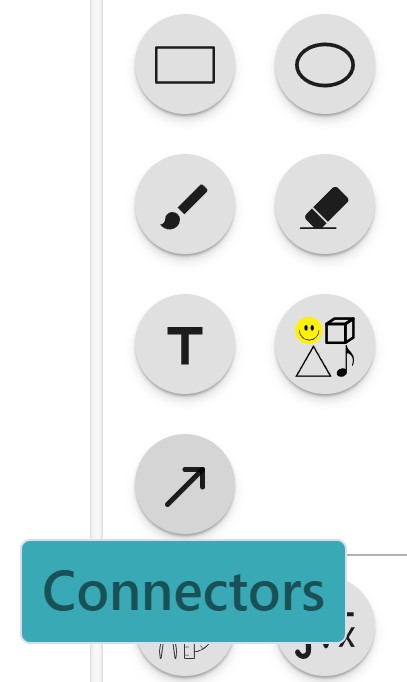
Choose from 5 connector types:
Simple line — a plain line with no arrowheads.
Open arrow — a line with an open arrowhead at the end.
Filled arrow — a line with a solid arrowhead at the end.
Double open arrow — open arrowheads at both ends.
Double filled arrow — solid arrowheads at both ends.
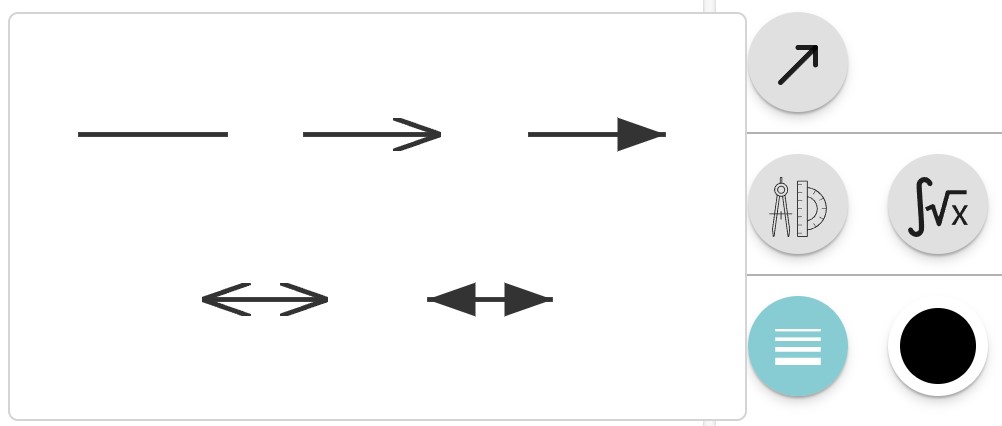
Drawing a connector:
Select a connector type from the popup menu.
Click and drag on the board to draw the connector from start to end.
Release to place it.
Editing a connector:
Click on a connector to select it.
Drag the line body to move the entire connector.
Drag the endpoint handles to reposition each end independently.
Click the menu icon at the midpoint of the line to open the context menu.
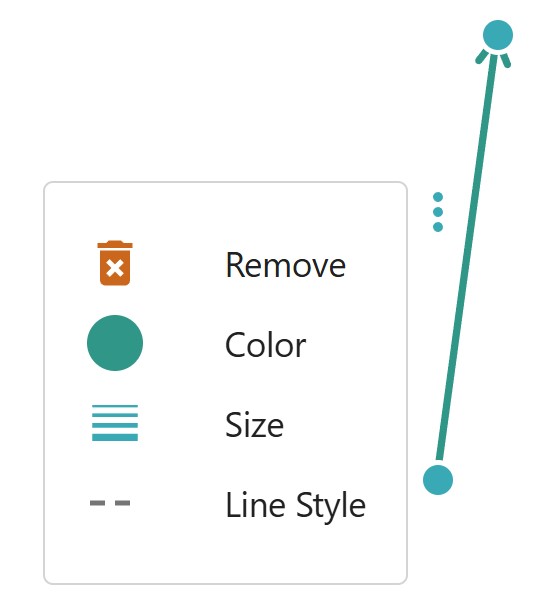
Styling options (from the context menu):
Color — pick from an 18-color palette.
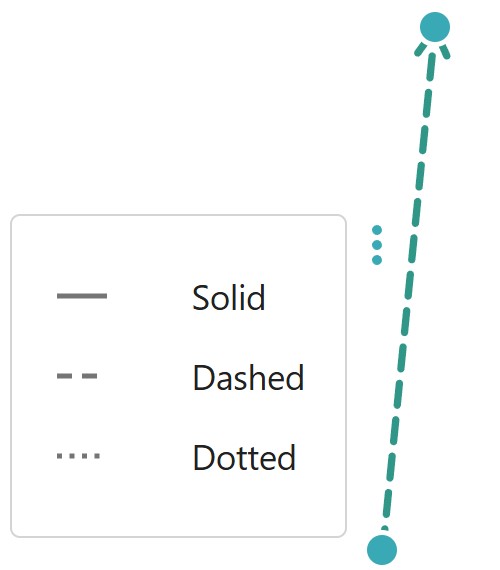
Line weight — adjust the thickness of the line.
Line style — choose solid, dashed, or dotted.
Links
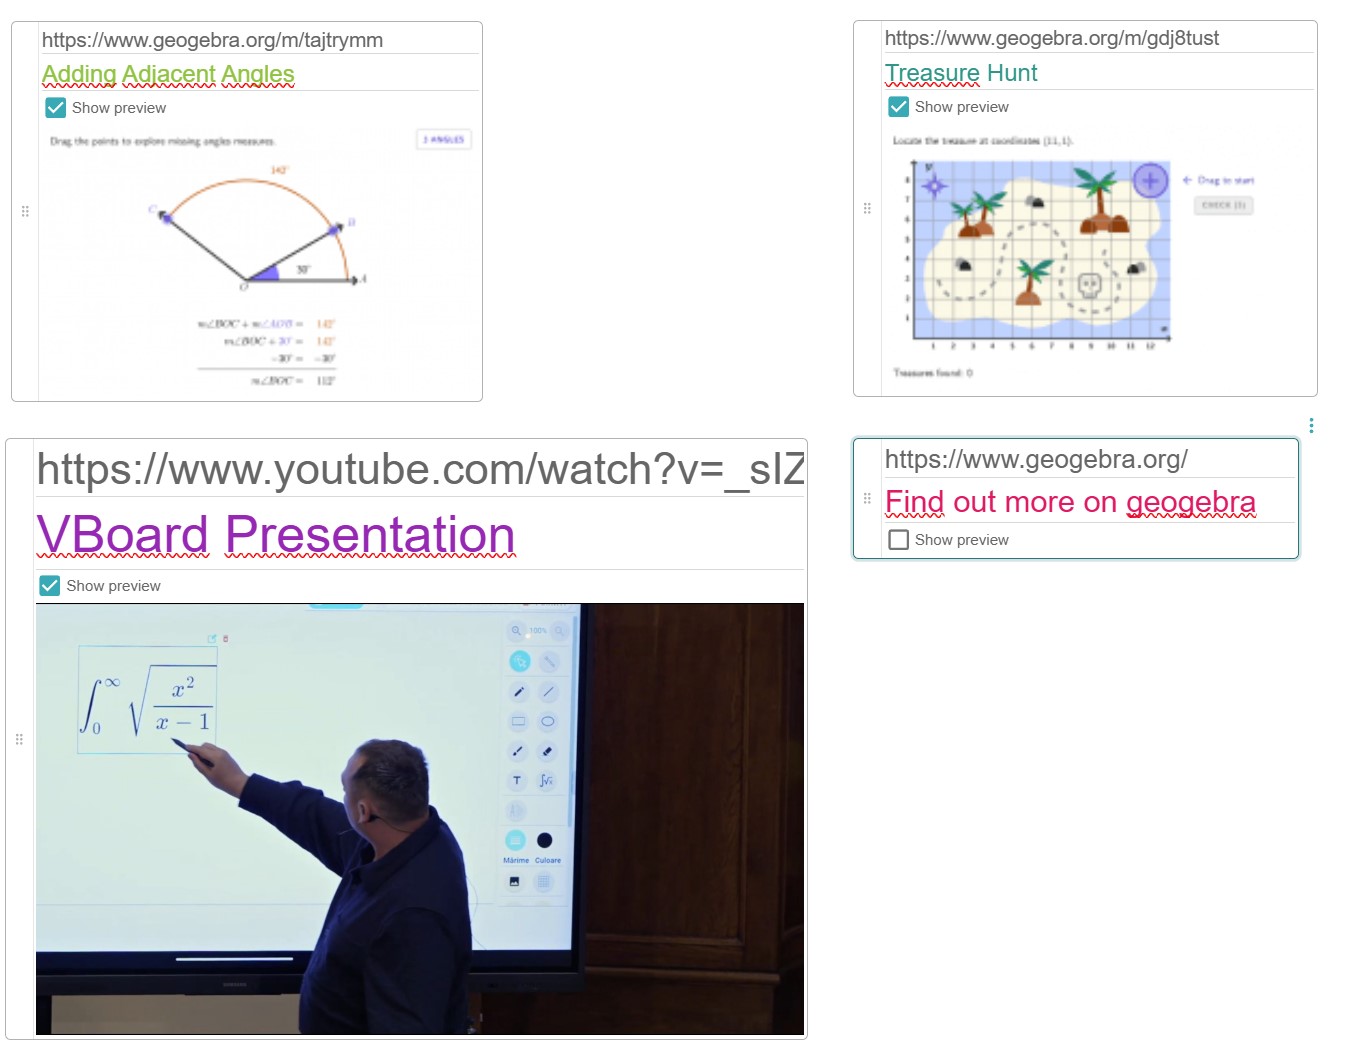
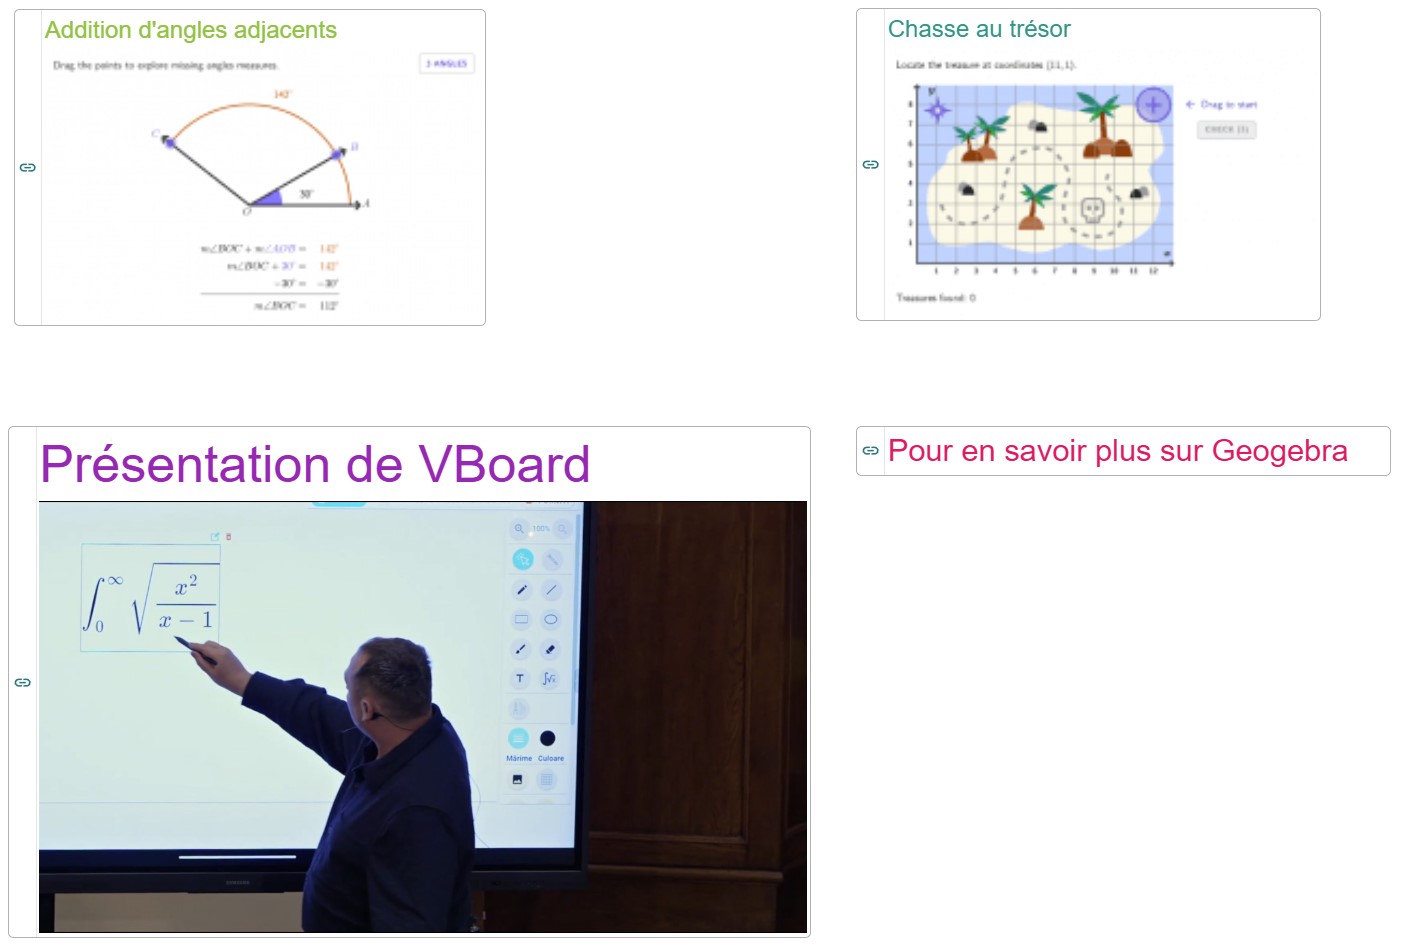
The link tool allows you to add clickable links to the board with a custom label and URL. A preview image is automatically fetched from the link when available.
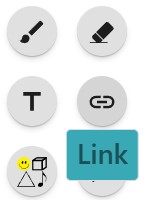
Link tool — click the link icon in the toolbar to activate the link tool.
Creating a link:
Click anywhere on the board to place a new link element.
Type or paste a URL in the first field (e.g. "https://example.com"). A preview image will be fetched automatically if available.
Optionally type a label in the second field (e.g. "My Website").
Editing a link:
Click on an existing link to select it and edit the label or URL.
Use the drag handle on the left side to reposition the link on the board.
Click the menu icon to access additional options such as delete, font size, and color.
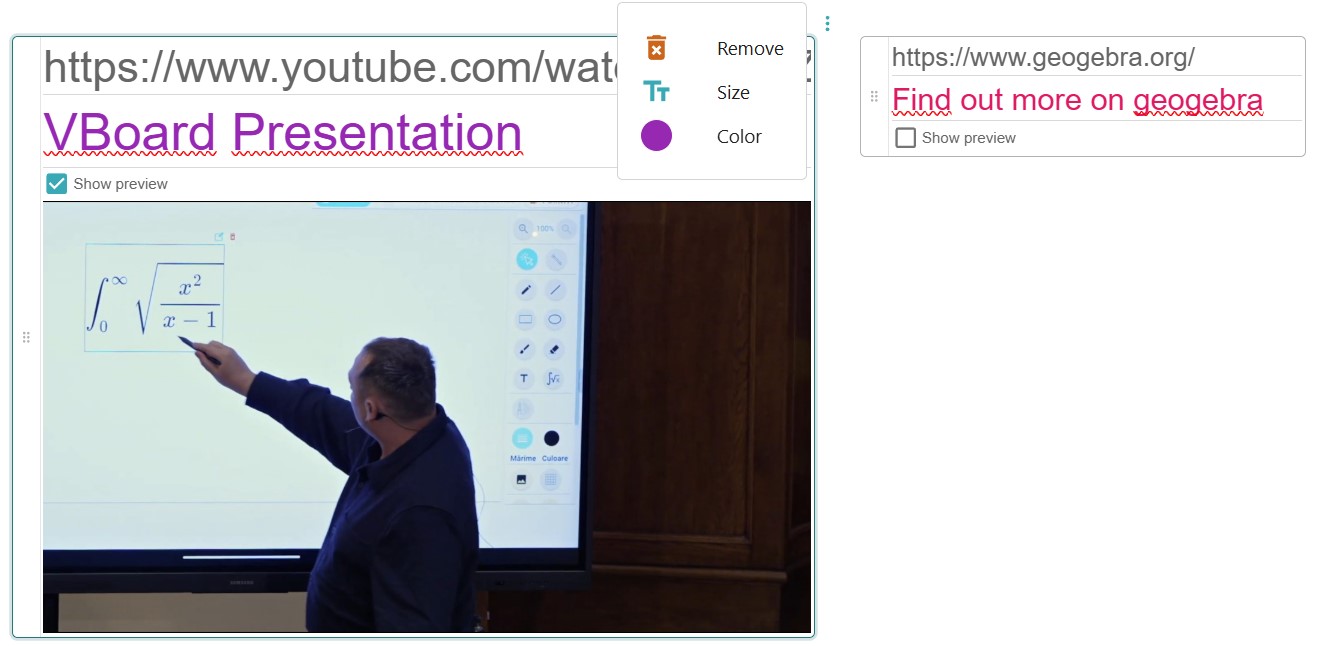
Link preview:
When you paste or type a URL, a preview image is automatically fetched from the website (if available).
A Show preview checkbox appears below the label field — uncheck it to hide the preview image.
The preview setting is saved per link and also applies to the view mode and PDF/image exports.
Styling options (from the context menu):
Color — pick from an 18-color palette to change the link text color.
Font size — adjust the size of the link text.
Text
The text tool lets you add formatted text boxes to the board. Each text element can be moved, resized, and restyled with different fonts, sizes, weights and colors.
Text tool — click the text icon in the toolbar to activate the text tool.
Creating text:
Click anywhere on the board to place a new text box.
Start typing — the text box grows automatically as you type and supports multiple lines.
Click outside the text box (or pick another tool) to finish editing. Empty text boxes are removed automatically.
Editing, moving and resizing:
Activate the selector tool and click a text element to enter edit mode.
Use the drag handle on the left side to reposition the text box on the board.
Drag the small handle at the bottom-right corner to change the width of the text box.
Click the menu icon to access additional options such as delete, font formatting and color.
Font formatting:
Open the Font option from the context menu to reveal the formatting panel.
Font size — drag the slider to scale the text up or down.
Font family — pick from the dropdown (the default is Arial; a wide range of serif, sans-serif, monospace and handwriting fonts is available).
Bold / Italic / Underline — toggle these styles independently using the three buttons in the Style row.
Color:
Color — pick from an 18-color palette to change the text color.
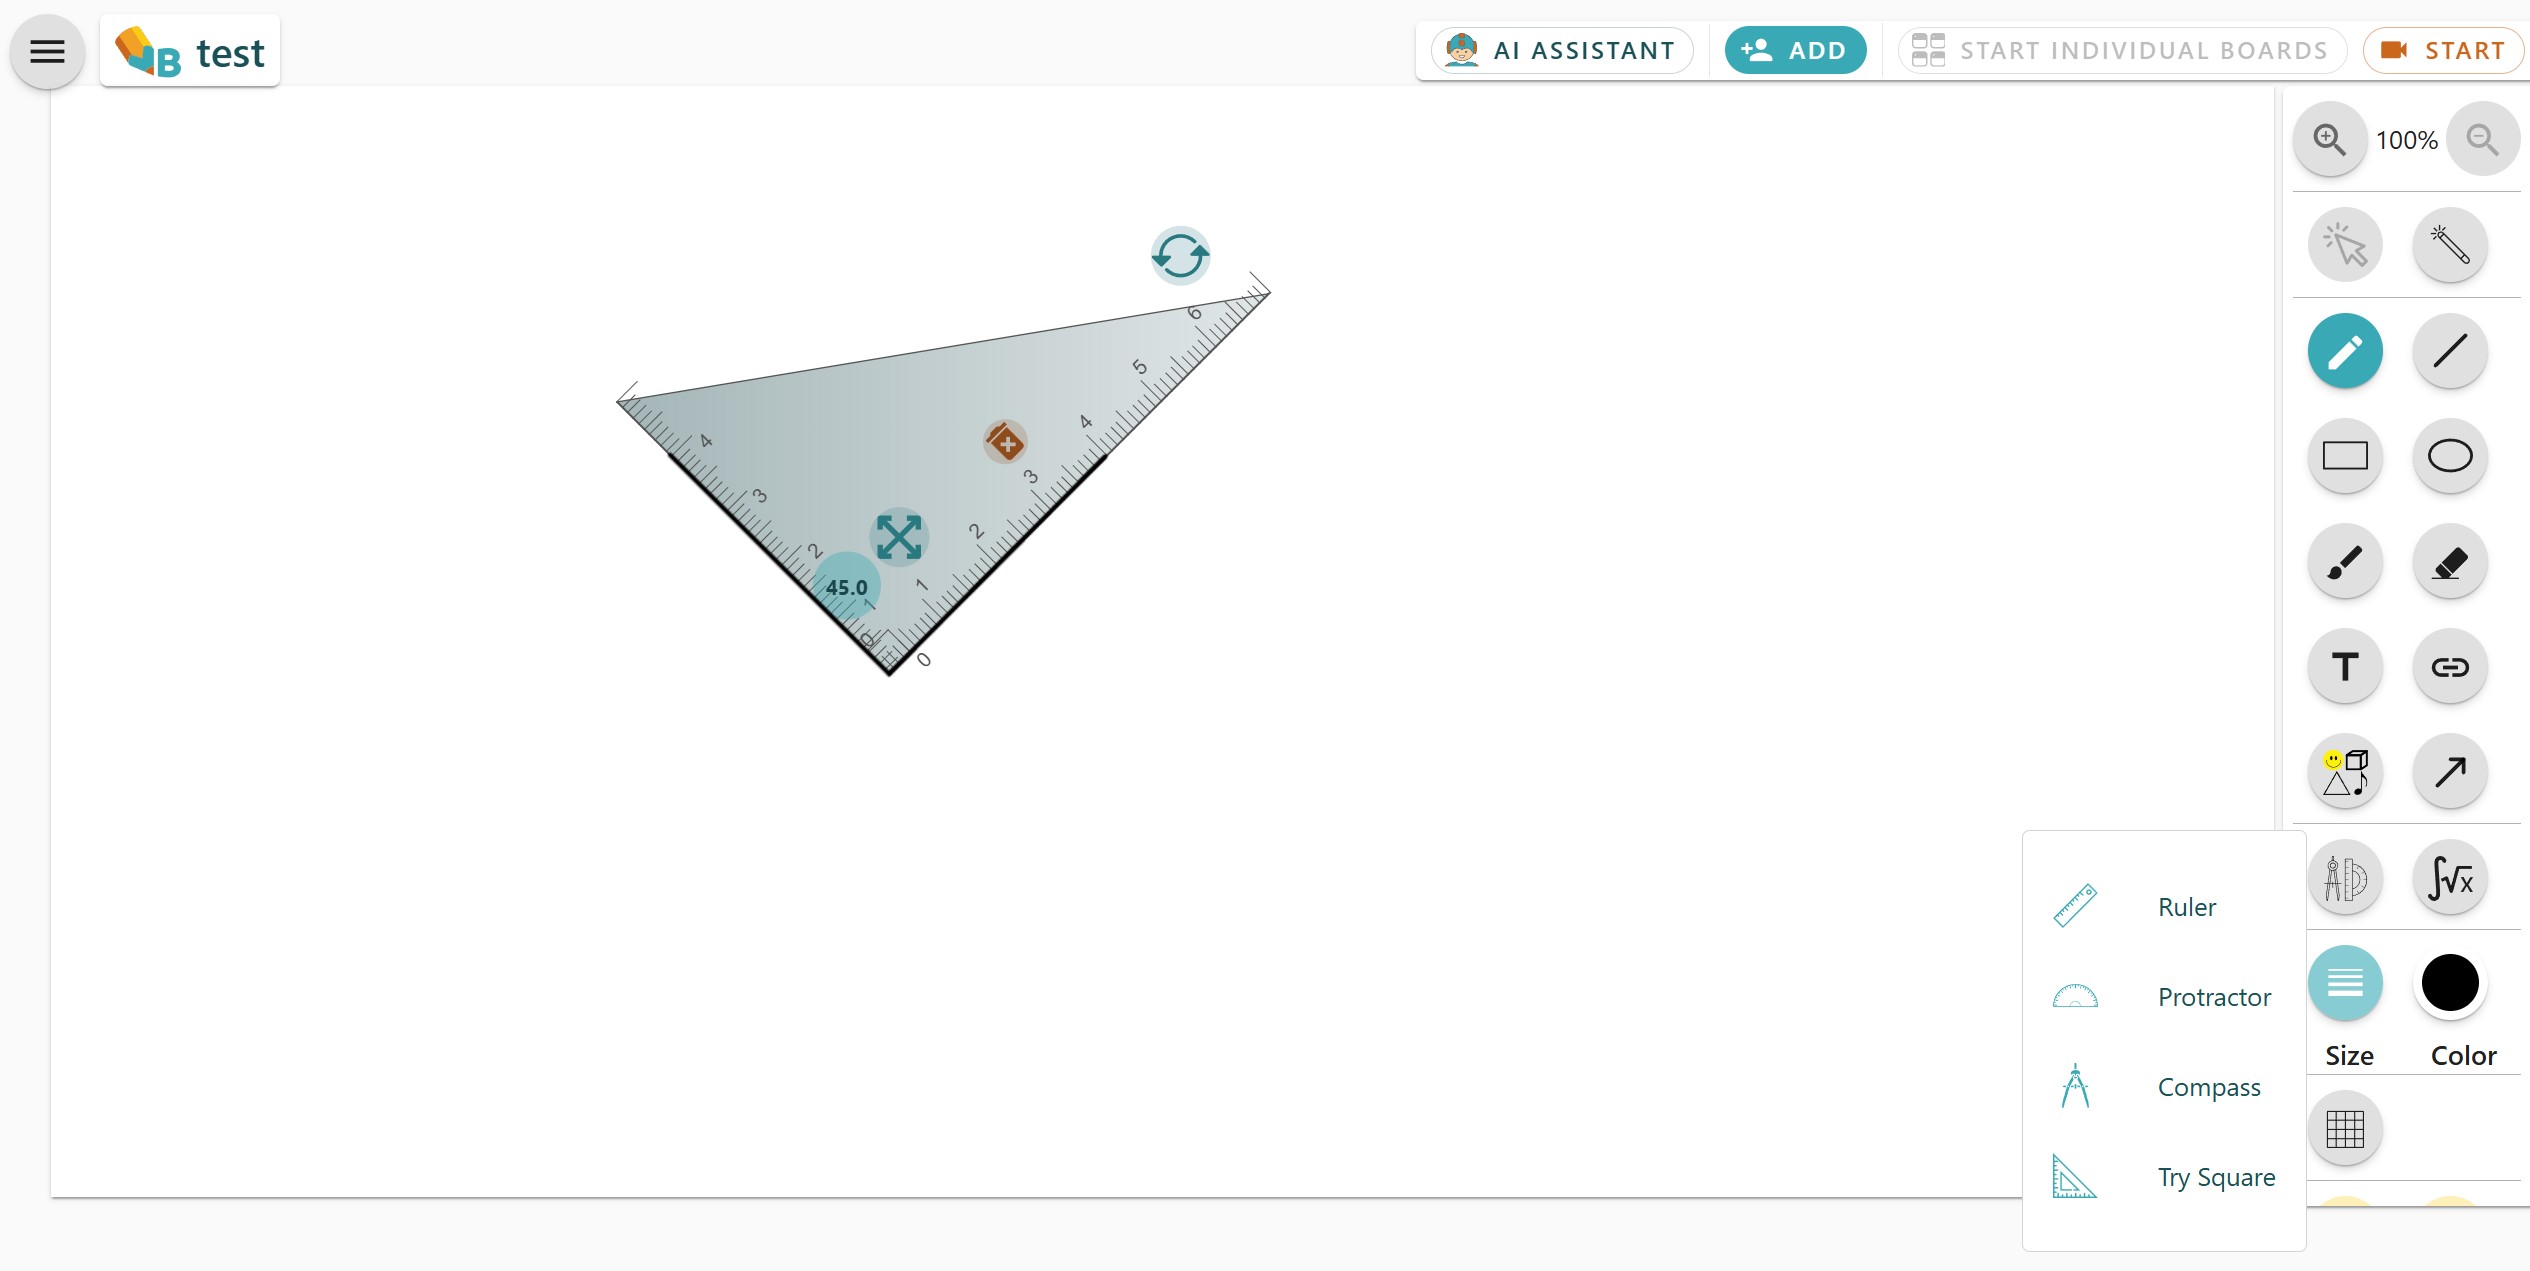
Geometry menu
During a lesson, we can use the following geometry tools:
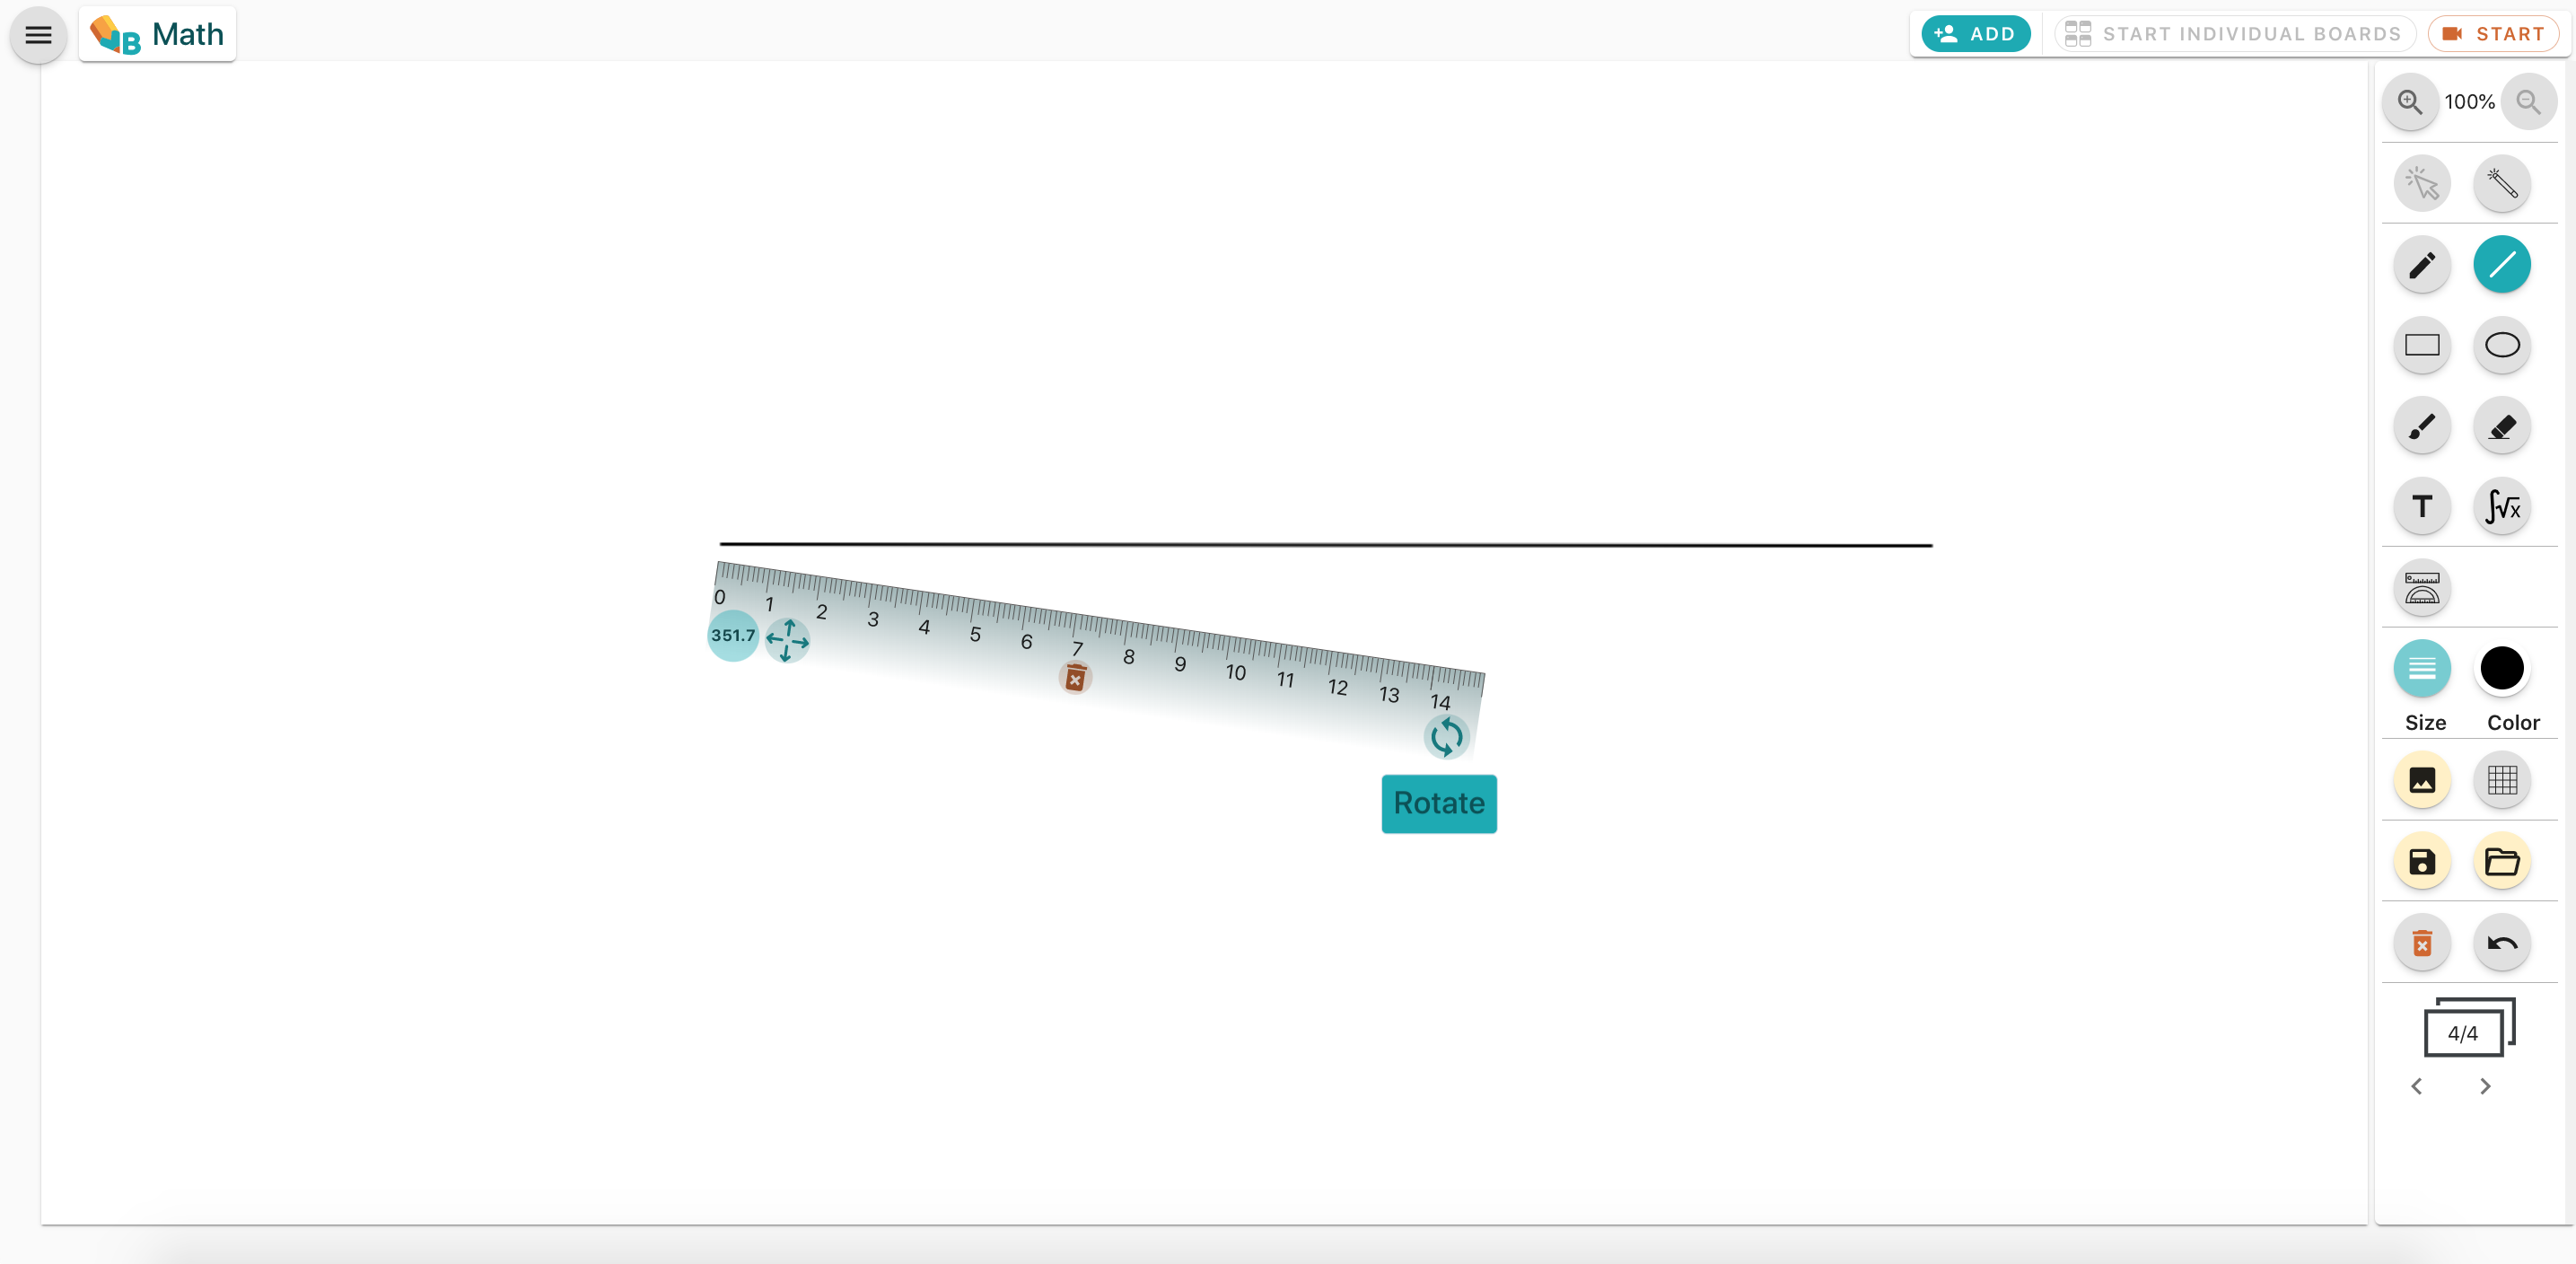
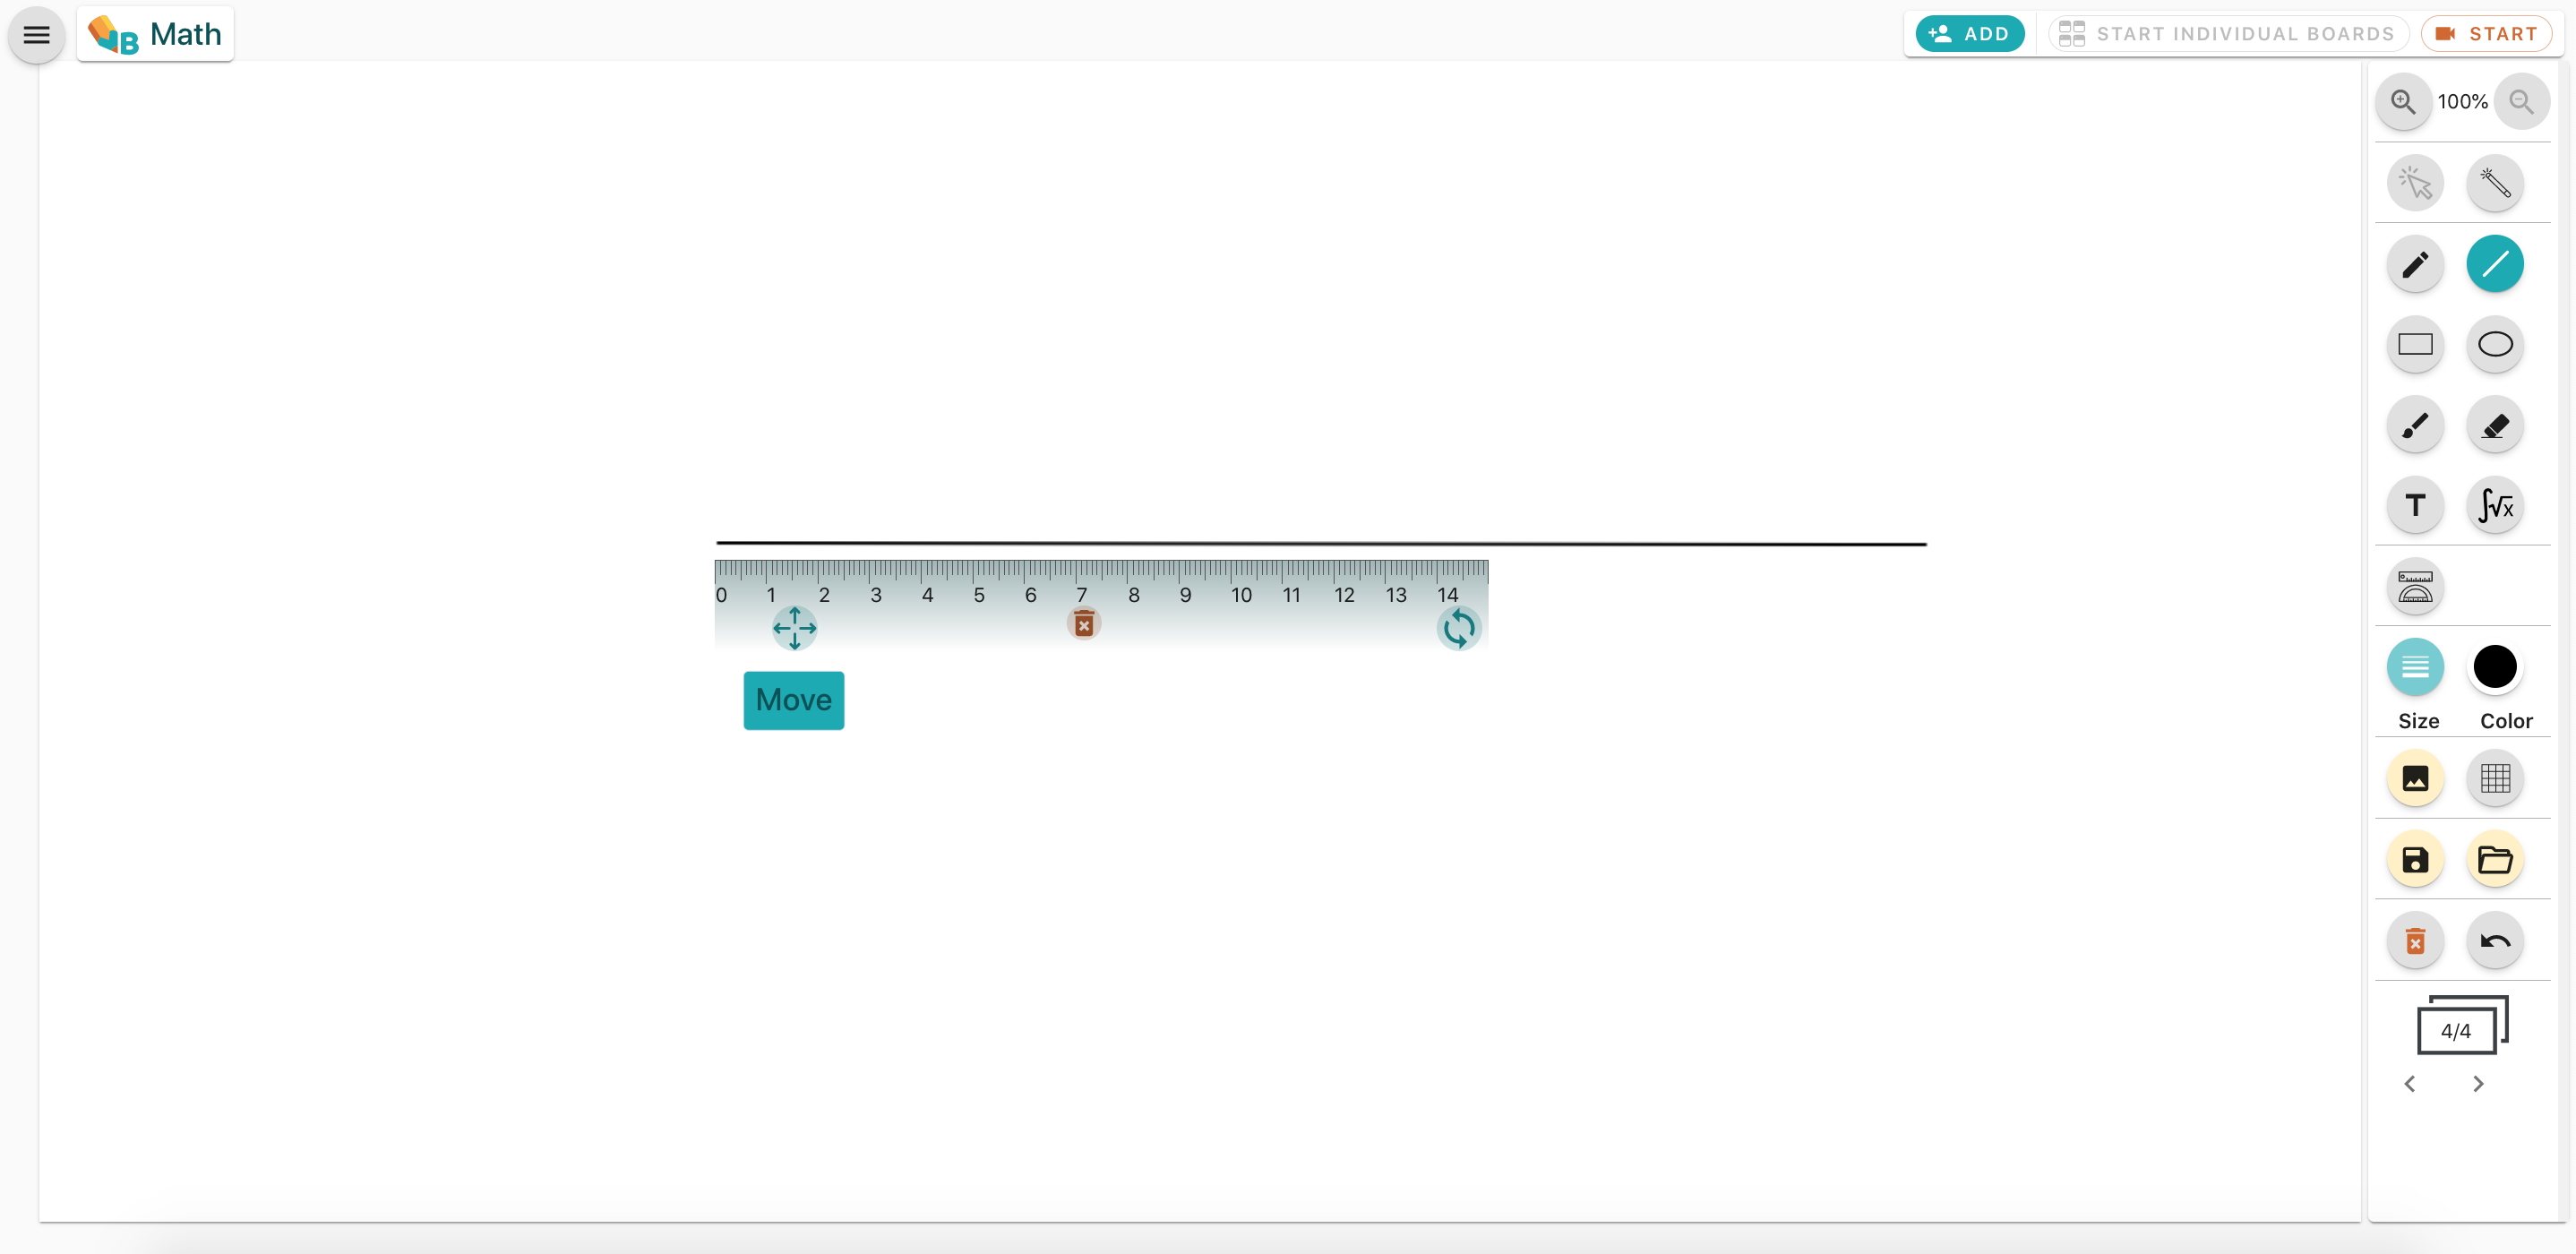
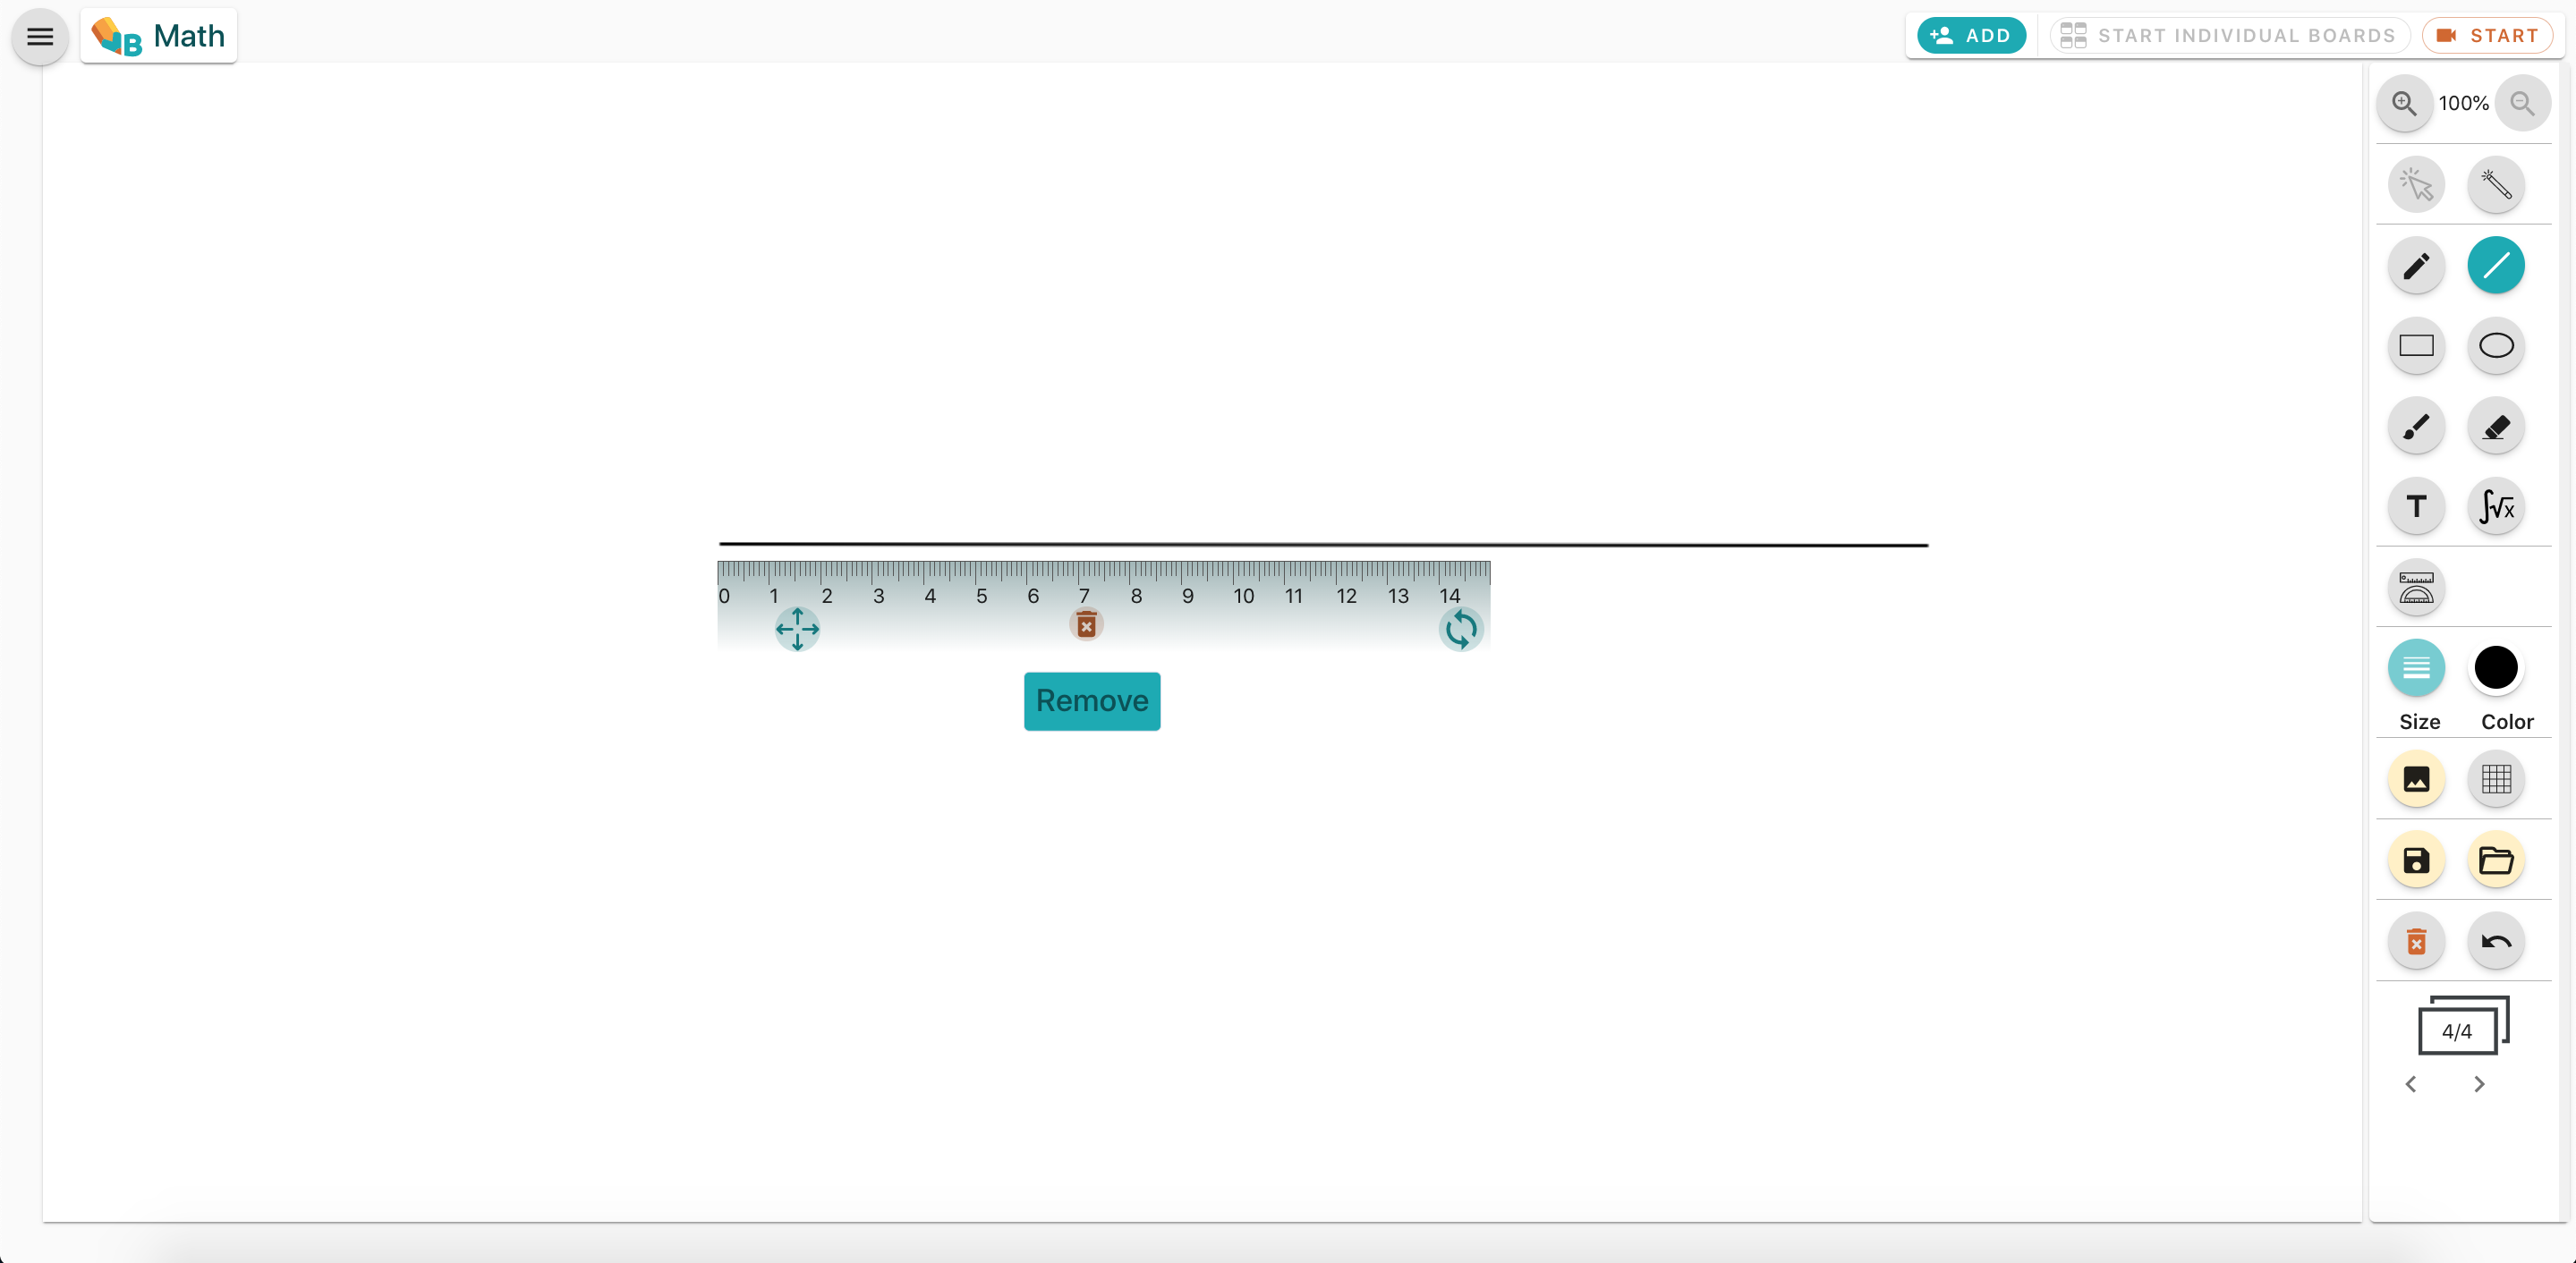
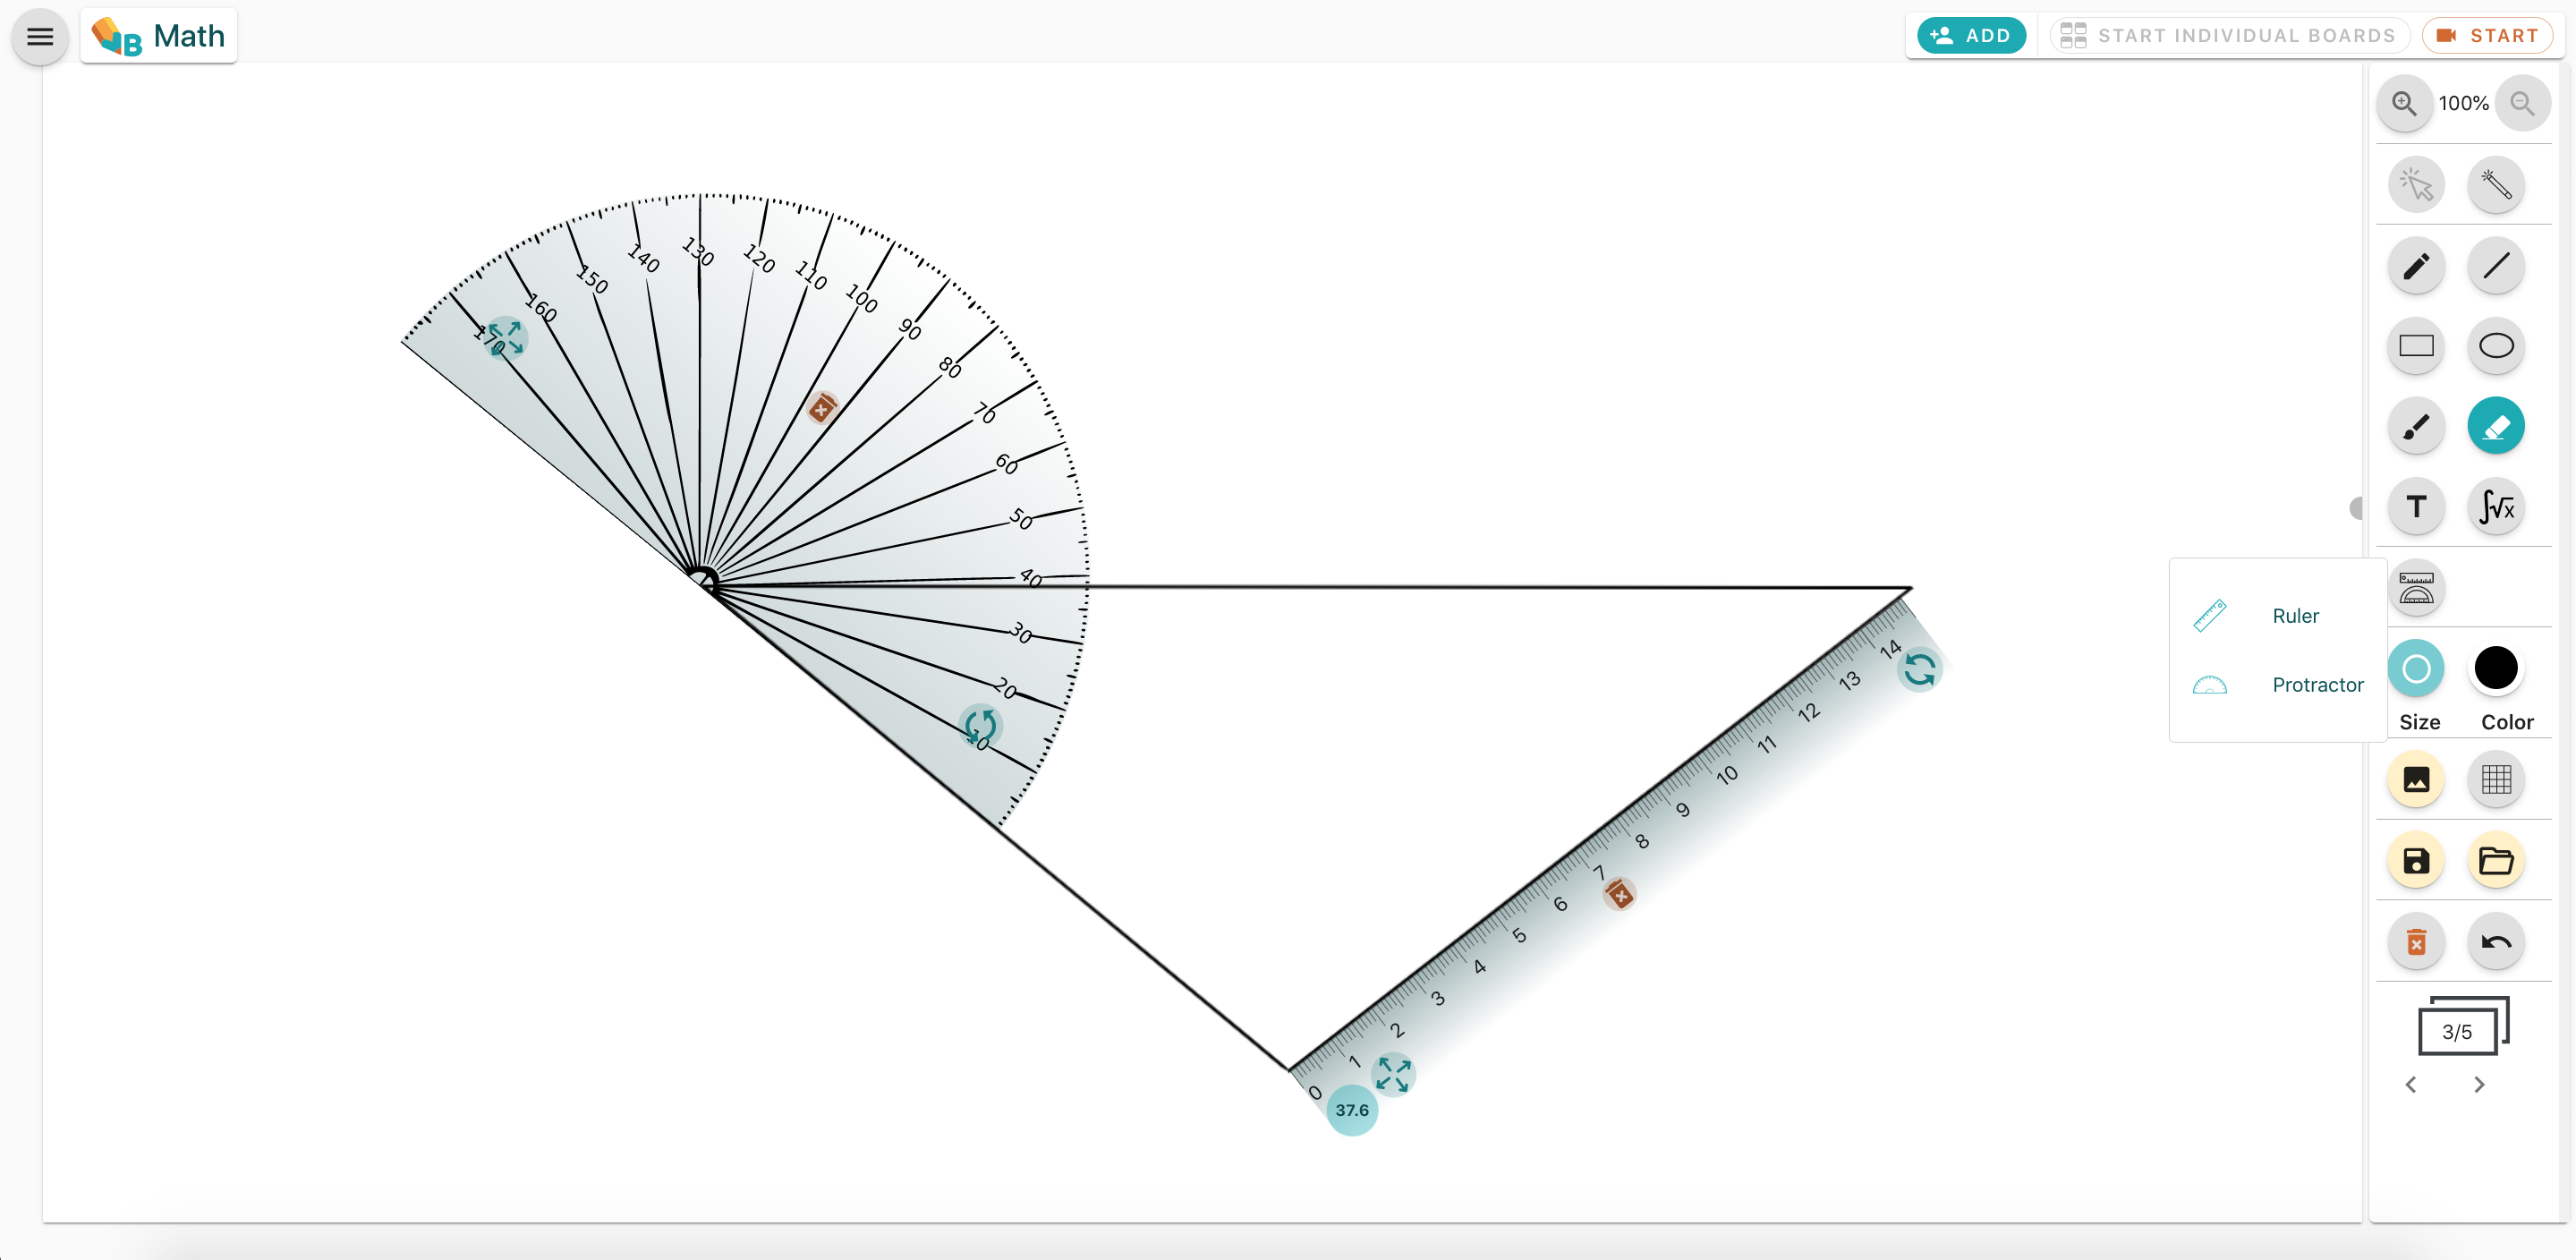
Ruler
- Use the move icon to place the ruler next to a line to measure it
- Use the rotate icon to rotate the ruler and see the angle at which we draw the next line
- Use the delete icon to remove the ruler
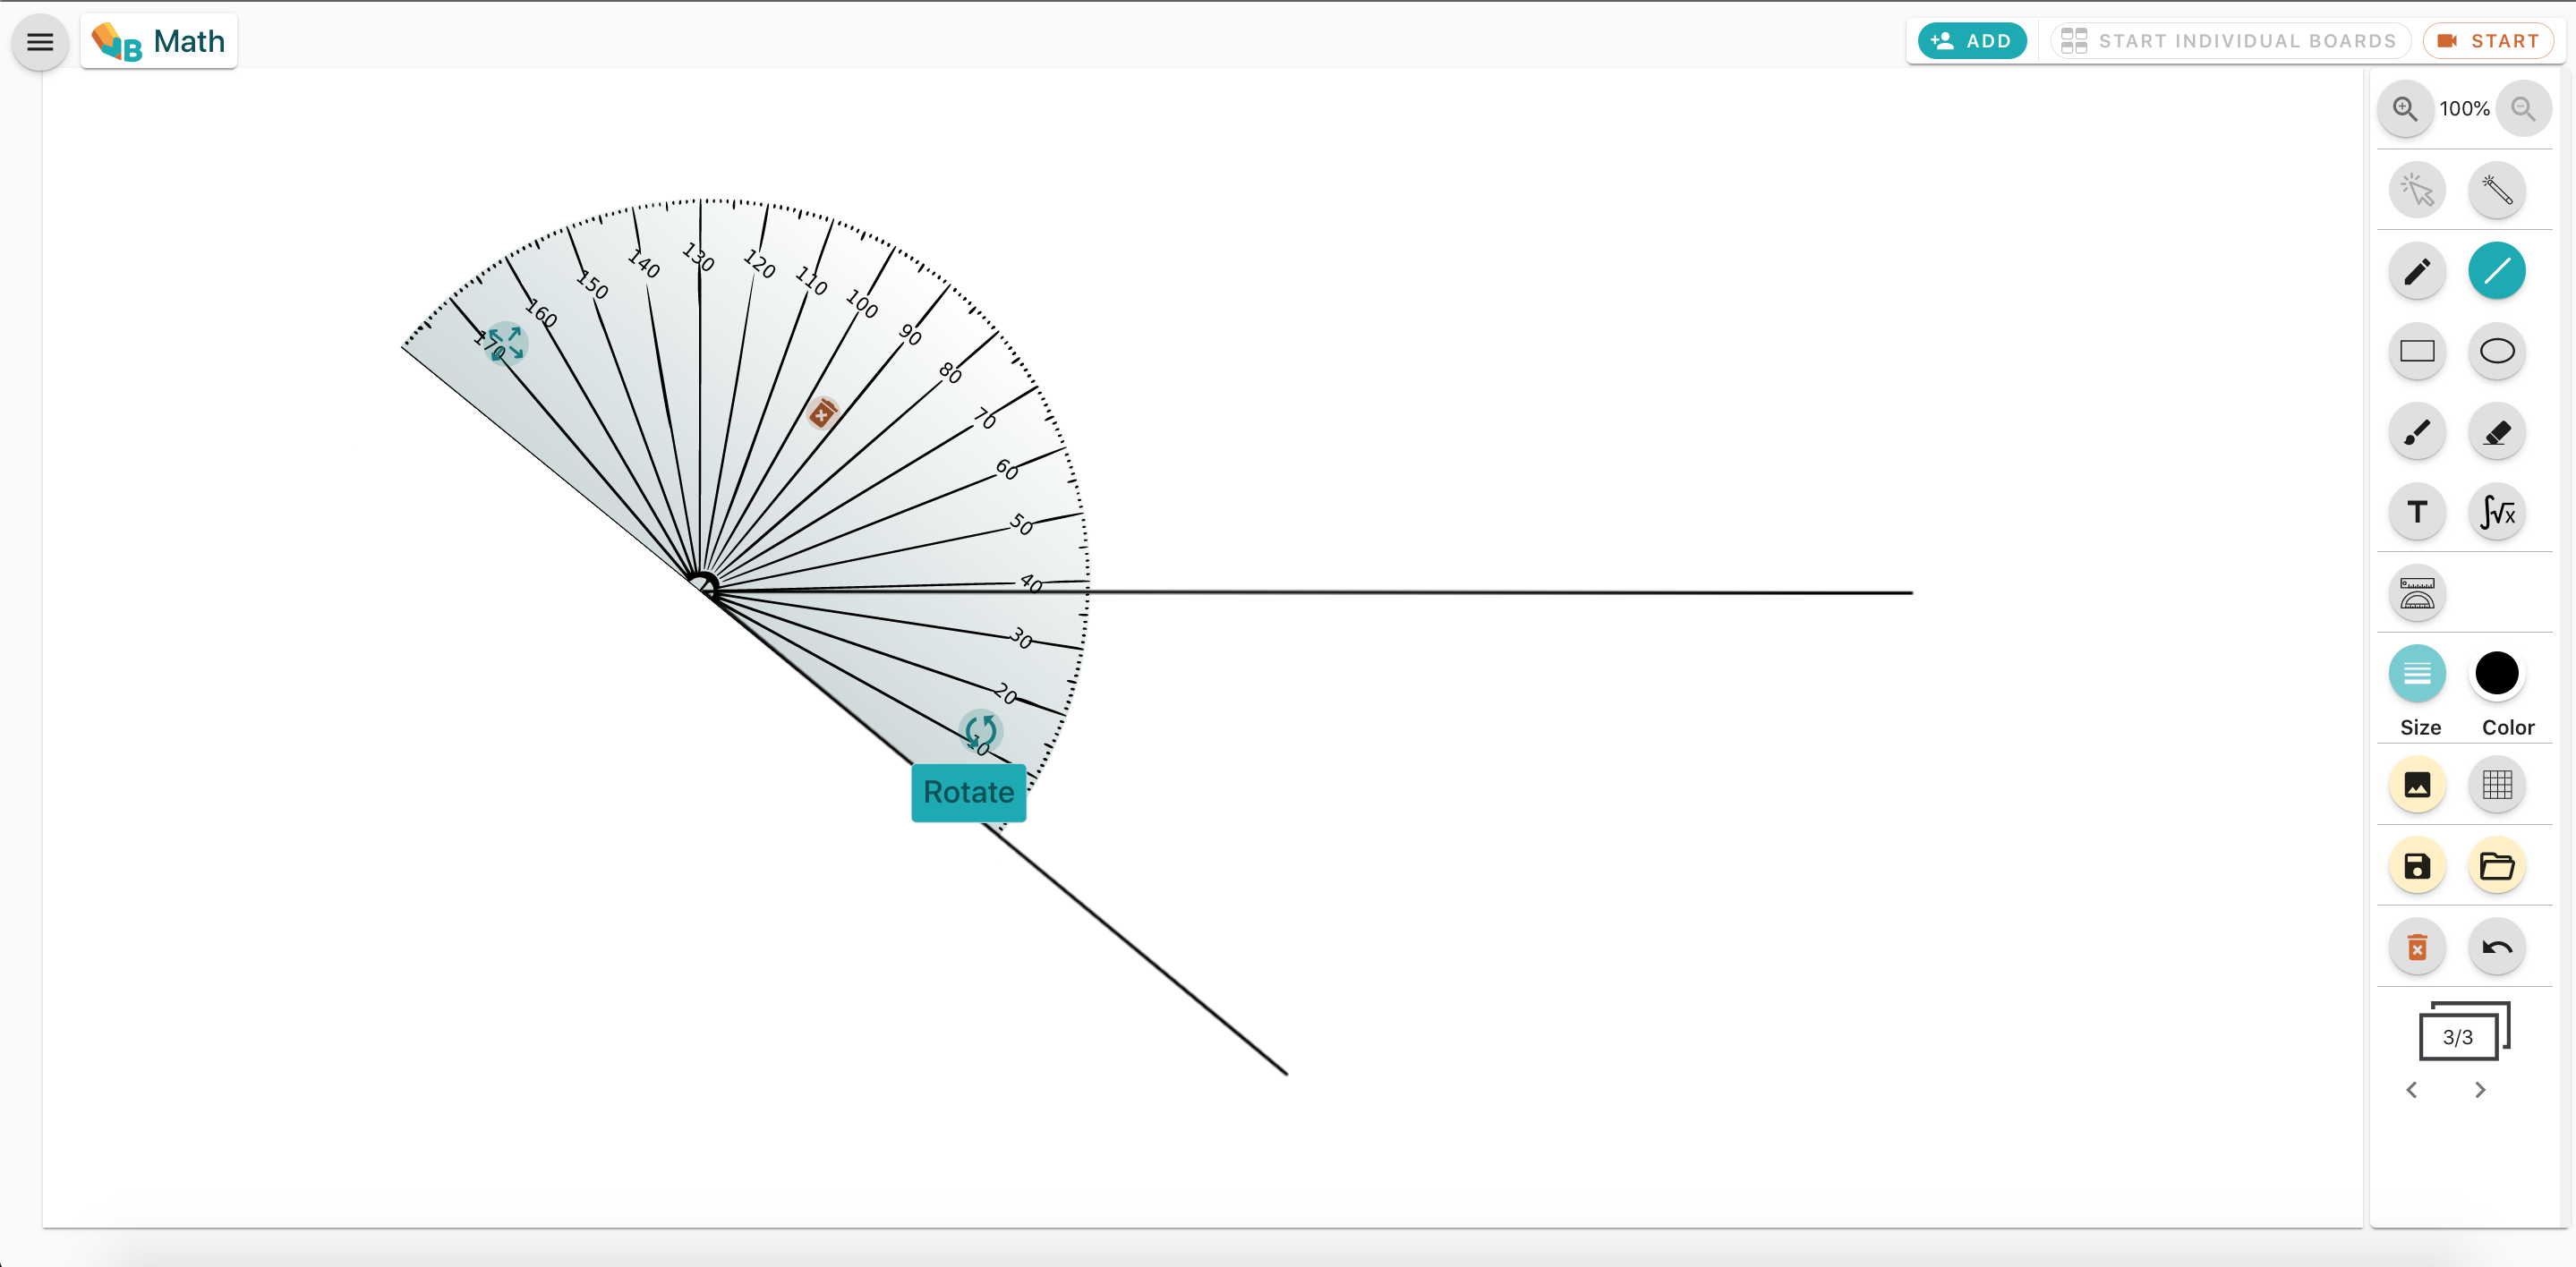
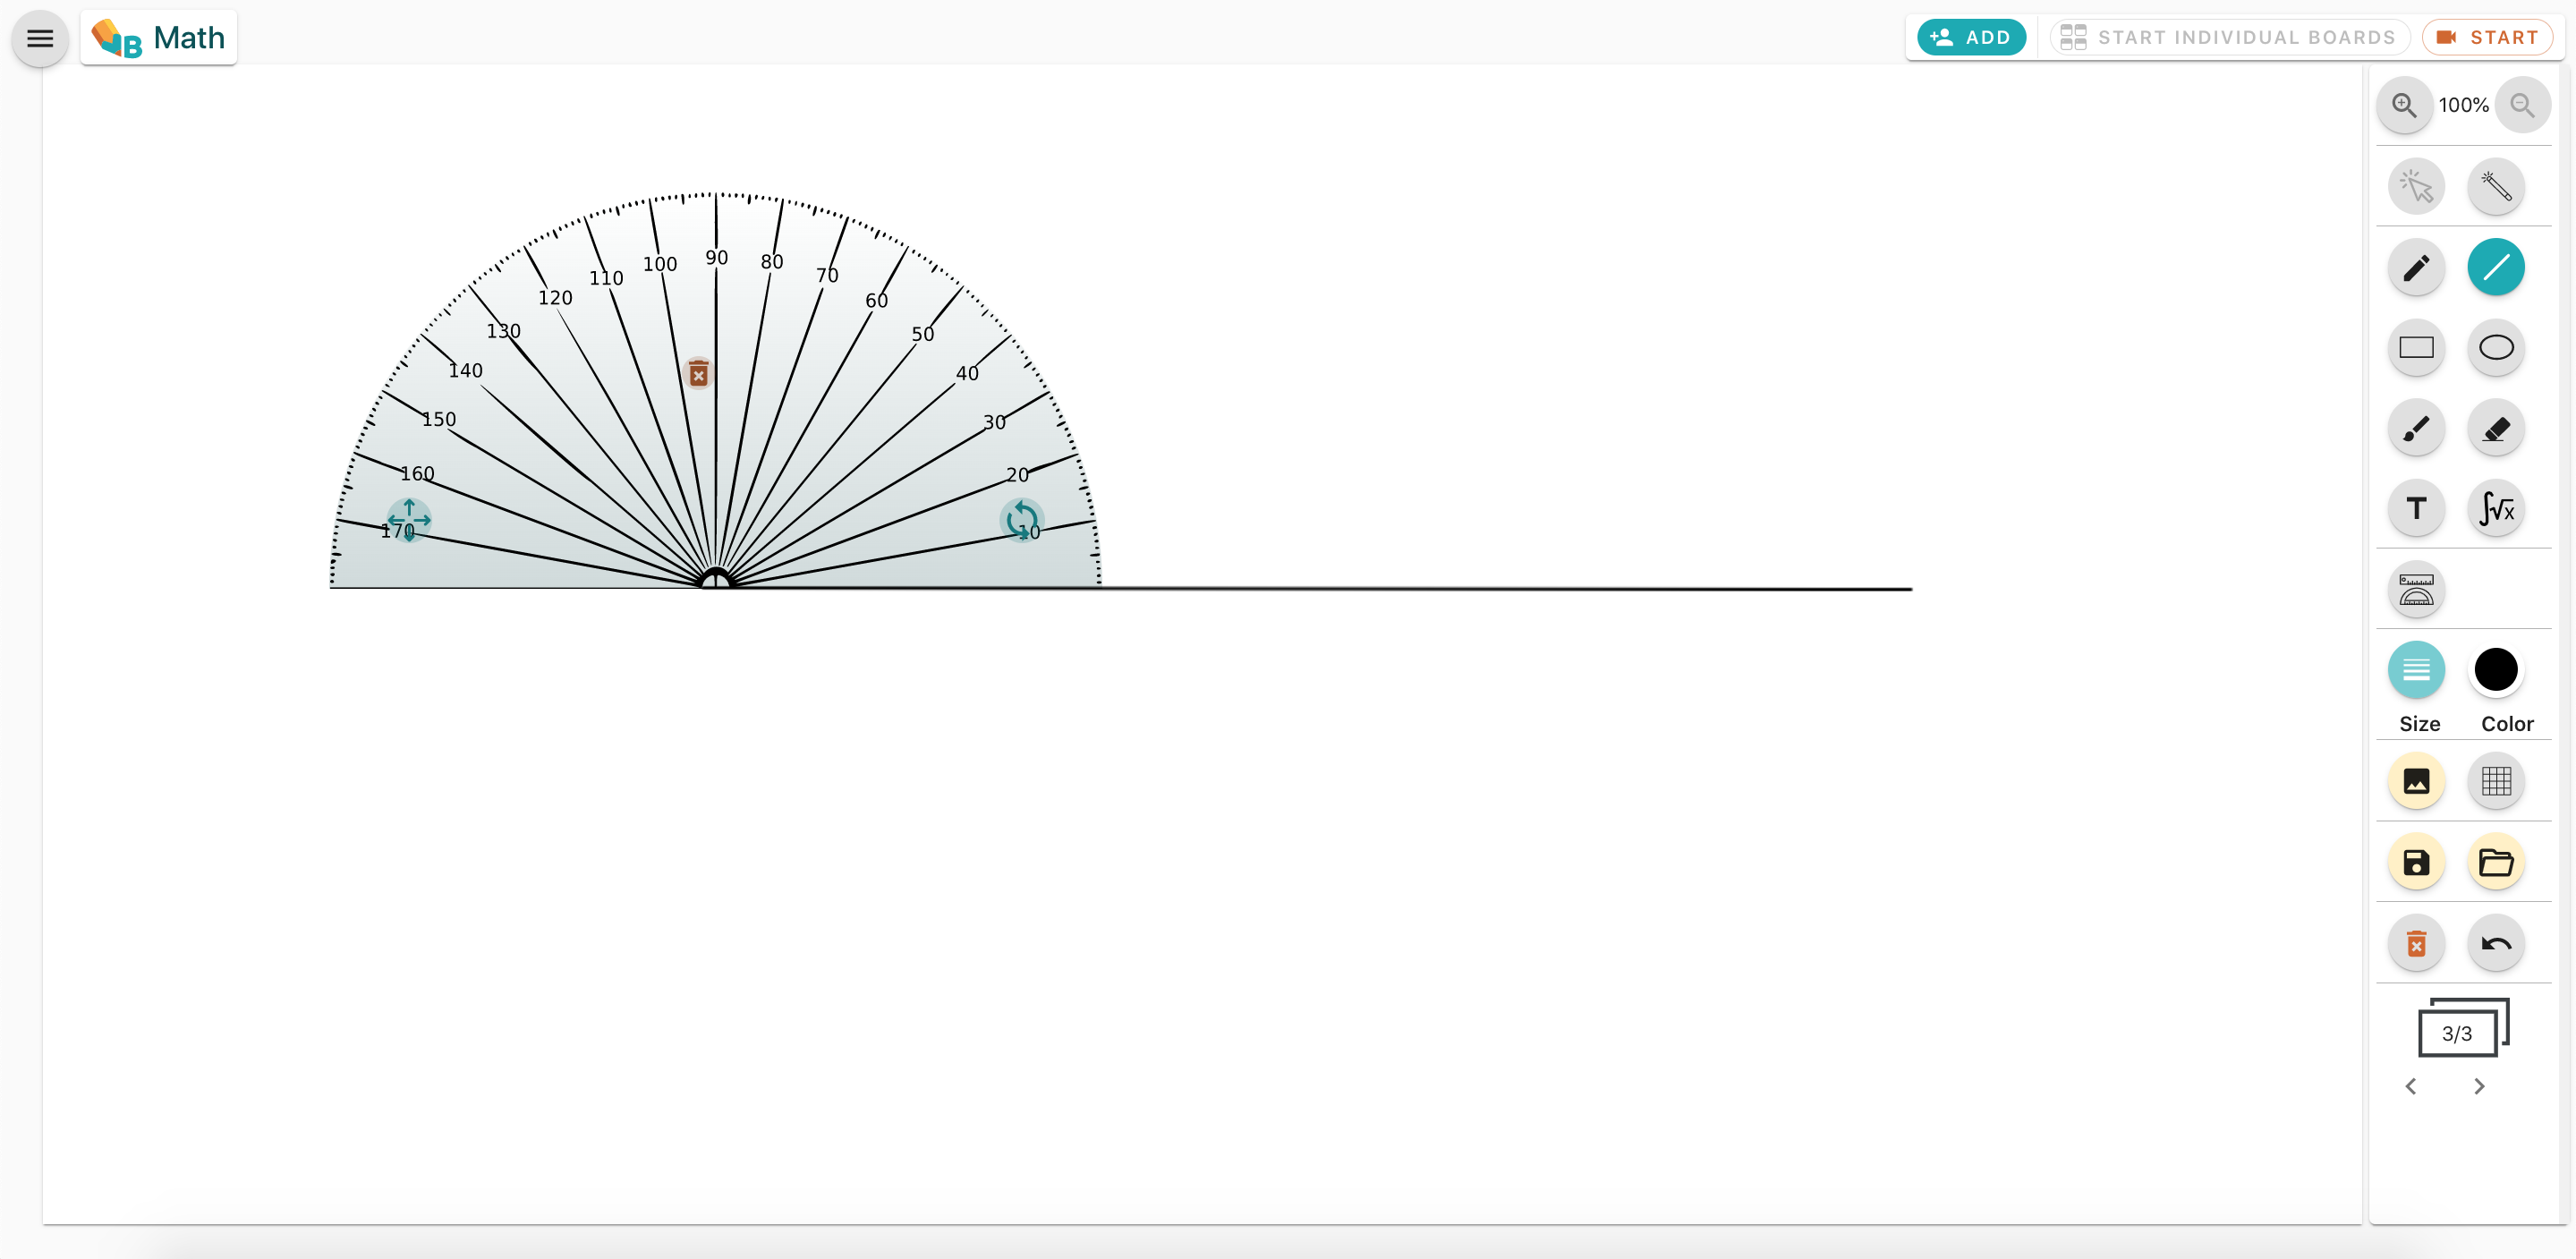
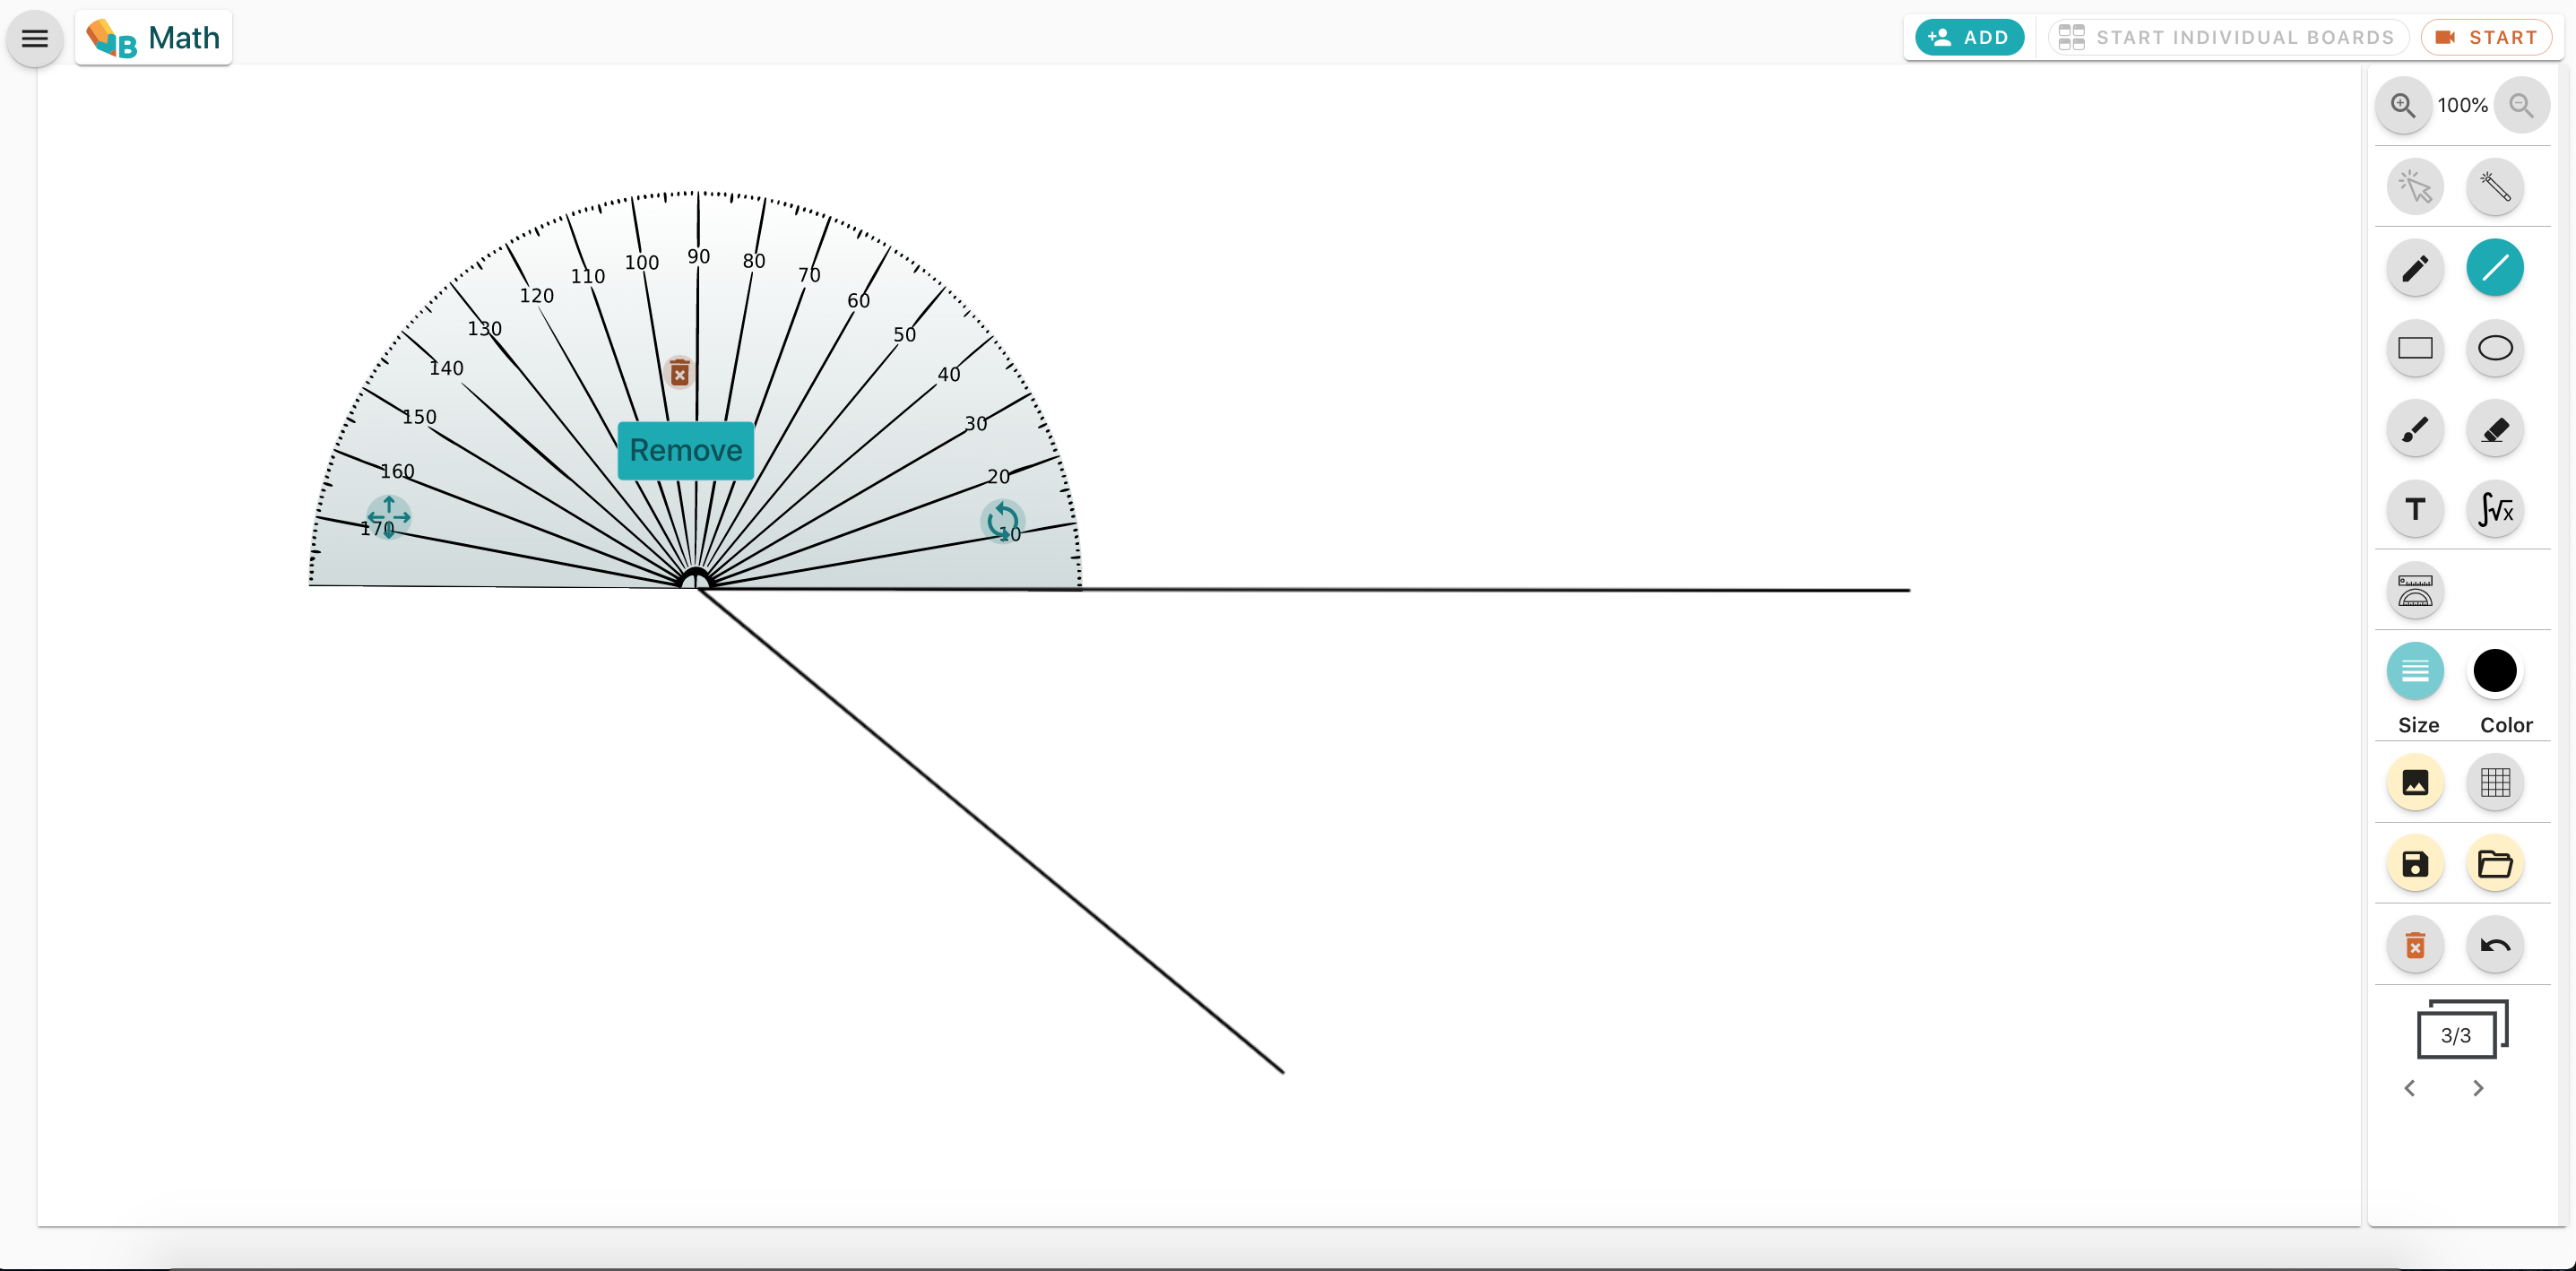
Protractor
- Use the move icon to position the protractor in the desired position
- Use the rotate icon to rotate the protractor to measure the existing angle
- Use the delete icon to remove the protractor
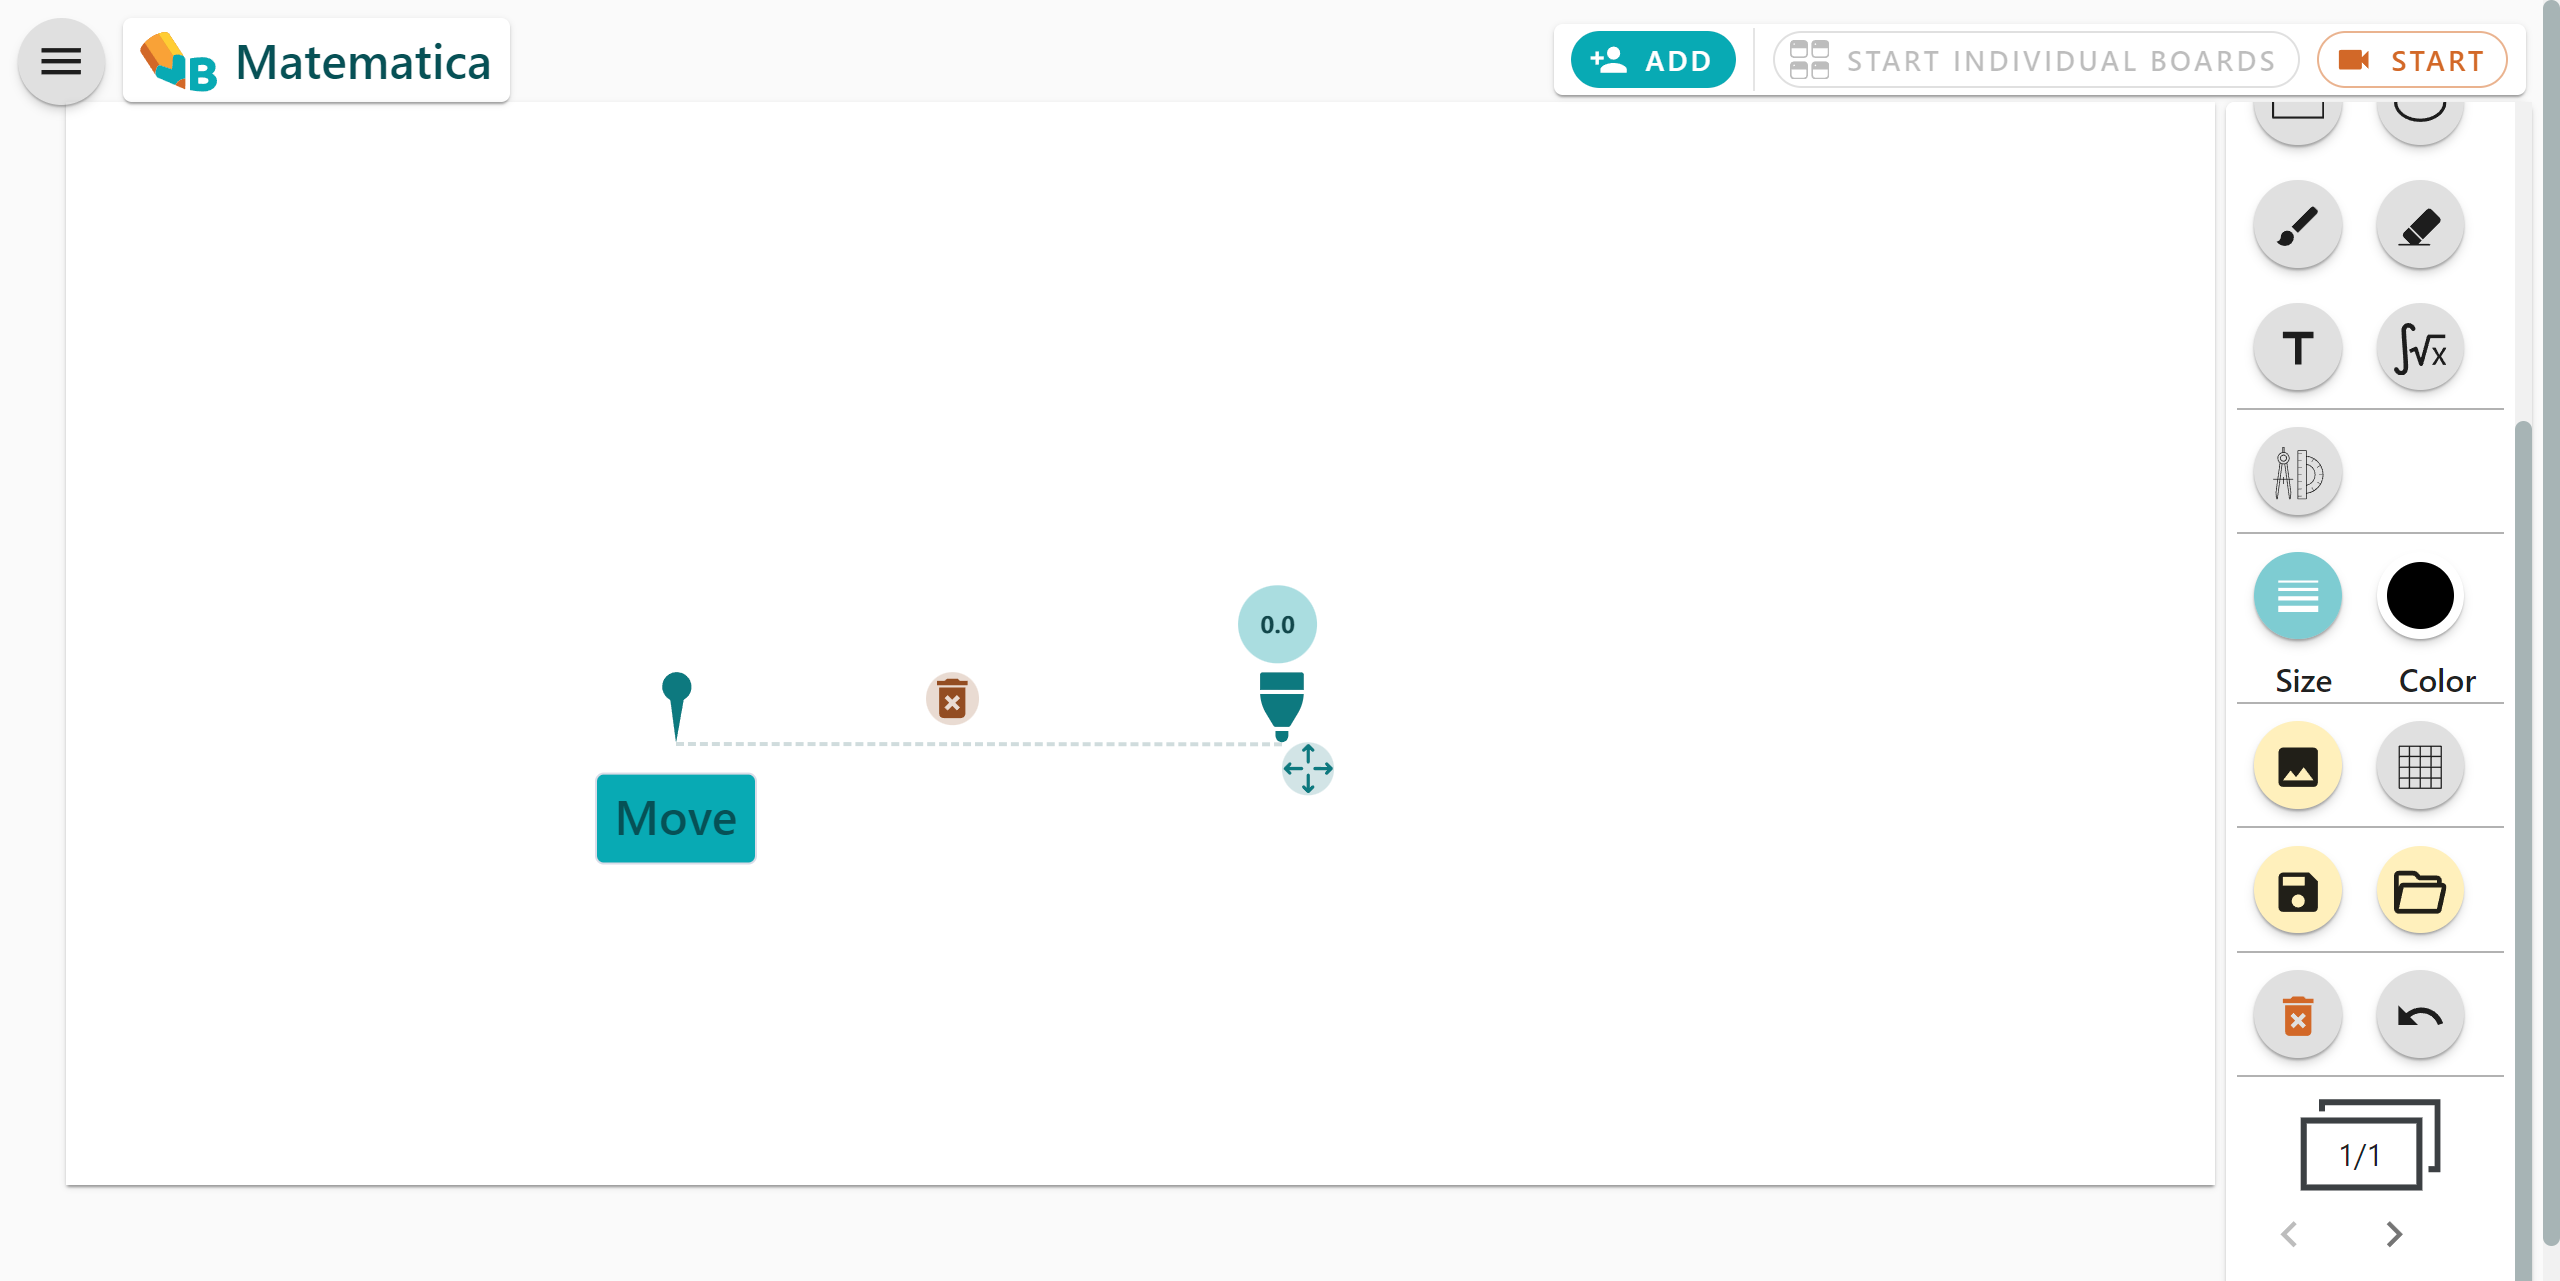
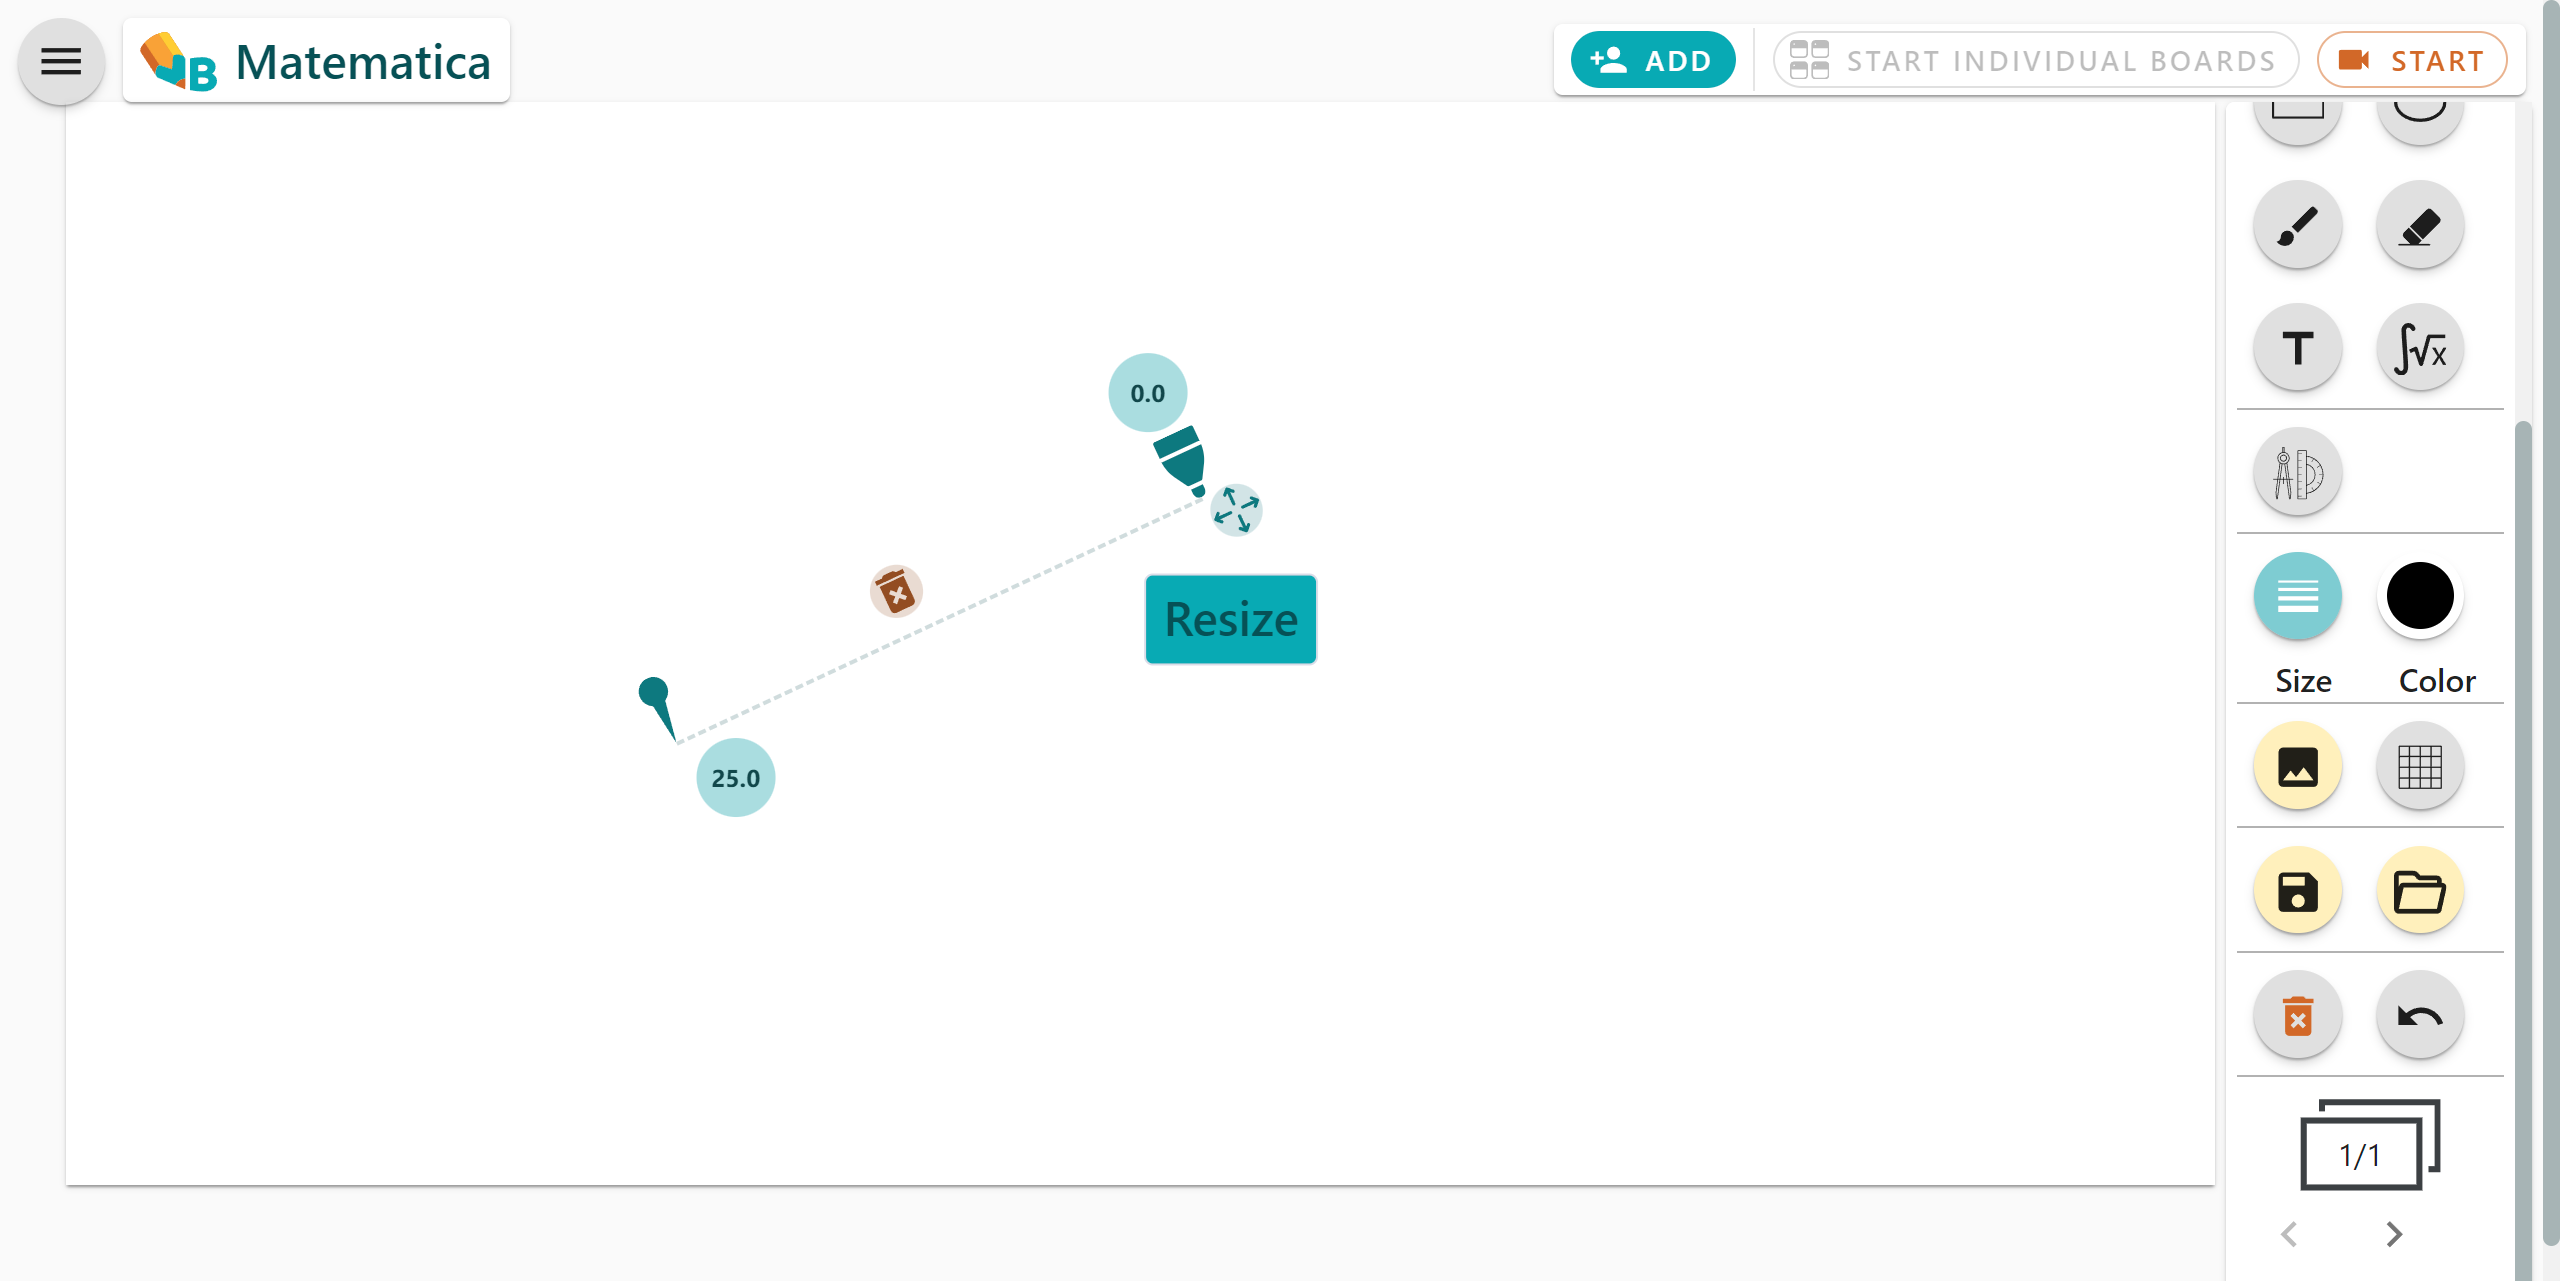
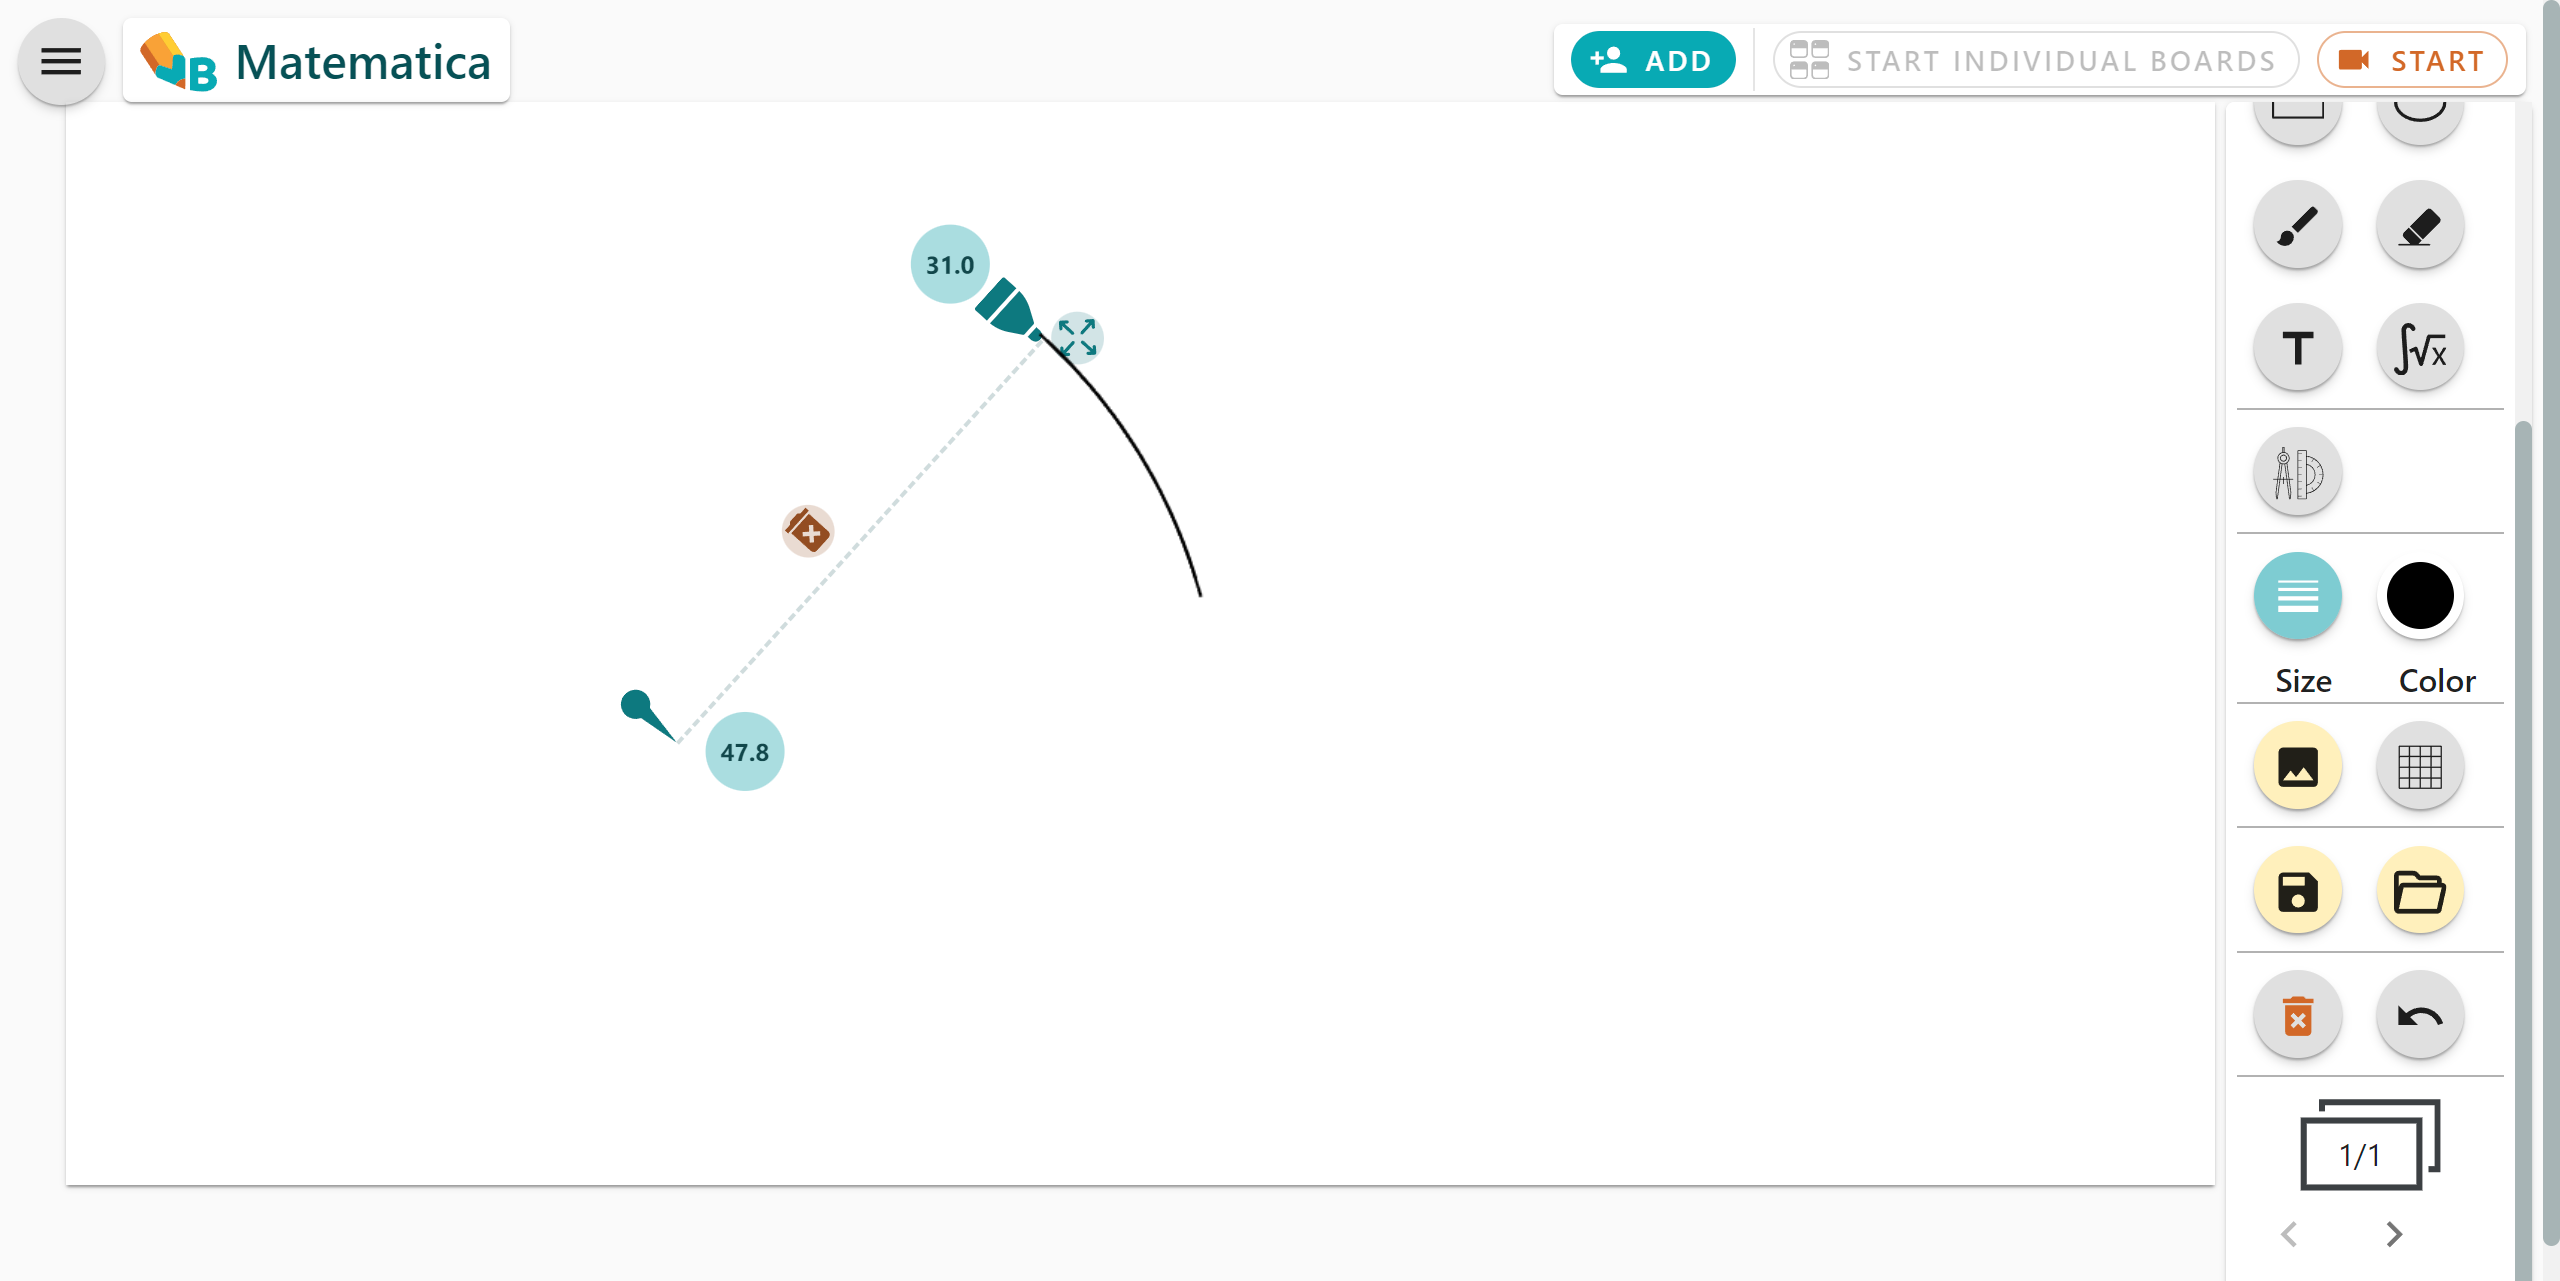
Compass
- Use the pin icon to move the compass position
- Use the move icon to reposition the pencil and adjust angle and arc radius
- Use the pencil icon to draw your arc
- Use the delete icon to remove the compass
Try Square
- Use the move icon to reposition the try square
- Use the rotate icon to rotate the try square
- Use the delete icon to remove the try square
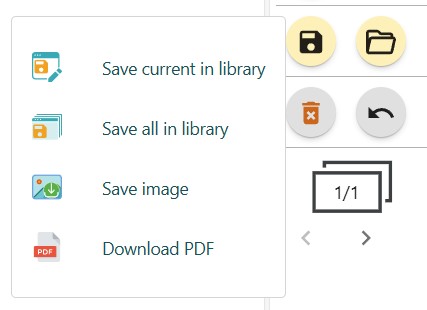
Save menu
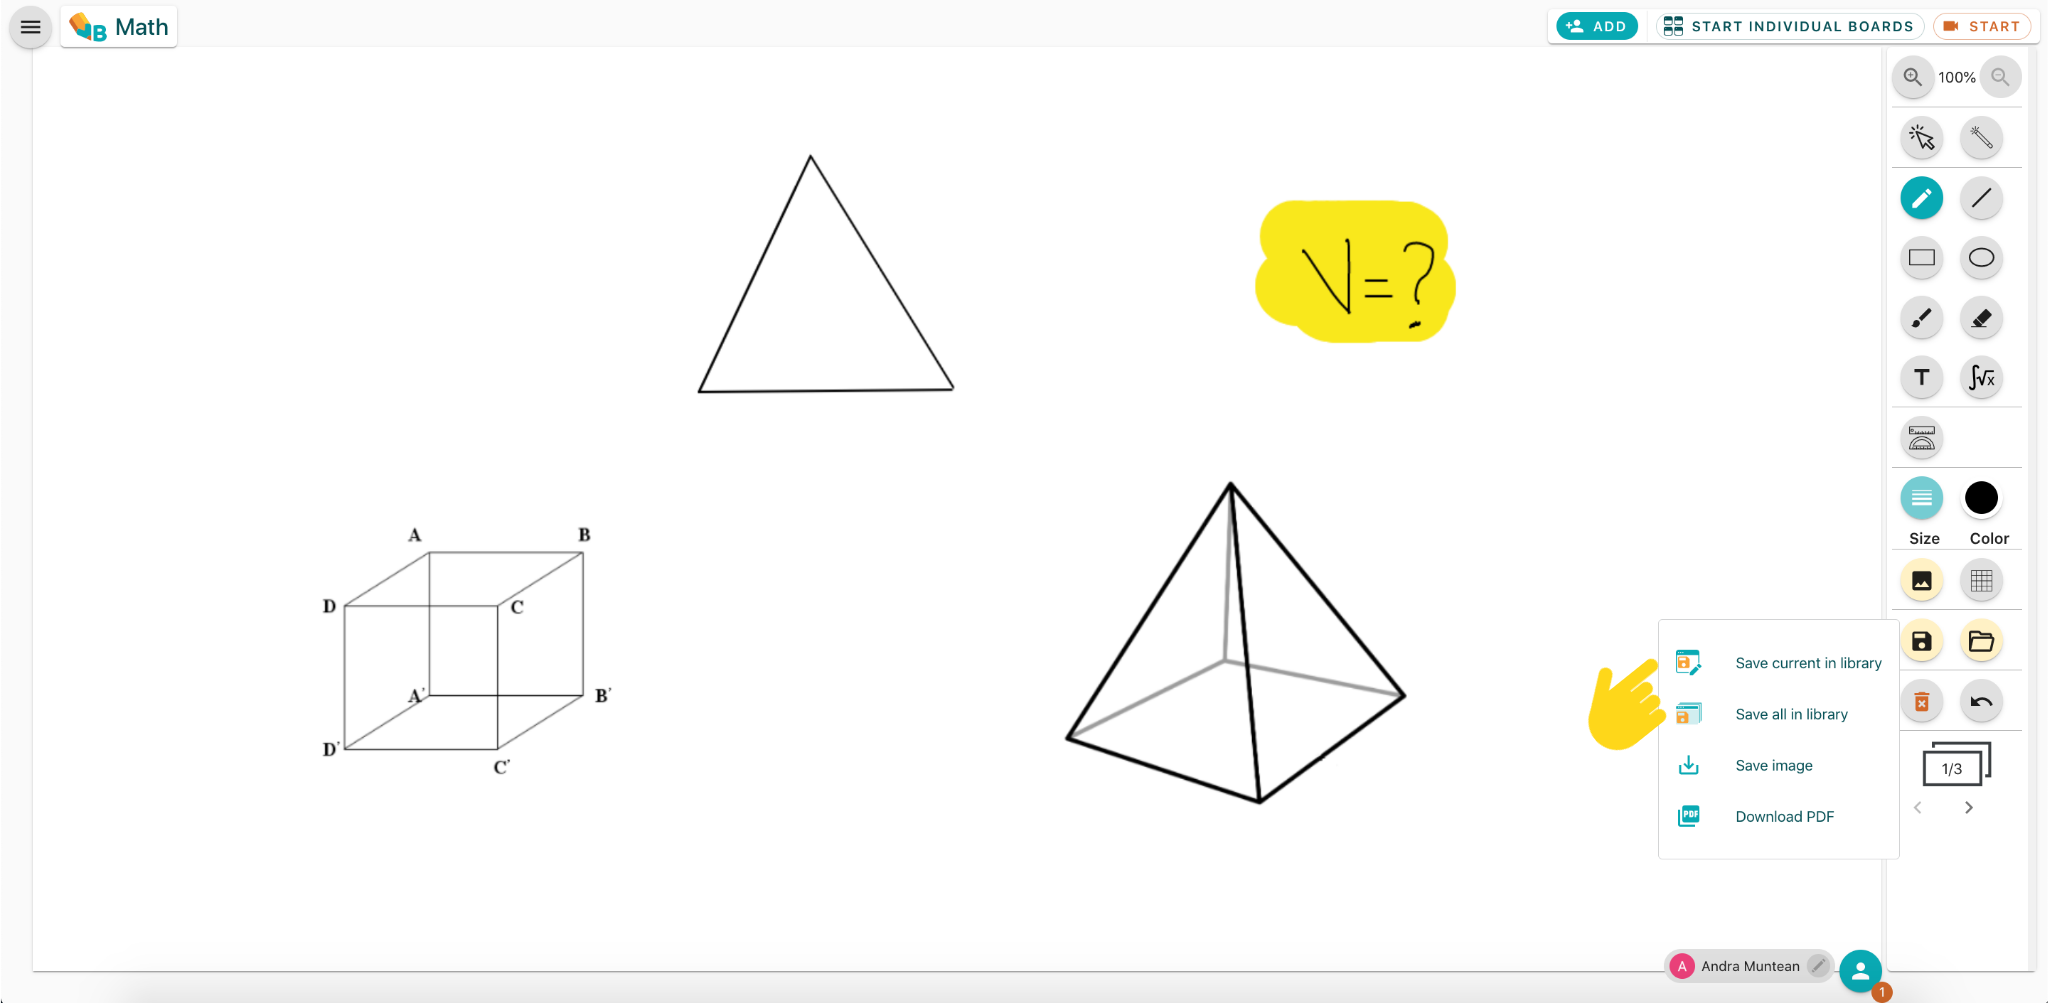
This menu allows us to save boards to the library or download them as images or PDF files.
Save current board
This option allows saving the current board to the library. Useful for saving individual exercises or work.
Save all boards
This option allows saving all boards from the current lesson to the library. Useful for saving complete lessons or multi-board exercises.
Download as image
This option allows downloading the current board as an image file.
Download as PDF
This option allows downloading all boards as a PDF file.
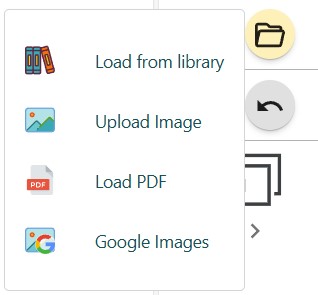
Open menu
This menu allows us to load boards from the library, upload images, load PDFs, or search for images on Google.
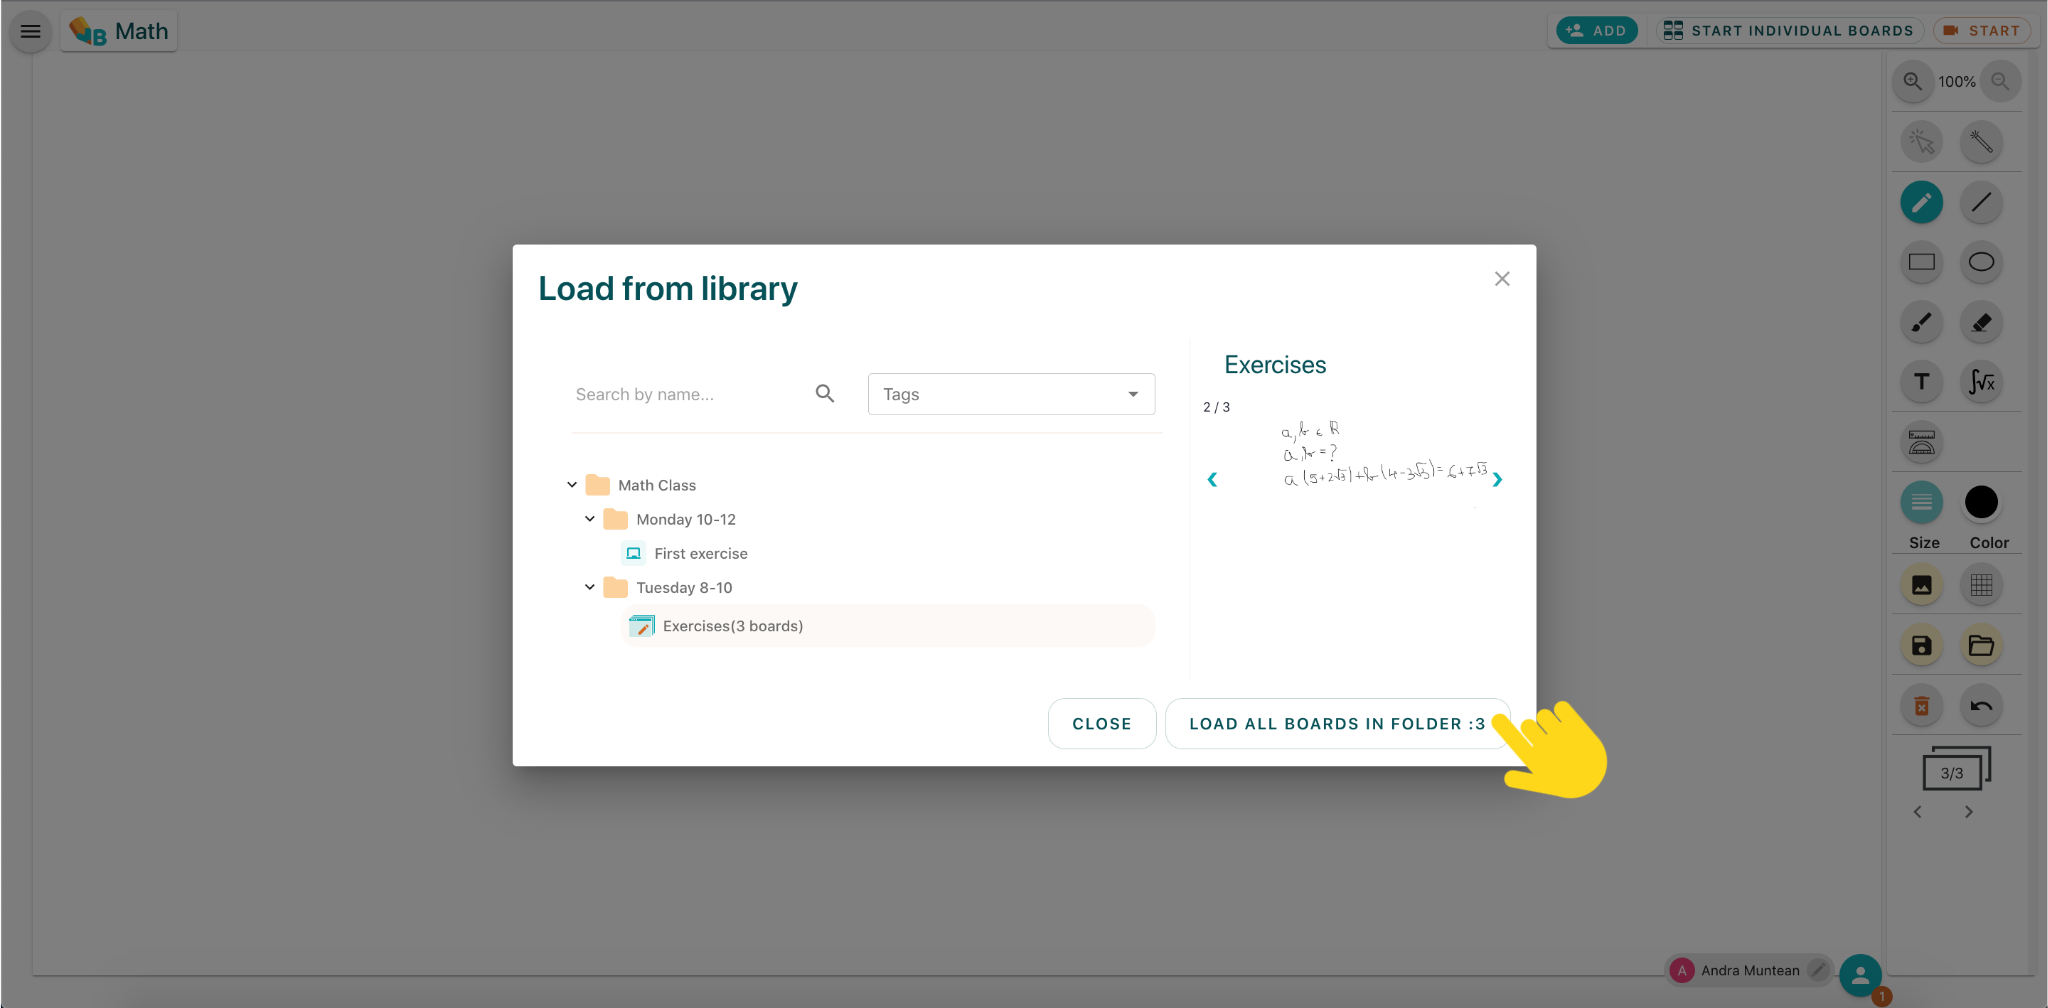
Load from library
This option allows loading saved boards from your library collections.
Upload image
This option allows uploading an image file to the board.
Load PDF
This option allows loading a PDF file into the board.
Google Images
This option allows searching for images on Google and adding them directly to the board.
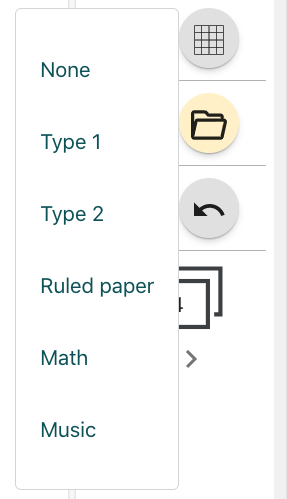
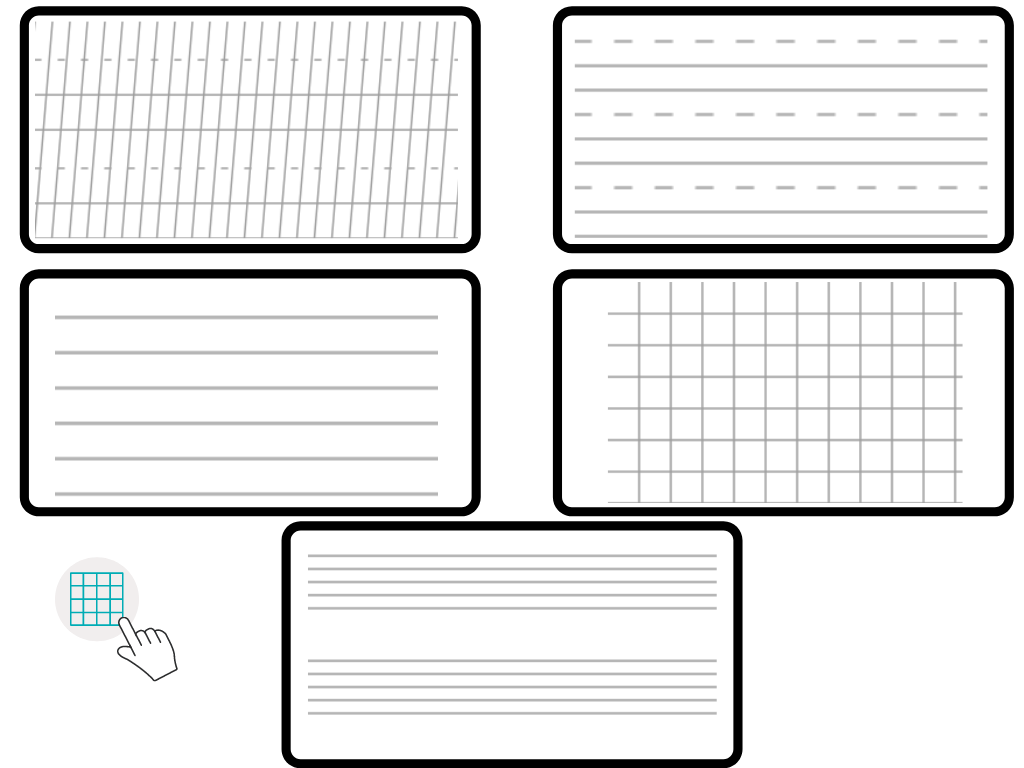
Lineage menu
This option allows us to apply a lineage on the board during the lesson. The available types are:
Type 1
Type 2
Dictando
Math
Music
Graph Paper
Board menu
This menu allows managing multiple boards during the same lesson
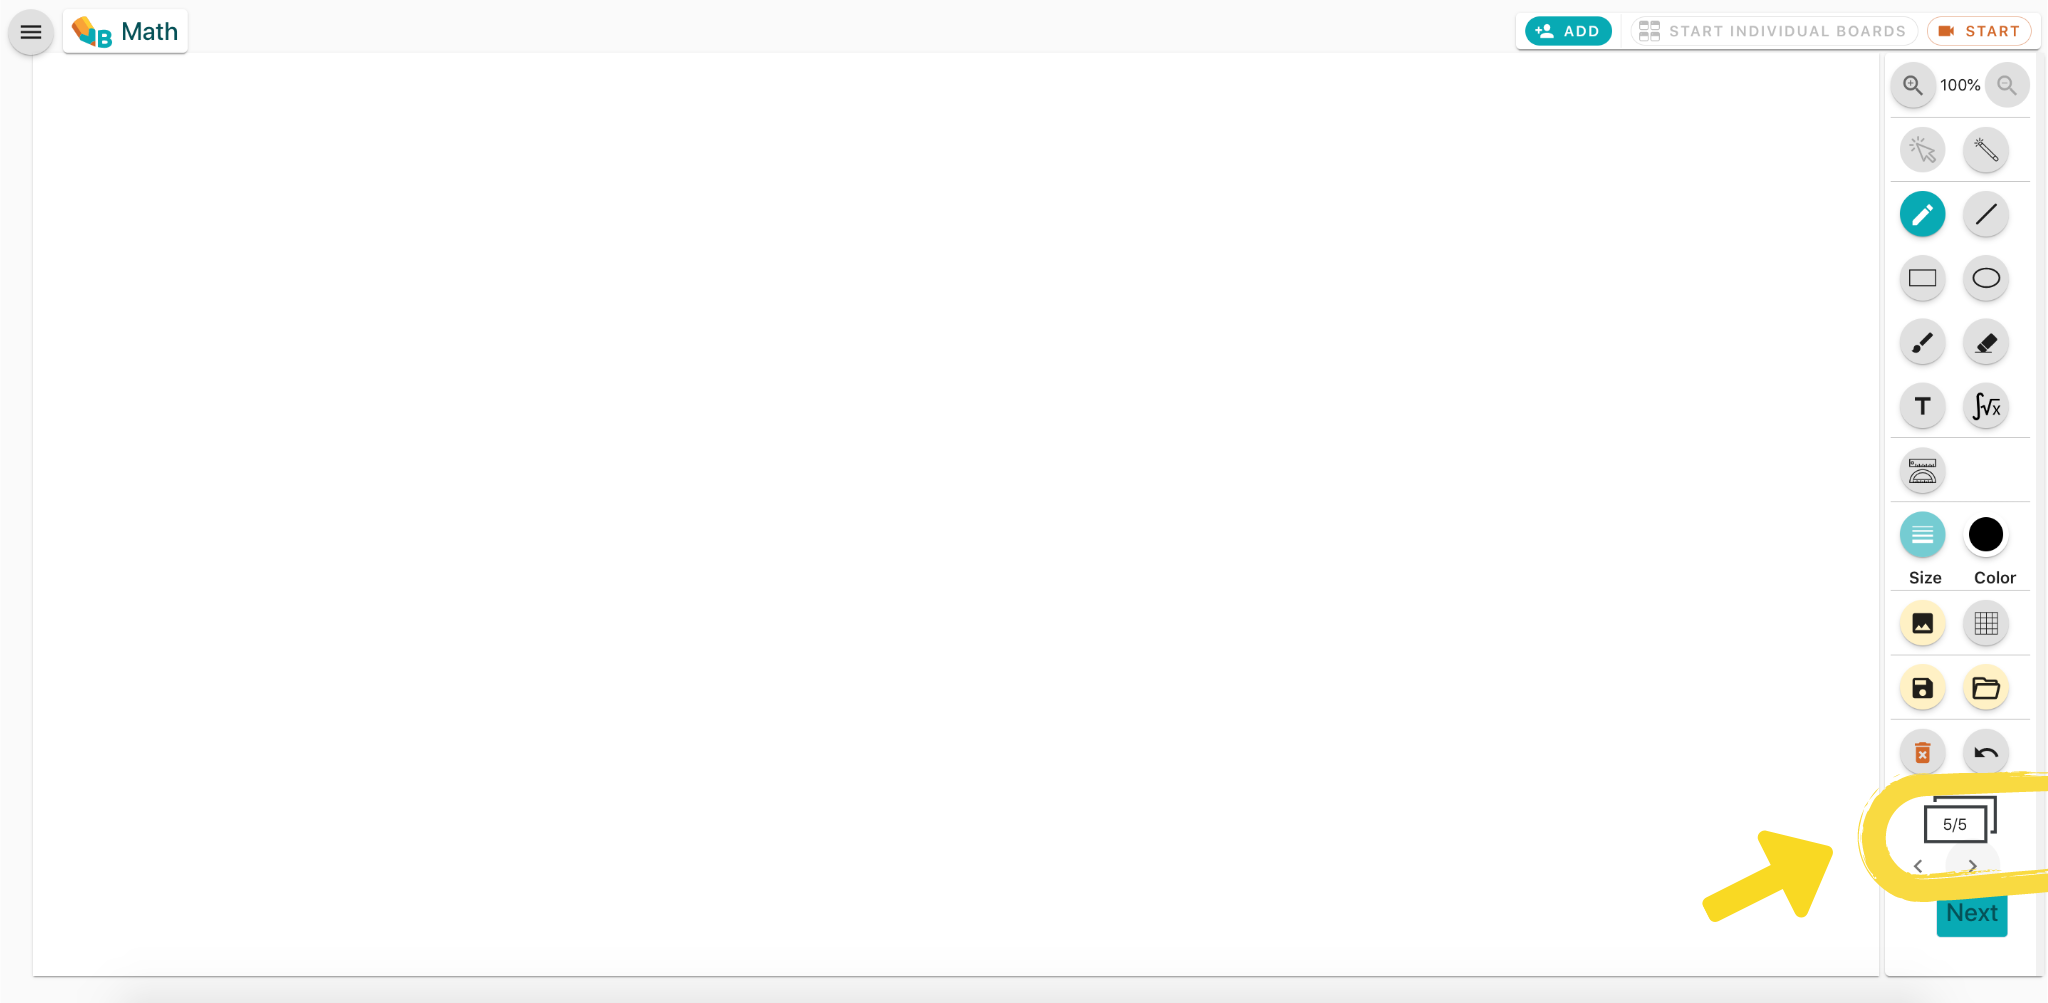
Navigation buttons
Allows navigating between boards and creating a board if we are at the end of the list
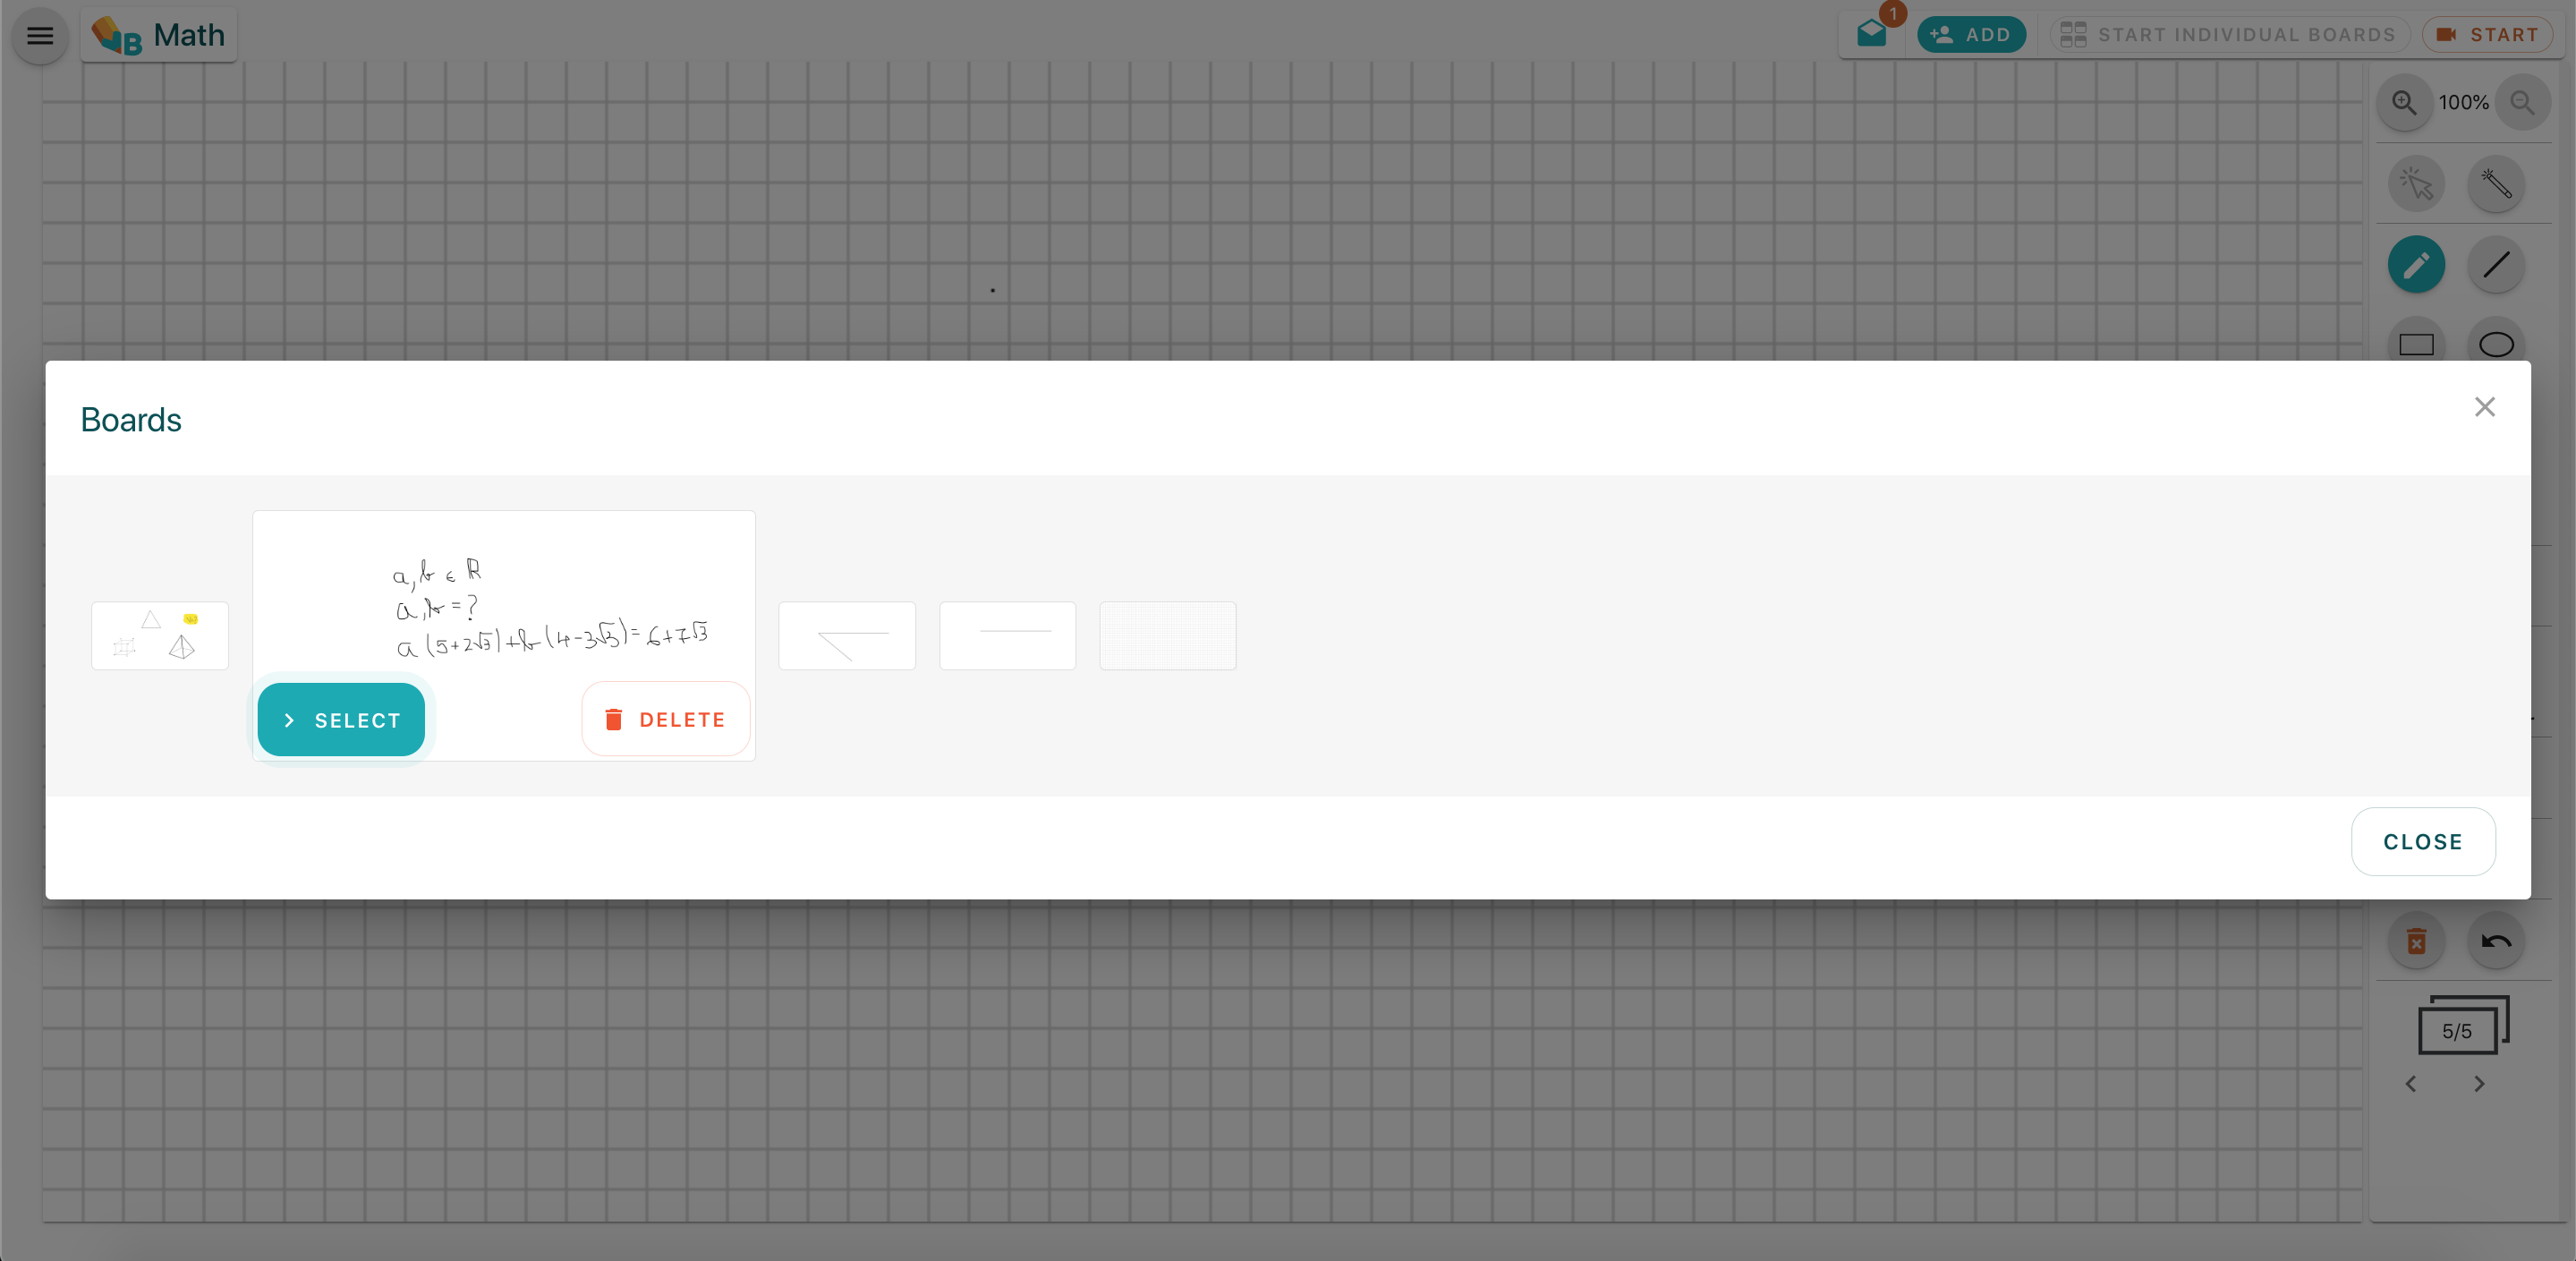
Board Management
Allows viewing and selecting boards from a menu. This menu also allows us to remove boards we no longer use.
Zoom ability
This ability helps towards a better usage on the mobile devices and tablets by virtually increasing the workspace
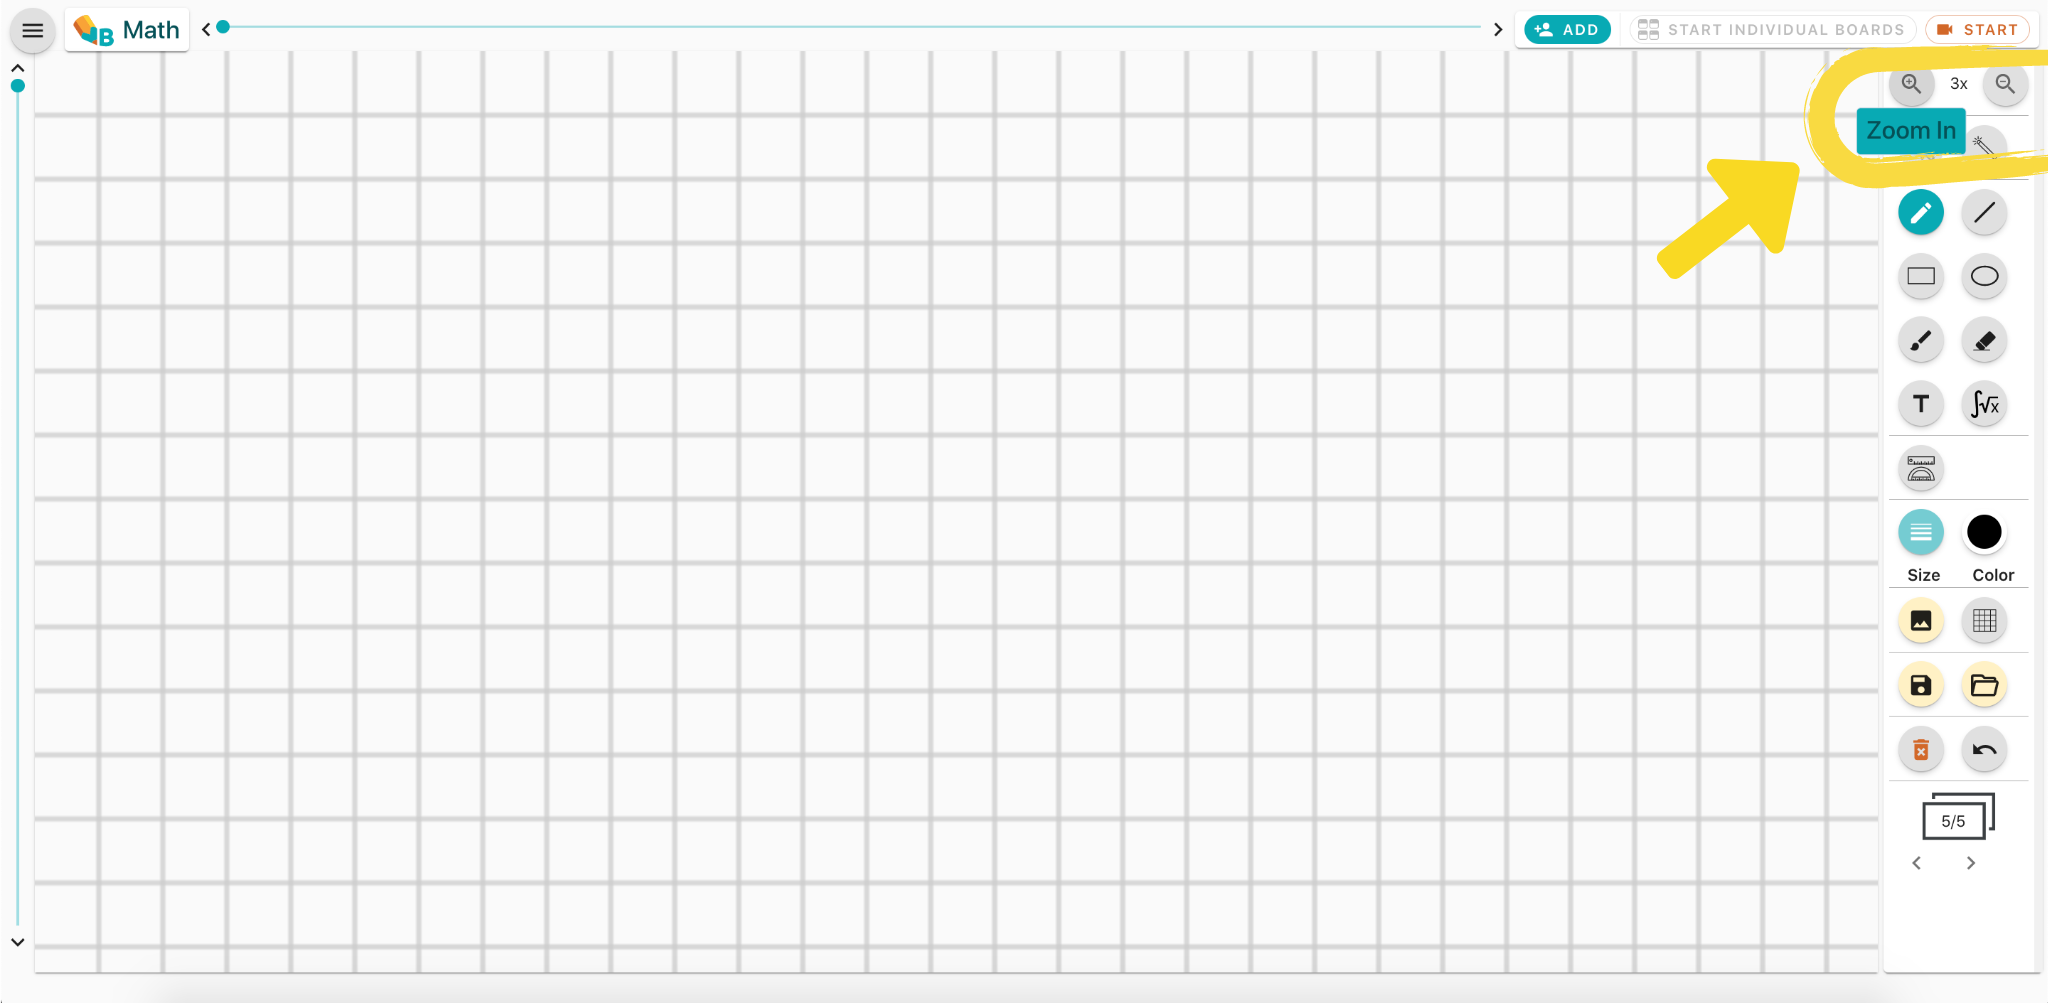
Zoom by using buttons
Clicking on Zoom In or Zoom Out, the board increases or decreases in size to allow the user to easier write on devices with smaller screen size
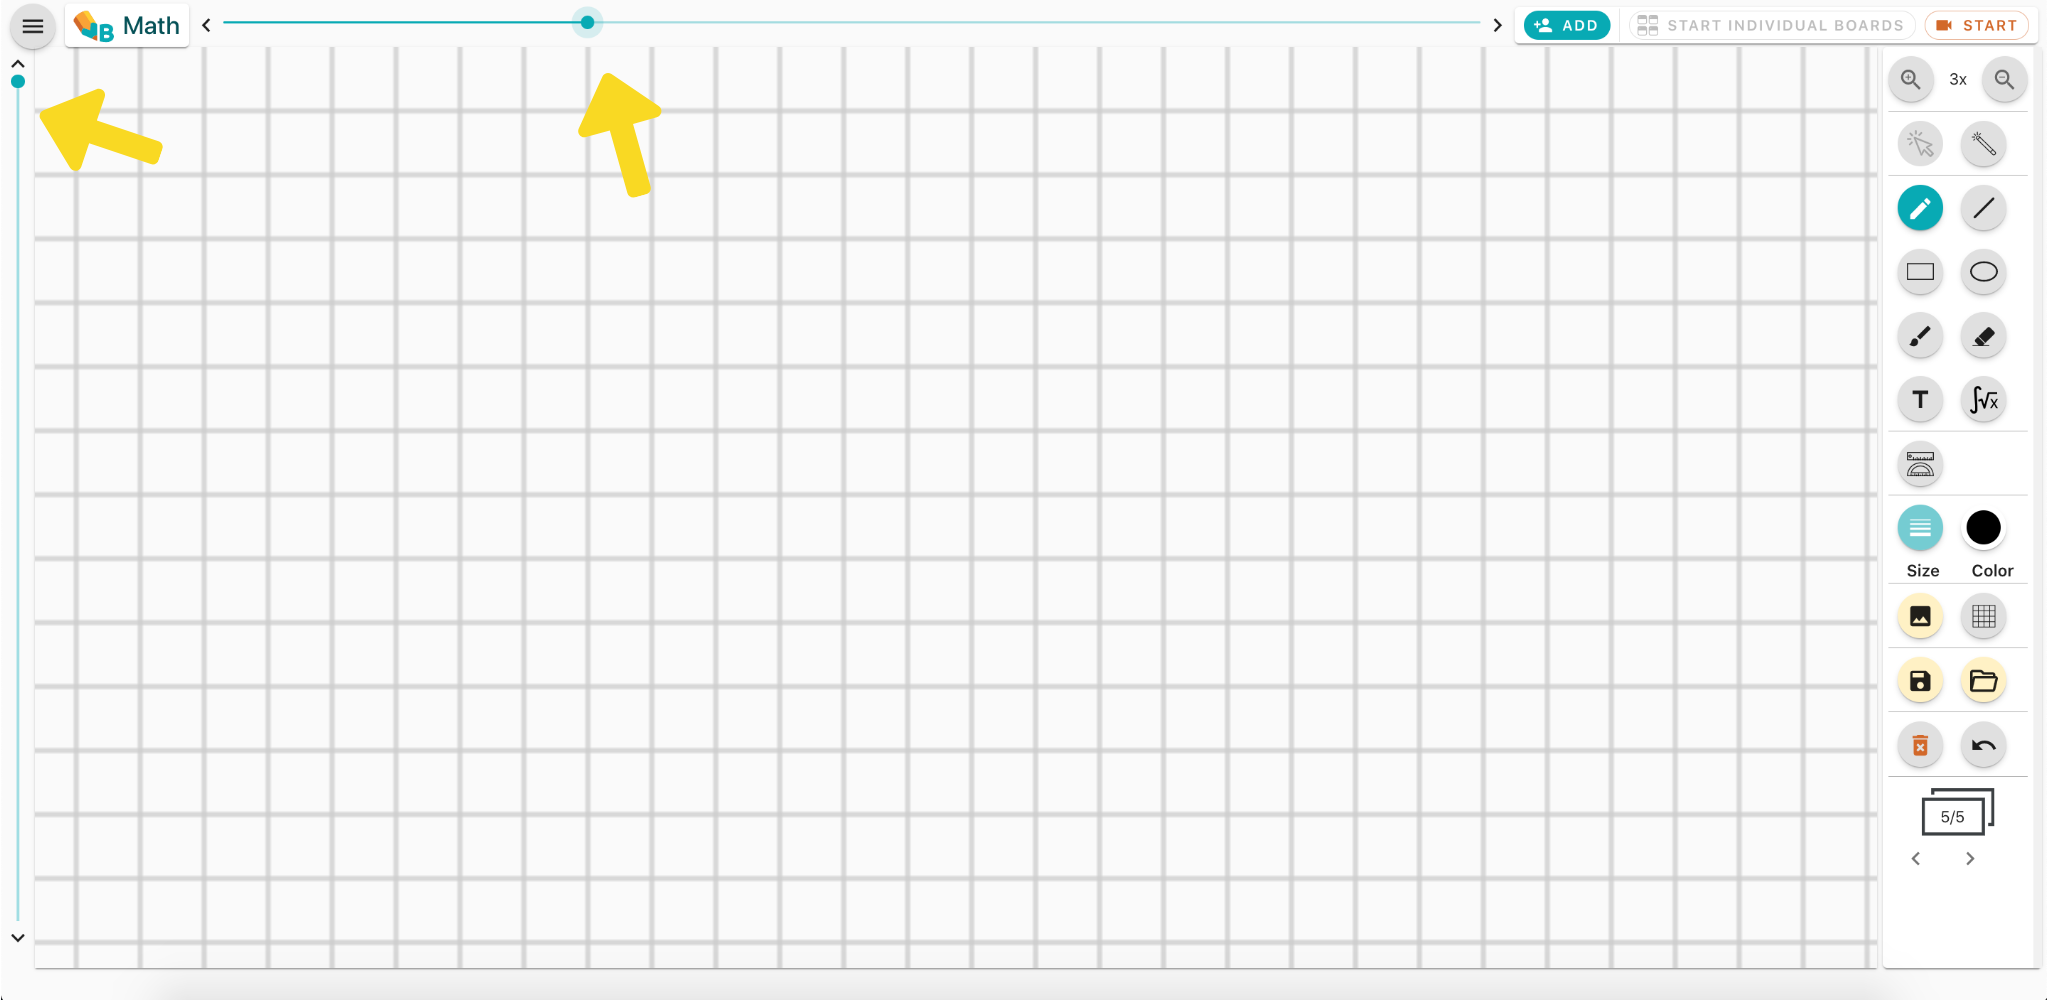
Navigation in the board using sliders
Using the sliders when the board has been zoomed we can move our viewport in any point on the board
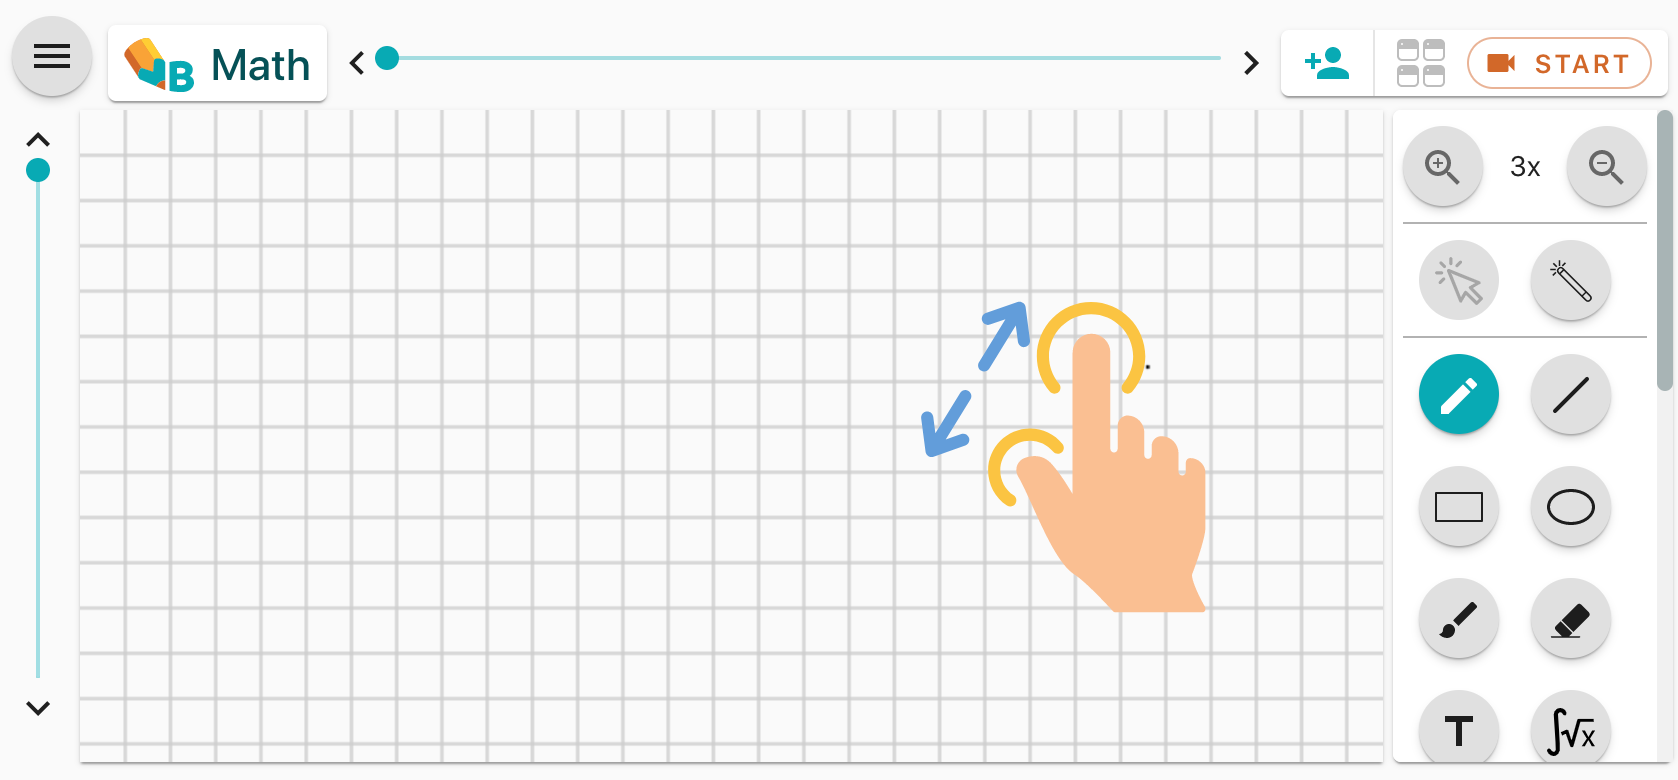
Zoom by using fingers on touch screens
On mobile phones and tablets we can use two fingers to increase or decrease the size of the board by using pinch to zoom.
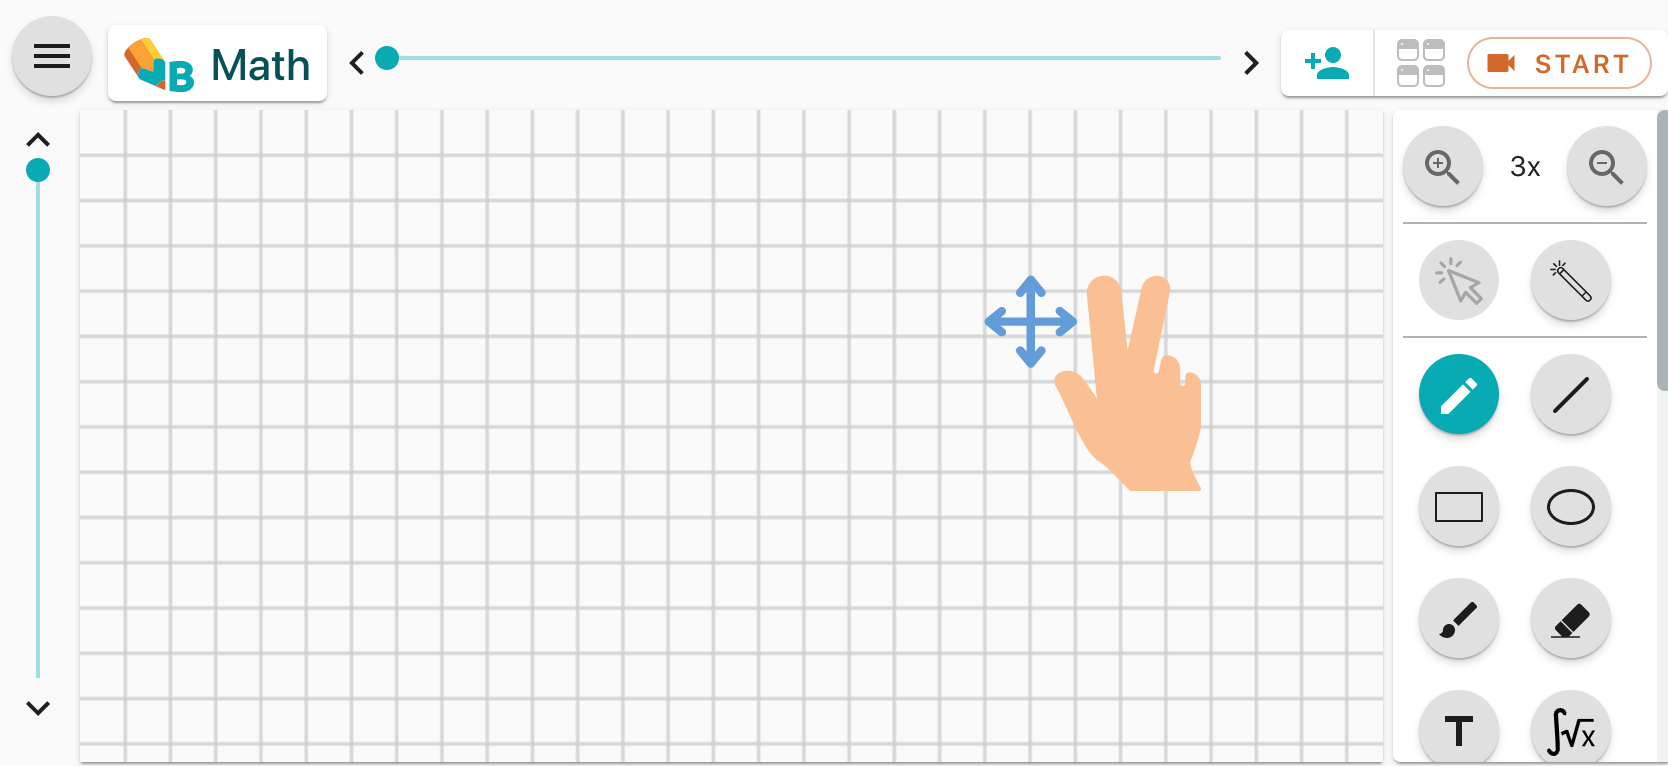
Navigating the board by using fingers on the touch screen
On mobile phones and tablets we can use our fingers to move the board once it has been zoomed. Placing two fingers on the screen and the sliding them up/down or left/right the viewport will move
AI Assistant
The AI assistant generates lesson content and turns the handwriting on the board into typed elements. This section shows how to open the panel, choose where the content goes and clean up the board, plus the maths formula converter.
Content generation
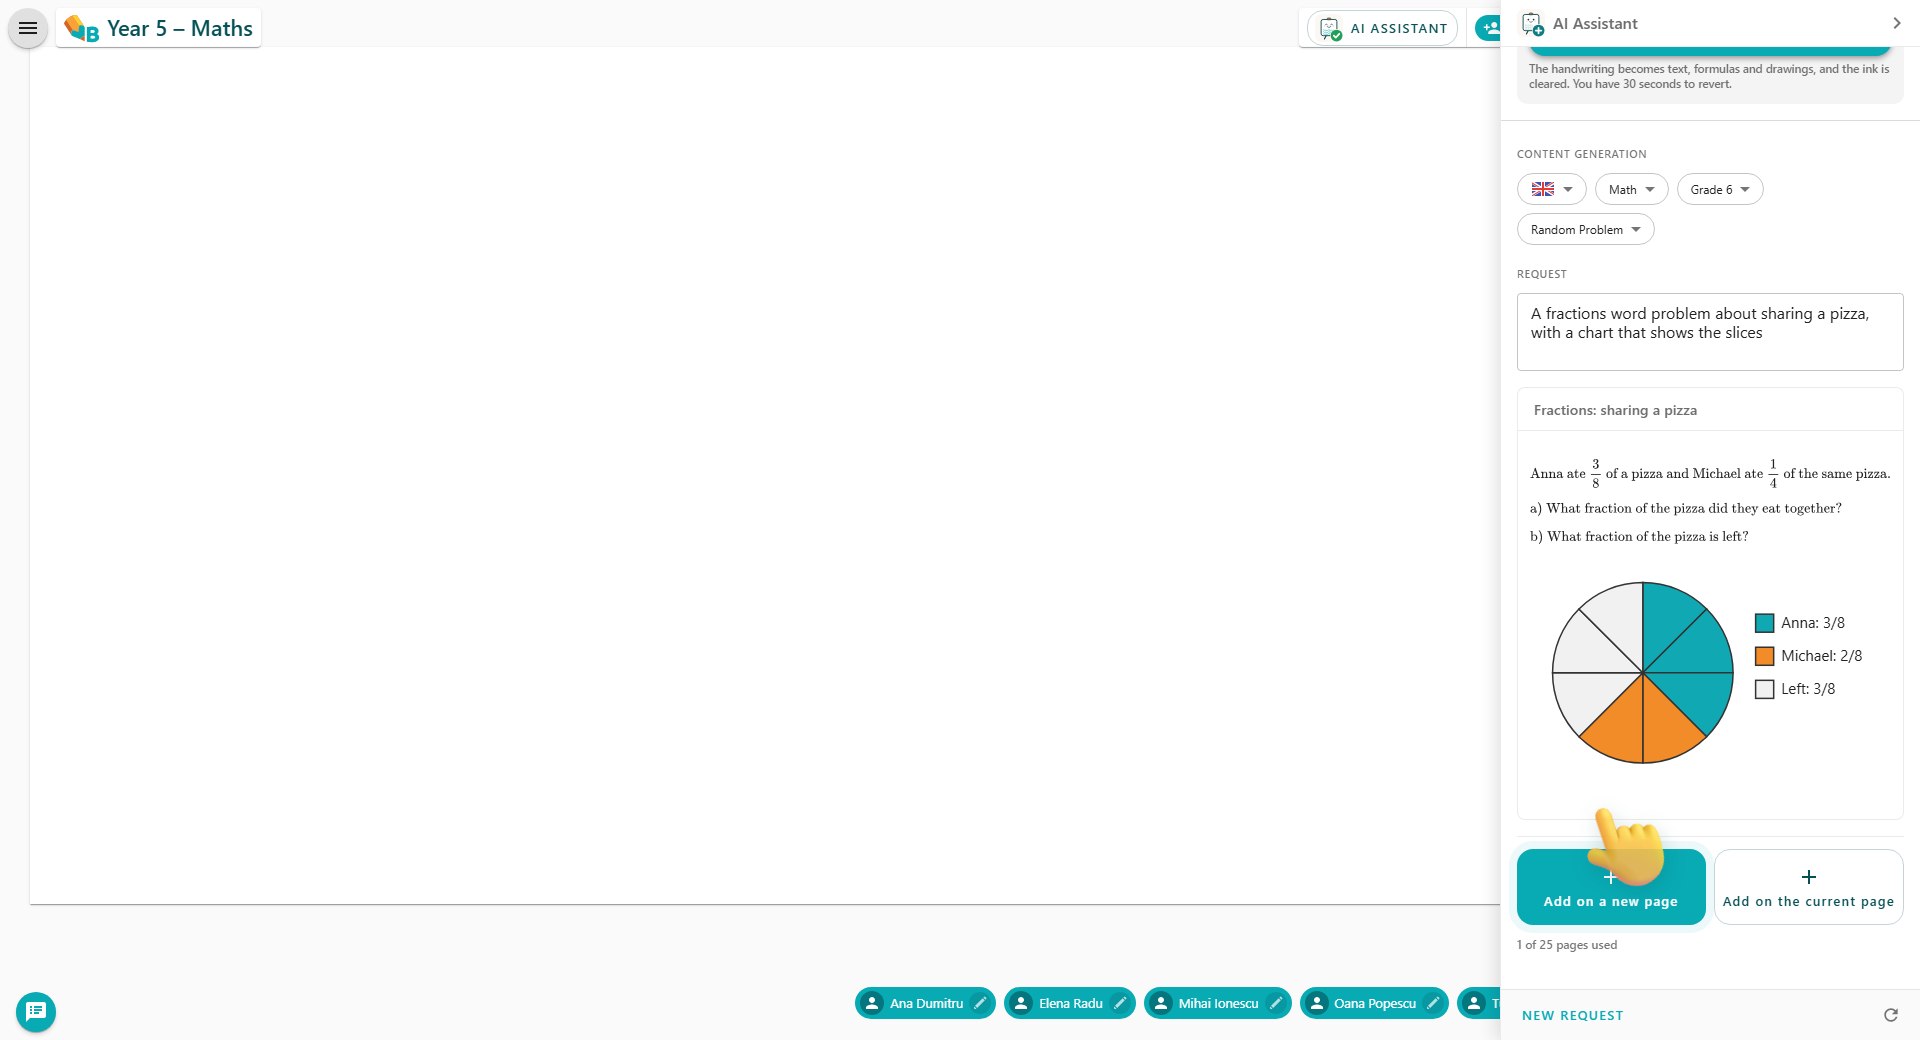
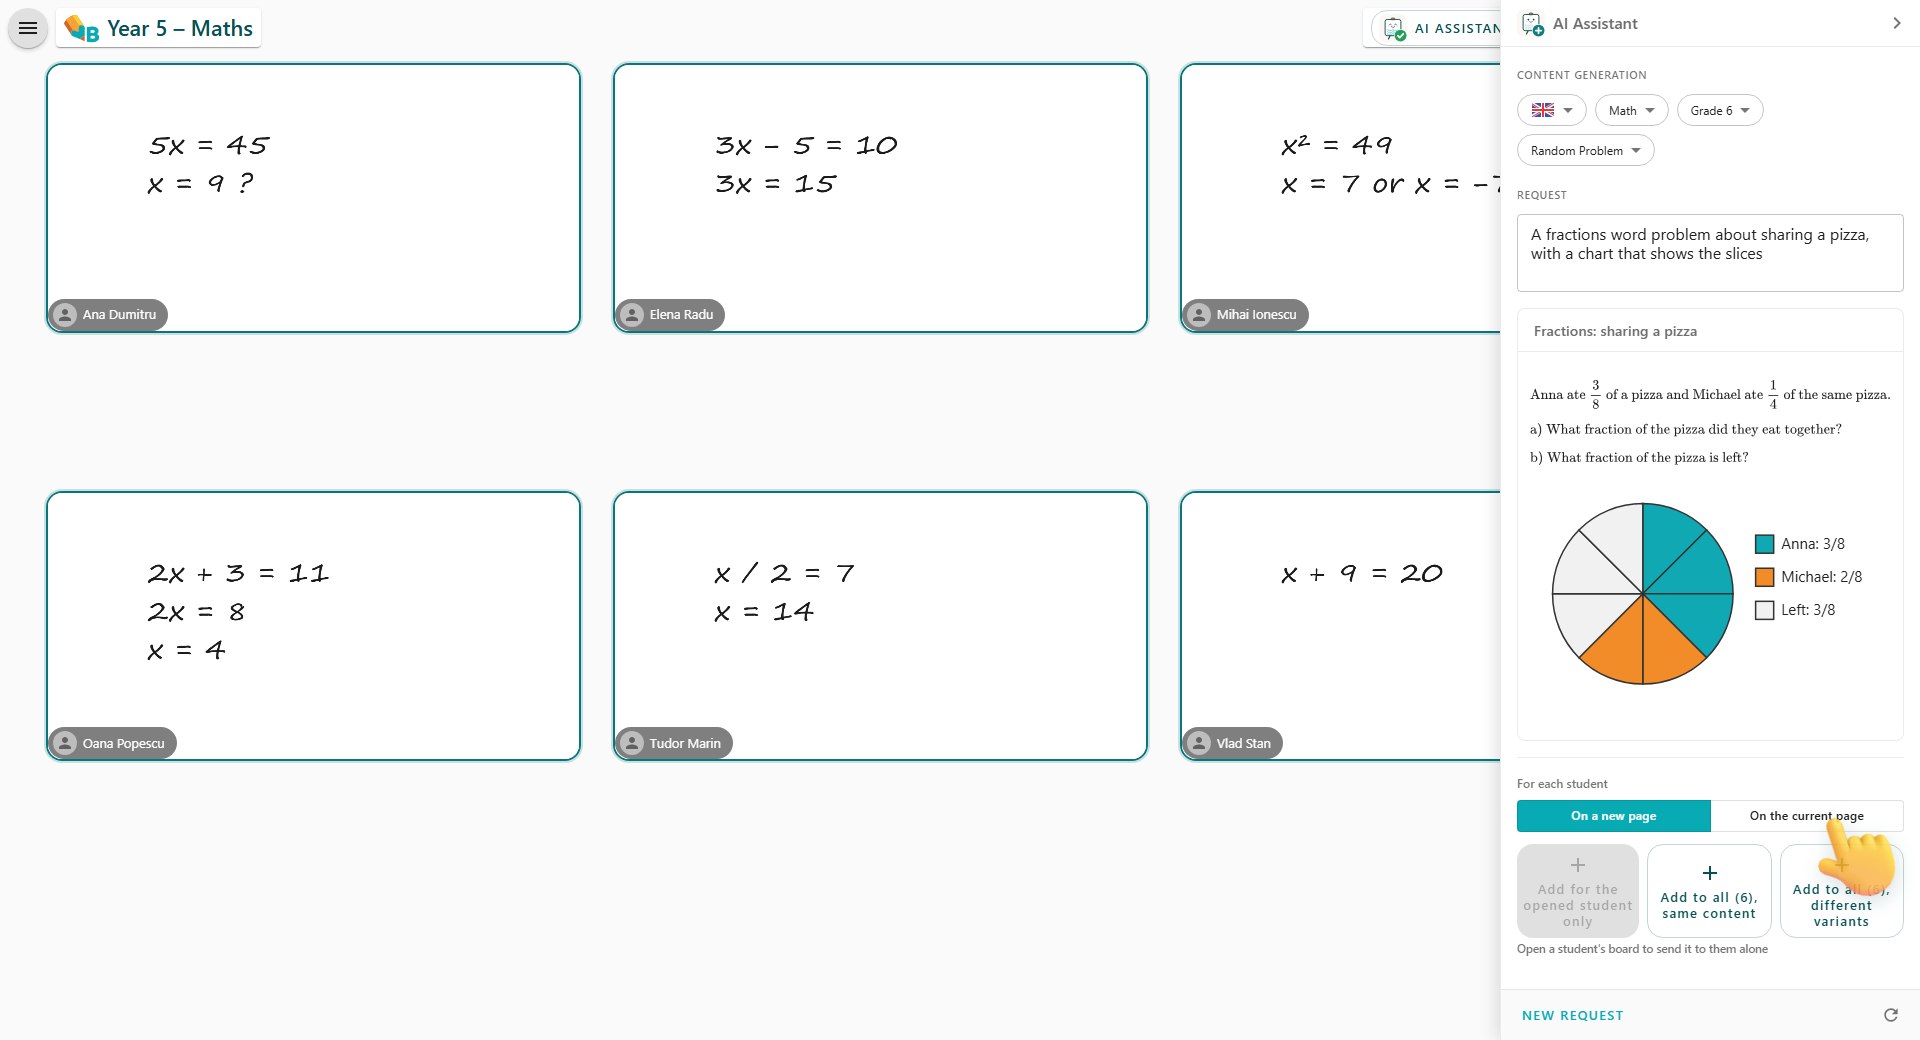
The AI assistant generates exercises, solutions and explanations straight onto the board, from a side panel that leaves the lesson visible
Press the AI Assistant button in the top bar to open the panel. The assistant’s face on the button always tells you what it is doing: calm while it waits for a request, animated while it works, and with a green check when it has an answer you have not put on the board yet
Pick the language: content is generated in Romanian, English or French
Pick the subject: math, physics, chemistry, geography, history or language
Pick the grade: the level that fits your students
Pick the result type: a random problem, a problem with a step-by-step solution, or a concept explained with an example
Write your request and press Send. The answer appears in the panel so you can check it before it goes on the board; Regenerate asks for another take, New request starts over
Diagrams and illustrations: for math, physics and chemistry the assistant draws precise vector diagrams that you can resize. For geography, biology, history and art it generates a realistic illustration instead (up to two per answer). Illustrations are drawn to help explain, so treat them as pictures rather than as accurate maps or references
Where the content goes
Below the answer, one click decides where the content goes
On the main board: Add on a new page creates the page and moves the whole class to it (up to 25 pages); Add on the current page lays it over what is already there
On individual boards: send it only to the student whose board is open, the same content to every student, or a different variant to each student, generated automatically. Each student gets a new page (when the plan allows several pages) and is moved to it
The panel closes as soon as you press; the button in the top bar shows the progress and a notification confirms when the content has landed
Clean up the board
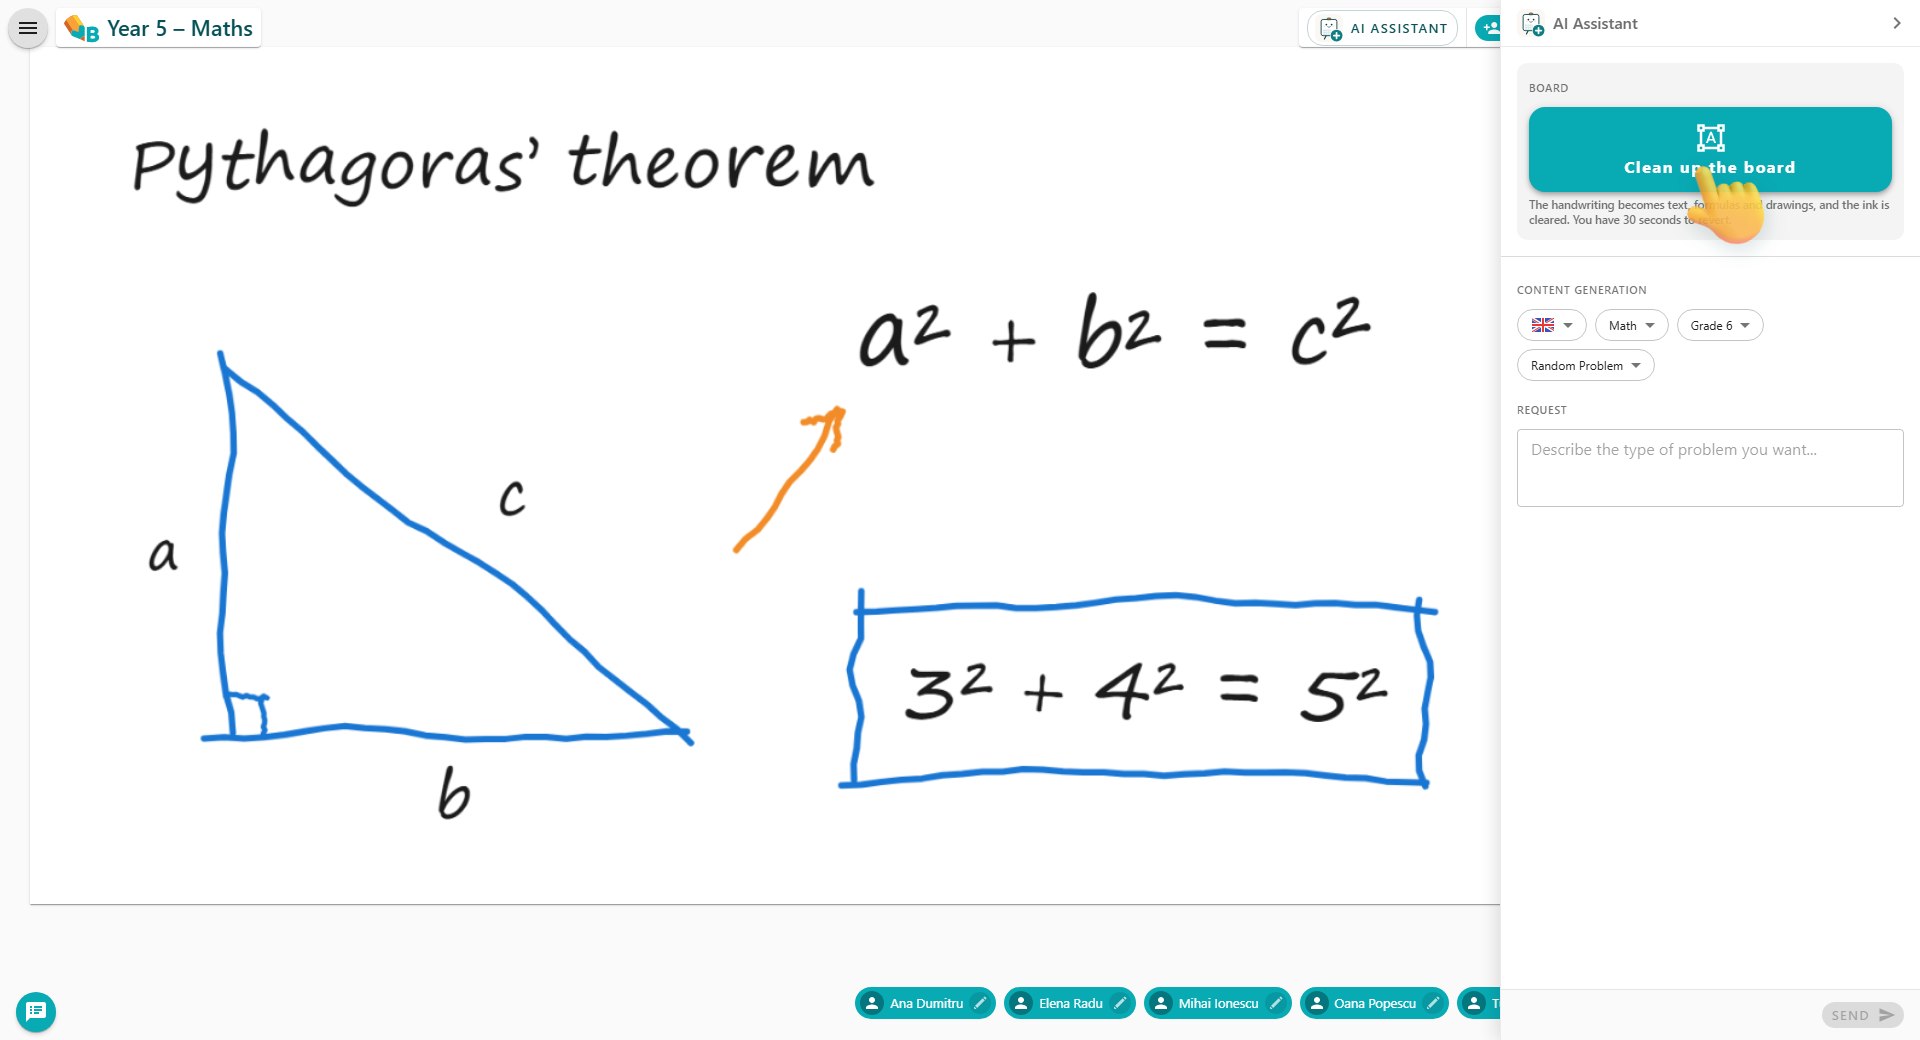
Clean up the board turns handwriting into typed elements with one click
Write and draw with the pen as usual, then press Clean up the board at the top of the panel. The board is locked for a few seconds while the assistant reads the handwriting
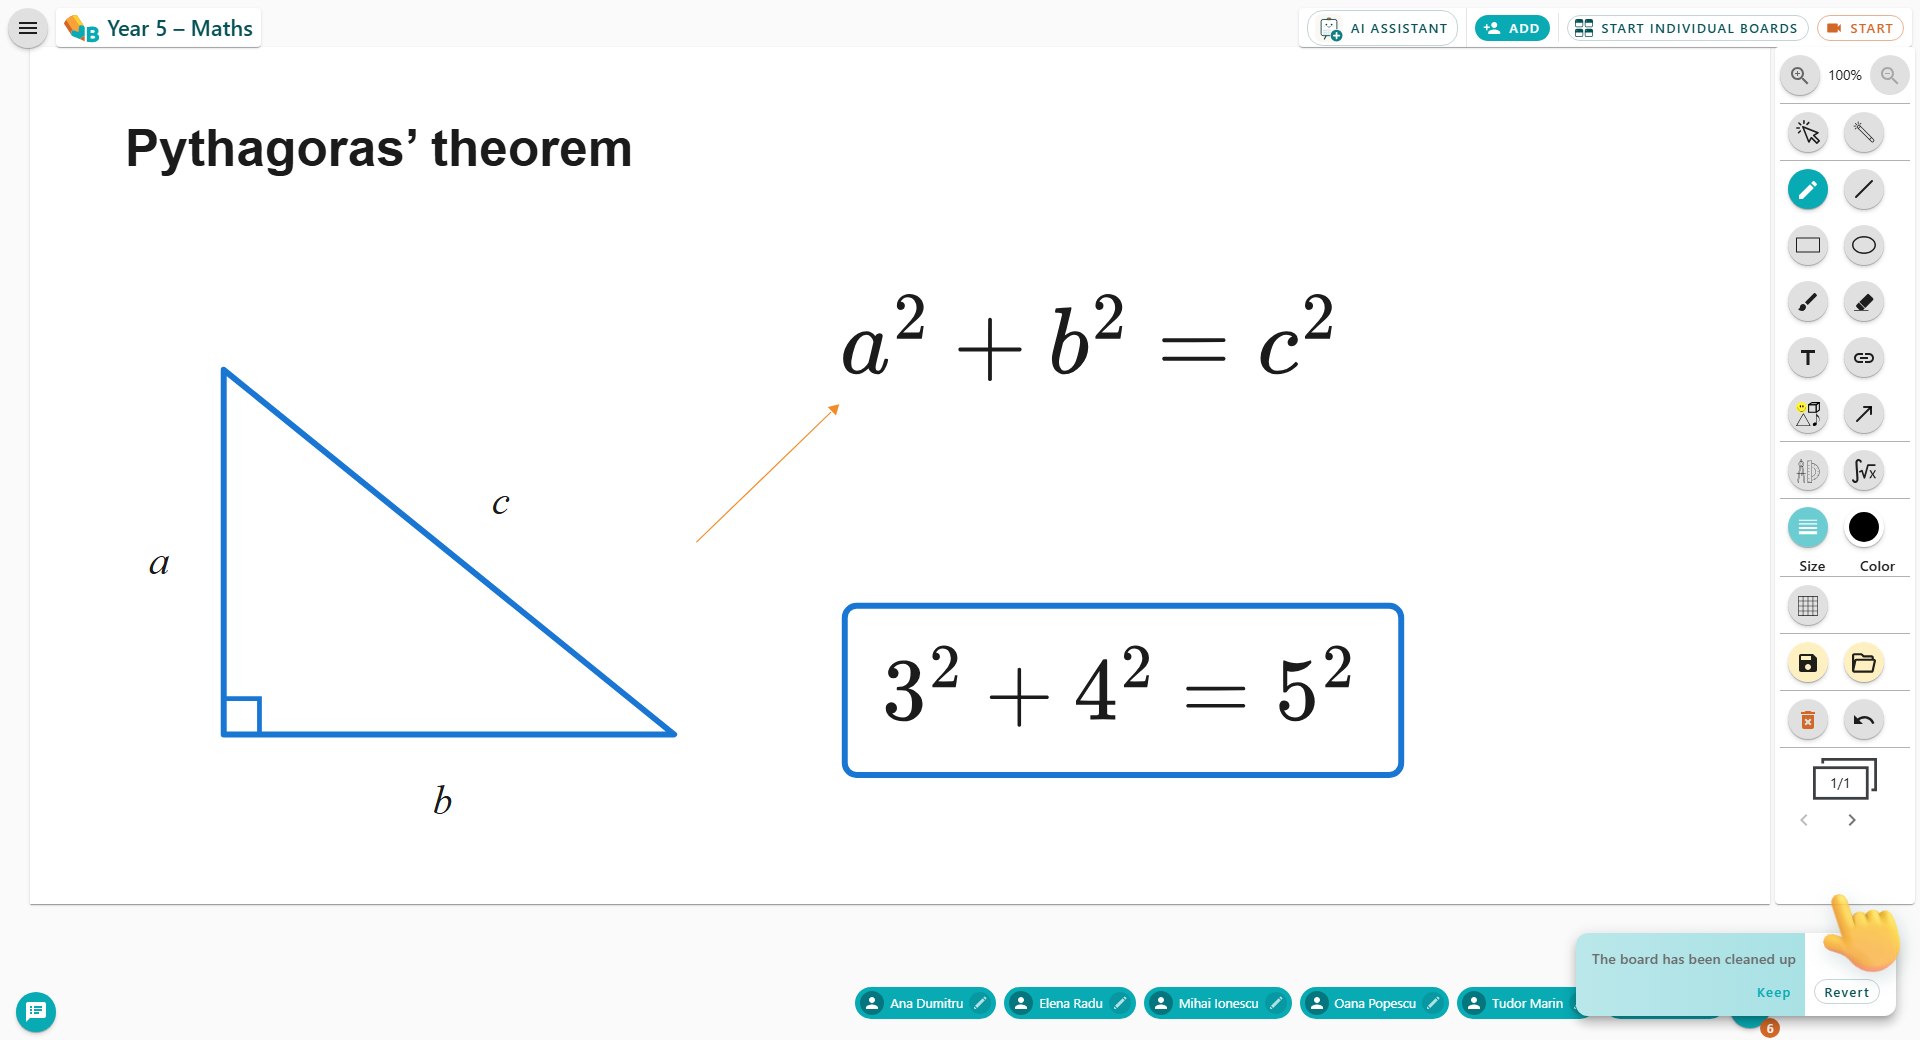
Text becomes typed text, formulas become formulas, and drawings become clean figures: round circles, straight lines, arrows with their heads, aligned shapes. Every element lands exactly where you wrote it, in the colours you used; elements added earlier are left untouched and the ink is cleared
For 30 seconds a Keep / Revert card sits in the bottom-right corner: Revert removes the received elements and brings the handwriting back; if you press nothing, the clean-up stays
The feature works on the main board (not on individual boards) and is part of the plans that include the AI tools
Mathematical formula converter
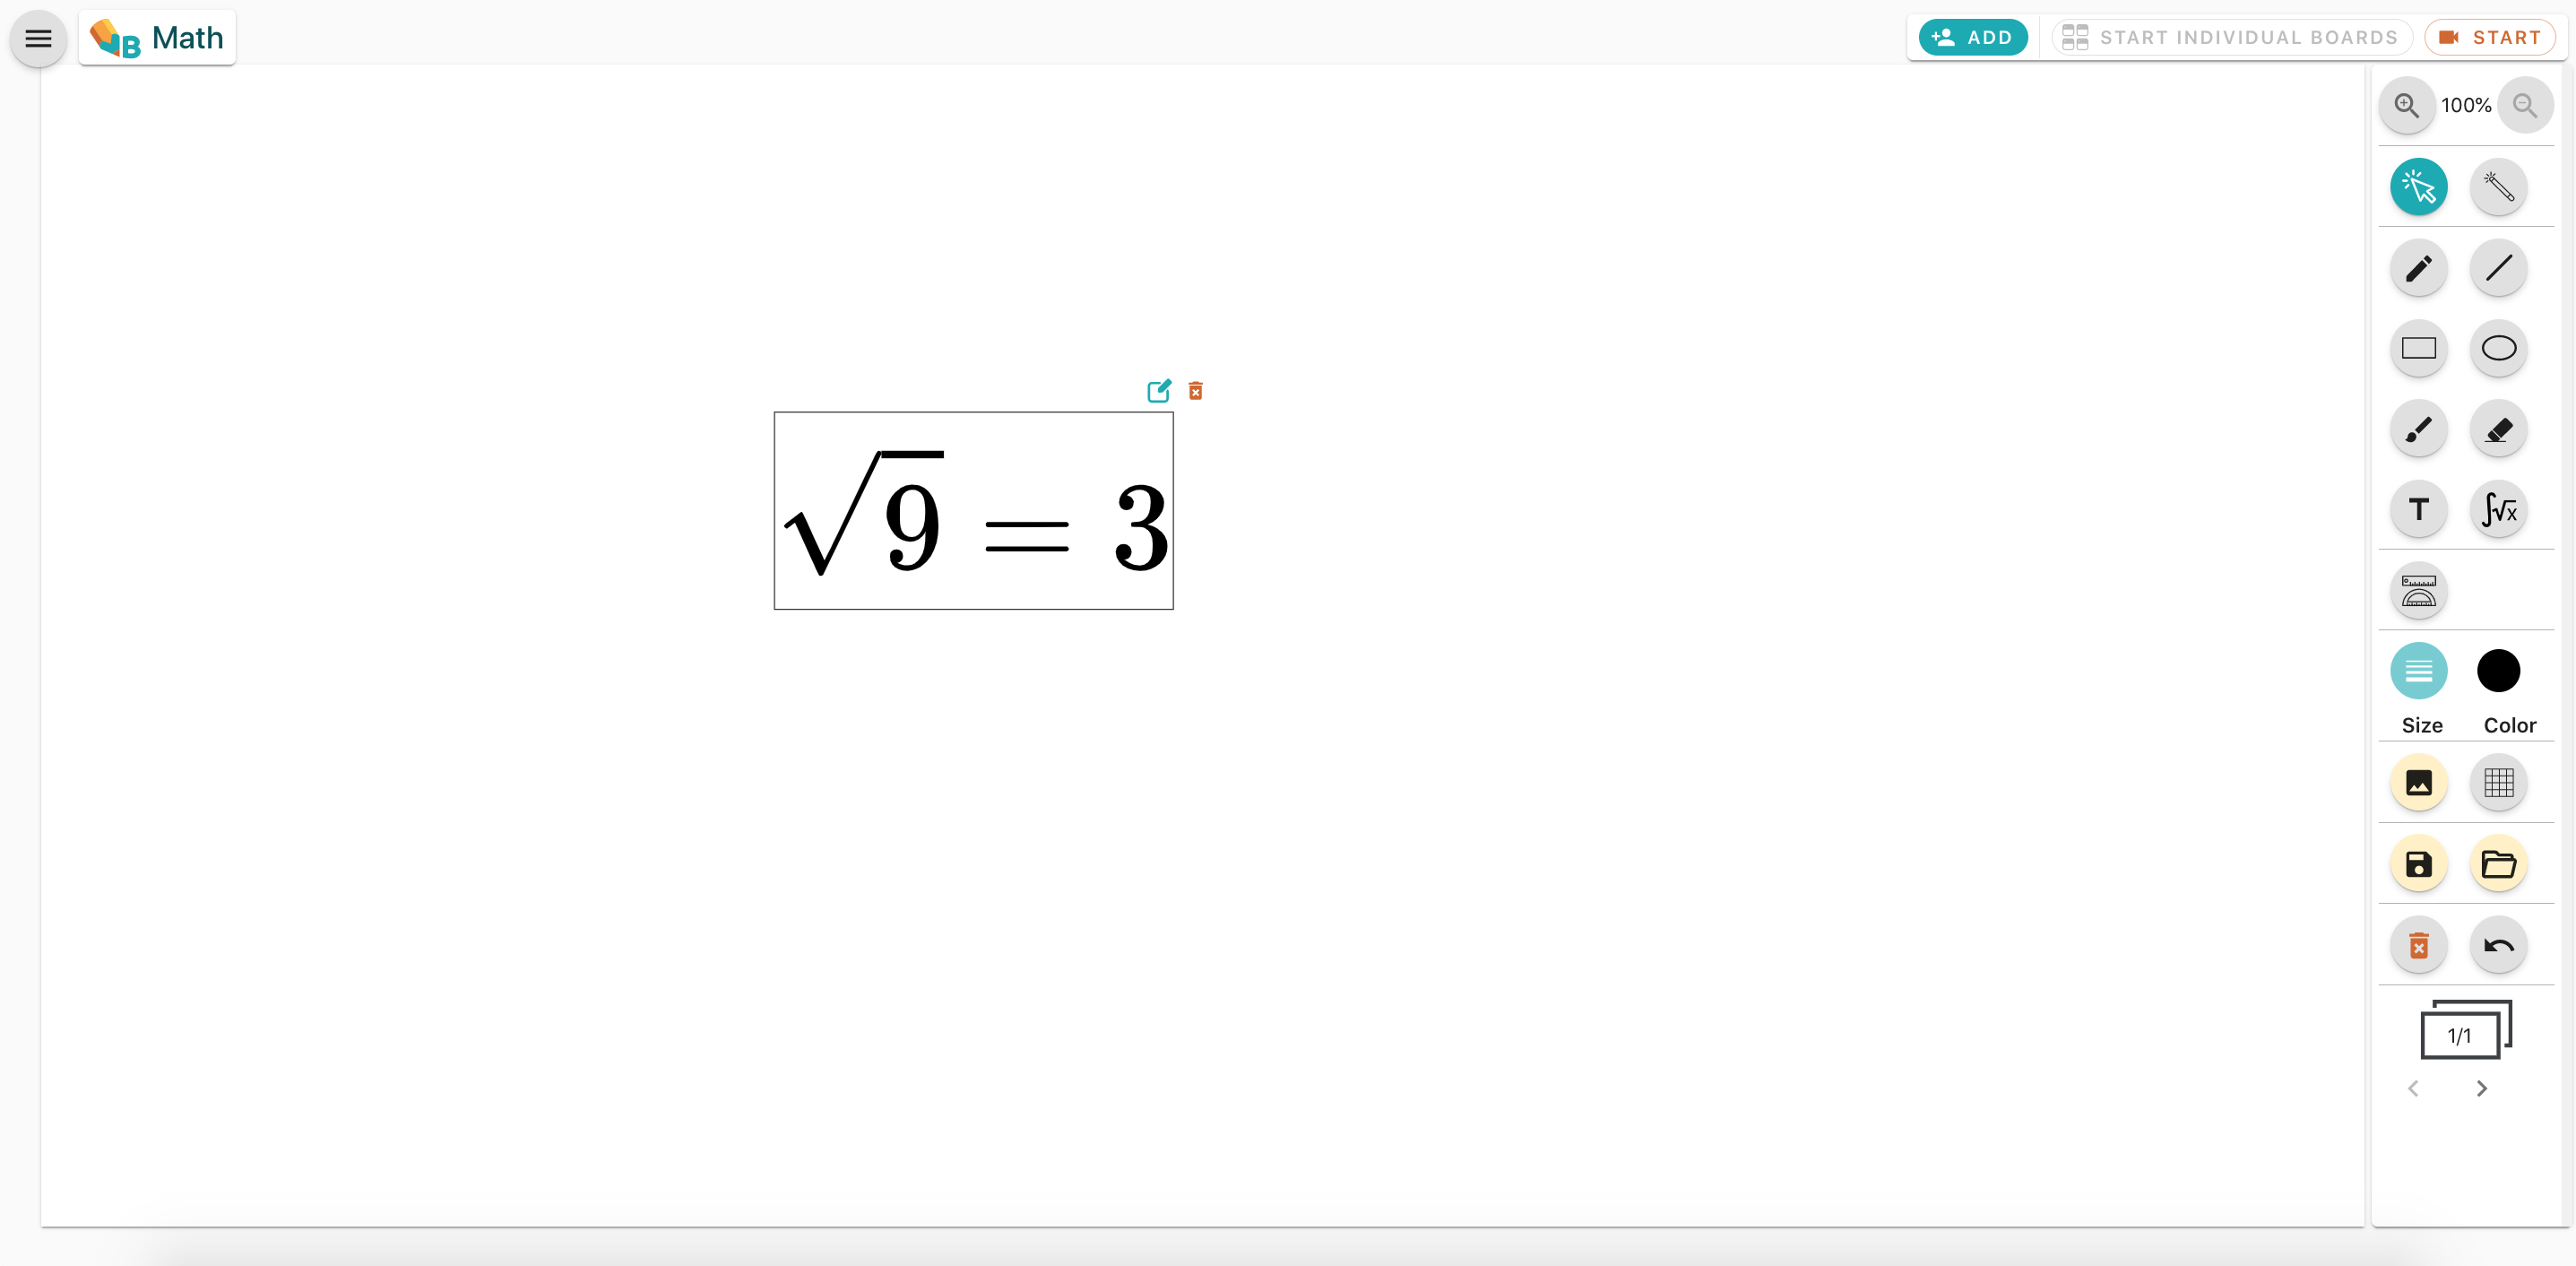
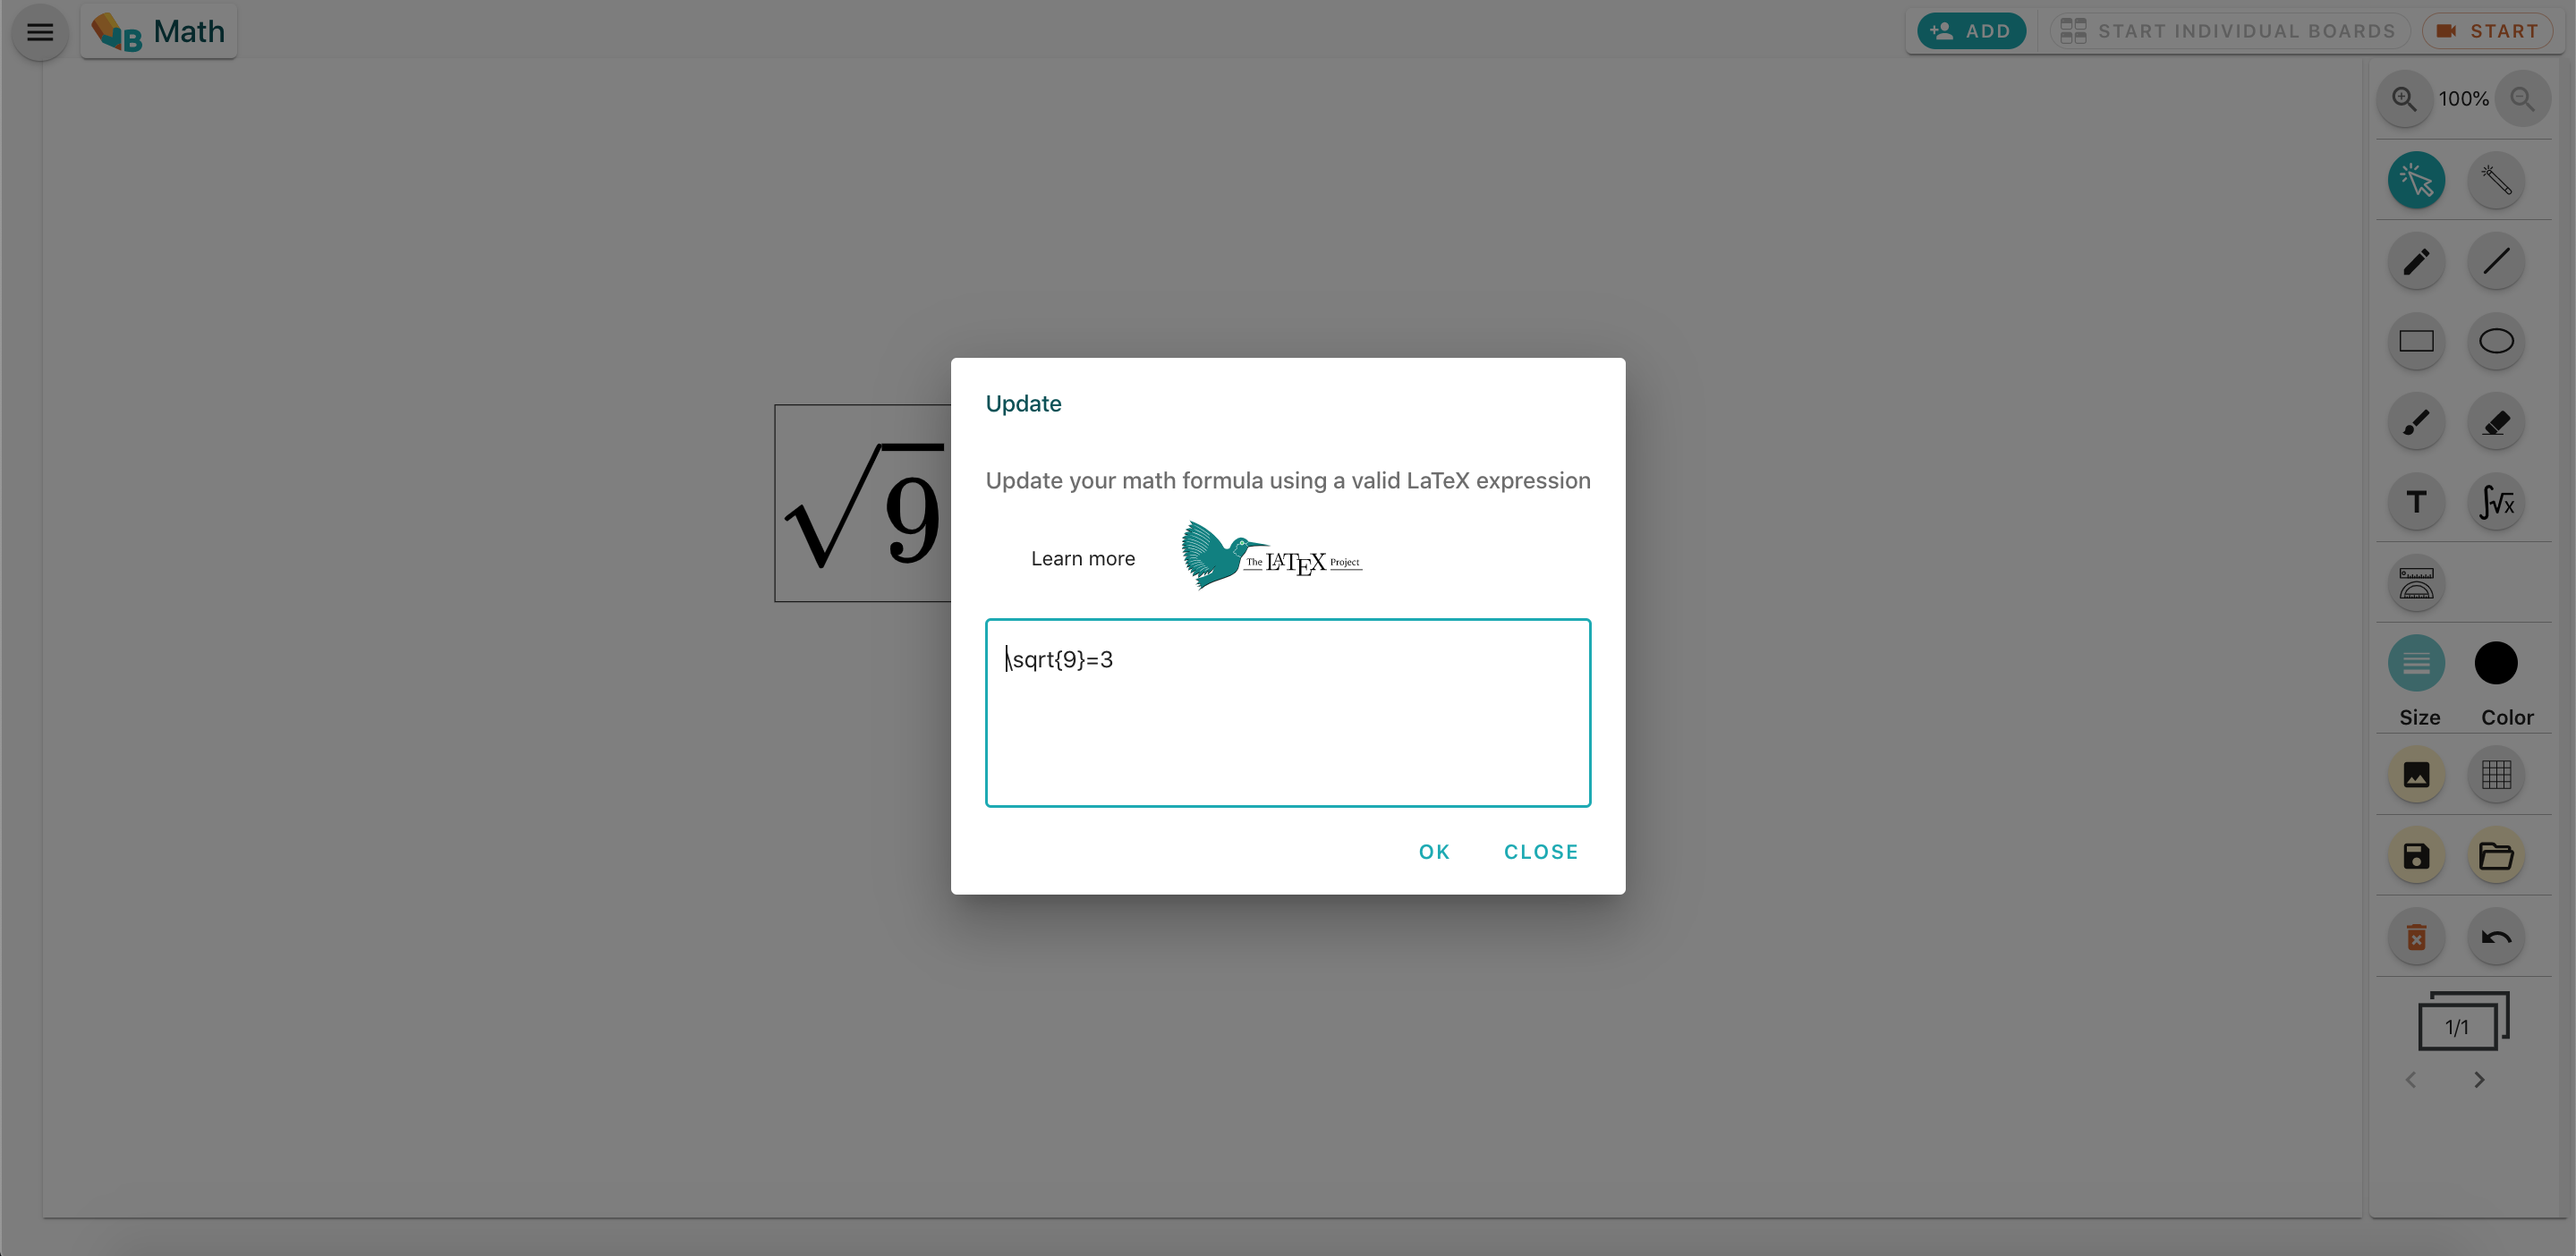
With the help of the mathematical formula converter we can convert pencil text into printed text
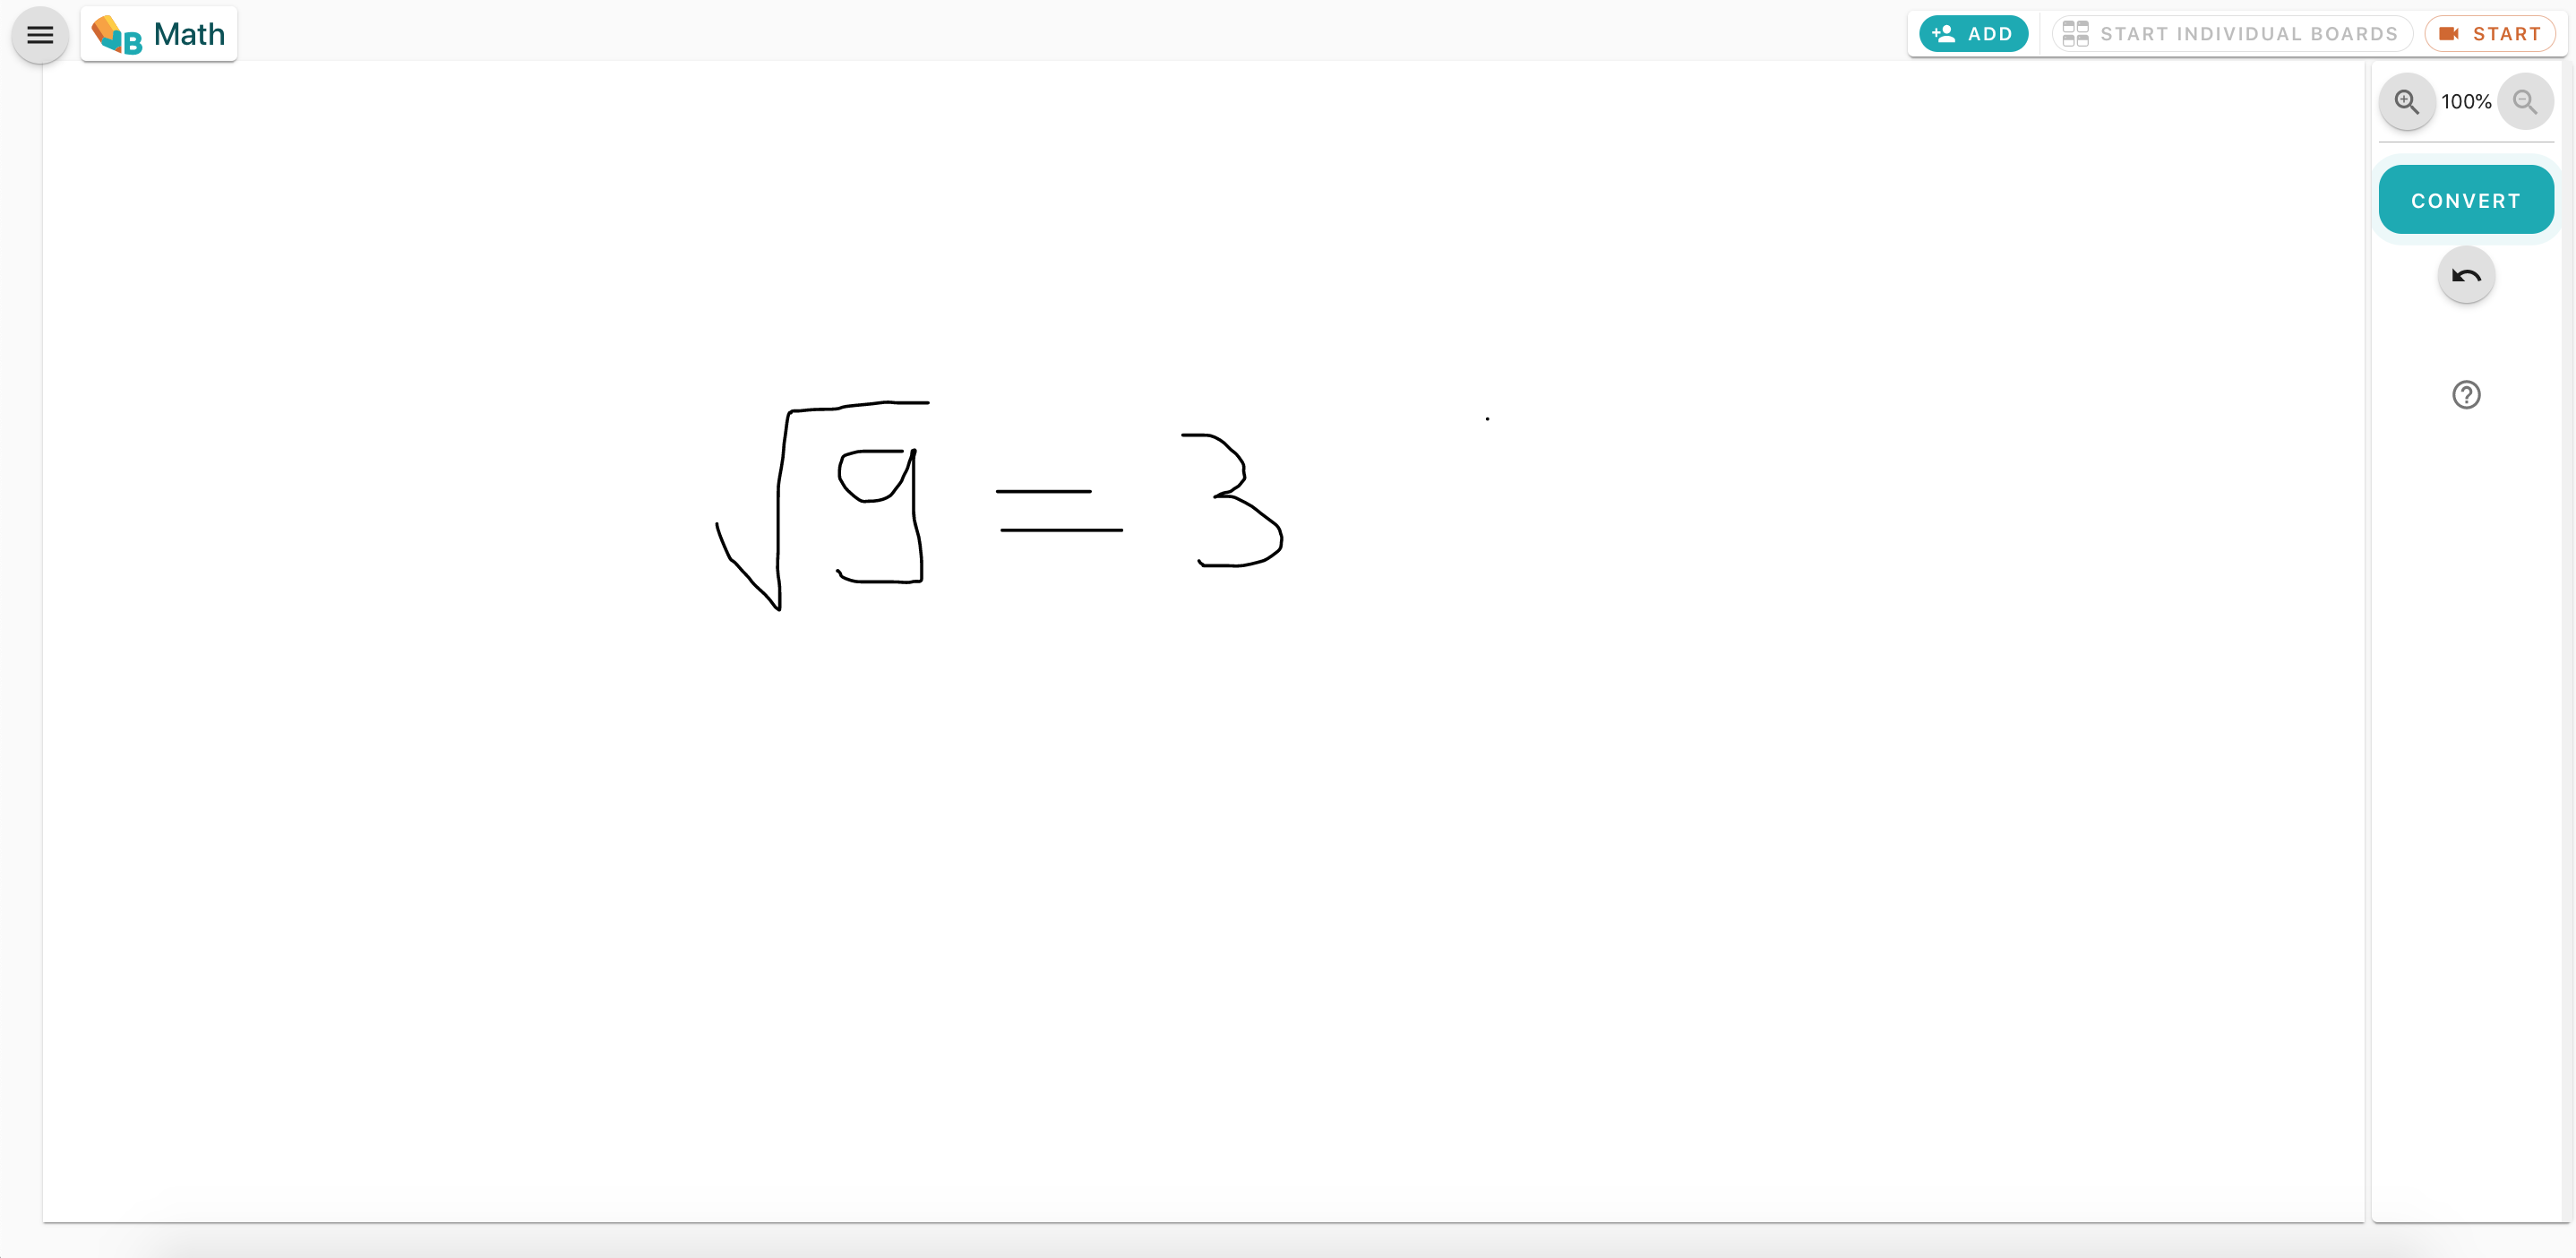
Click on the formula converter button
Using the pencil we write a mathematical formula or a number
By pressing the convert button this written formula is converted into printed text
The back button helps us to undo the last changes in case an error occurred
If the converted formula is a function of x (for example y = x² - 3x + 1), a graph of the function is automatically added next to it; if you write several functions, each one gets its own graph
Select the graph and press the edit button to change the expression or the x-axis interval; the graph can be moved, resized and deleted like any other element
If the formula uses two variables (for example z = x² + y²), a 3D surface is added instead; edit it to change the ranges or rotate the view with the rotation and tilt sliders
Individual board management
In this paragraph we will introduce how we can work with individual boards. This functionality is suited for individual work with pupils and for evaluation
Starting individual boards
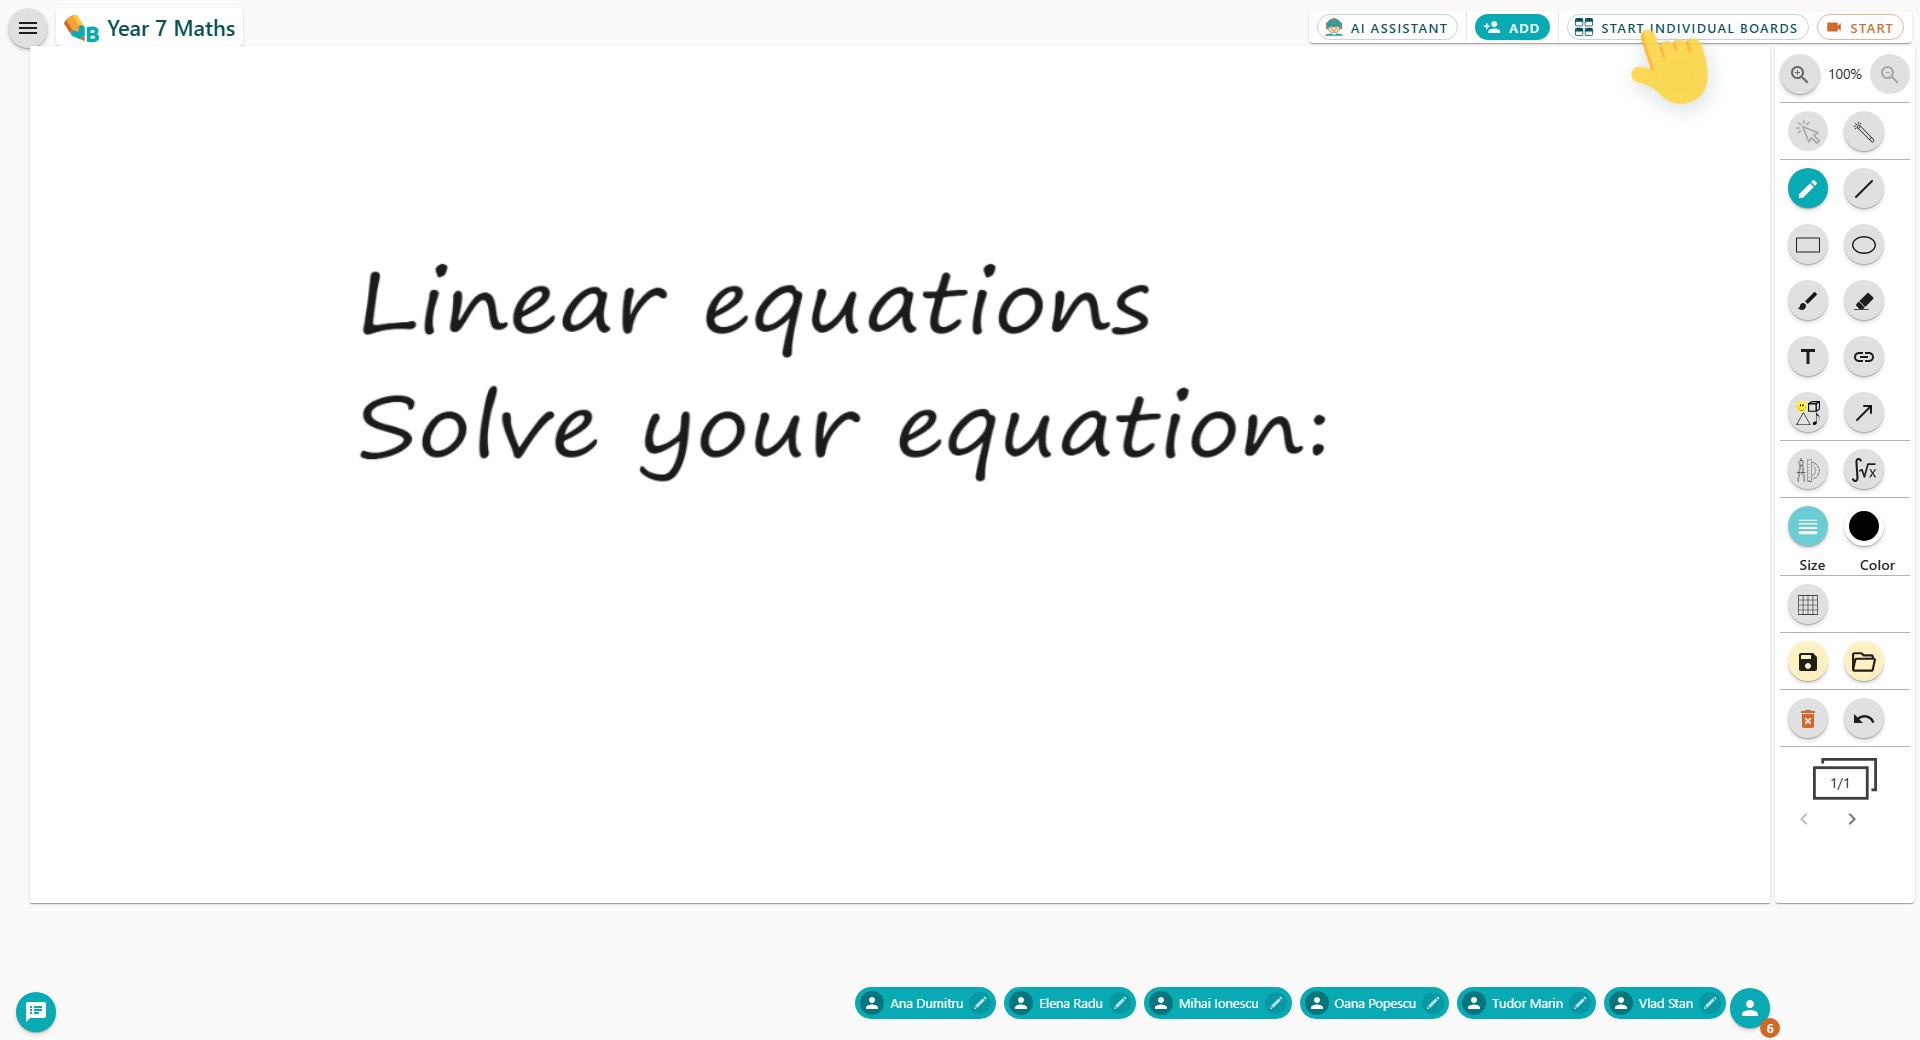
Starting working sessions with individual boards can be done during the lesson from the main menu. After starting an individual board activity, the following happens:
Each individual board for the pupils will contain a copy of the last active board in the shared session
The shared board is no longer active and all pupils will have access to their own board
An individual board activity with no participants will show an empty state
Each pupil will be granted the permission to write on their own board
Individual boards view
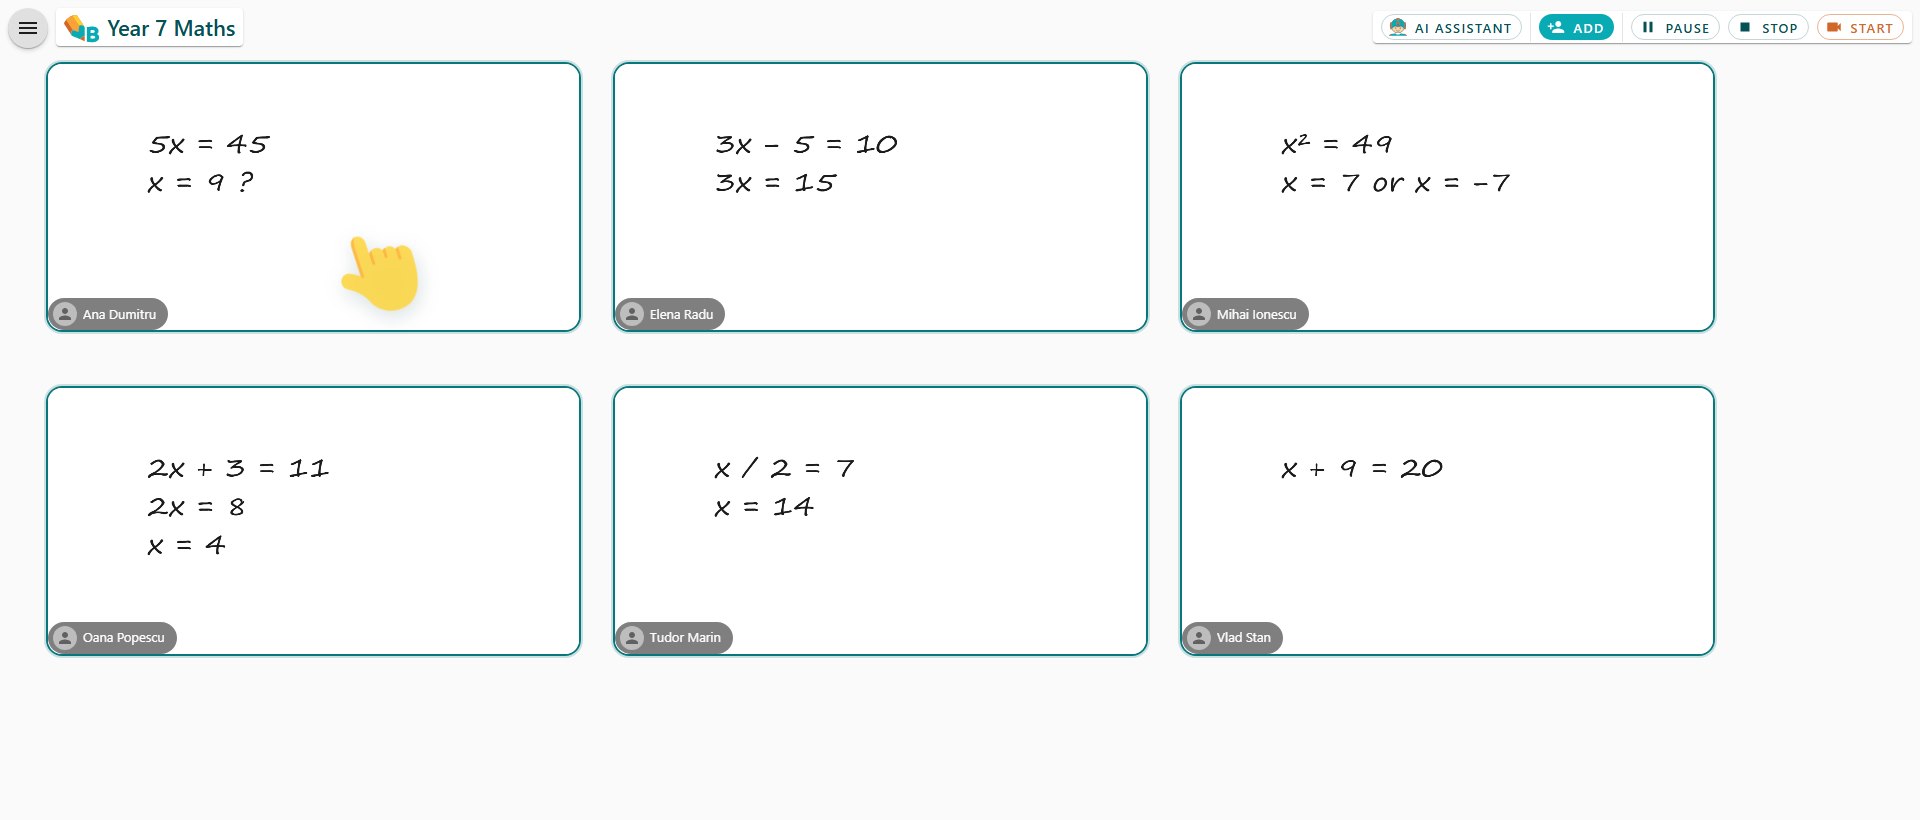
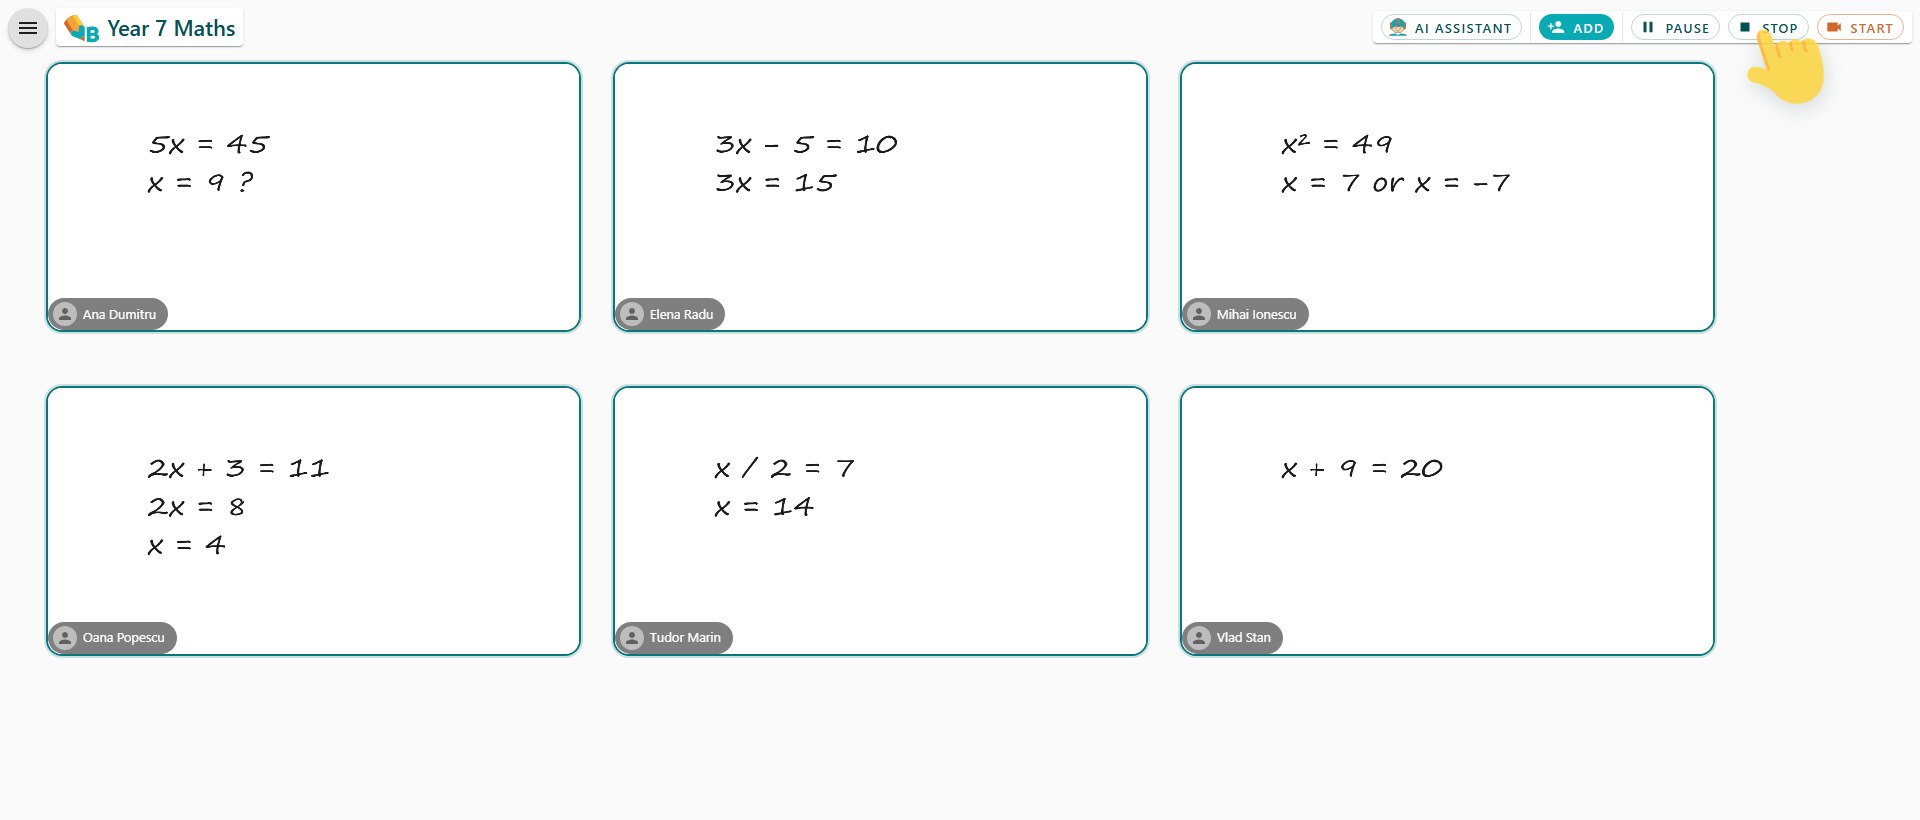
During an individual board activity the teacher can see all the pupils boards at the same time. The pupils will only see their own board
In the main screen the teacher can see all the changes the pupils make in real time
The boards will be re-arranged depending on the number of pupils in the classroom
Clicking on any of the boards will allow the teacher to interact with each of them to correct or add more information
Single board interaction
The teacher may choose any board from the list to interact with any of the pupils
During the interaction only the pupil and the teacher active in the board will see the changes
To return to the main screen with all the boards, the teacher may click on the red close button
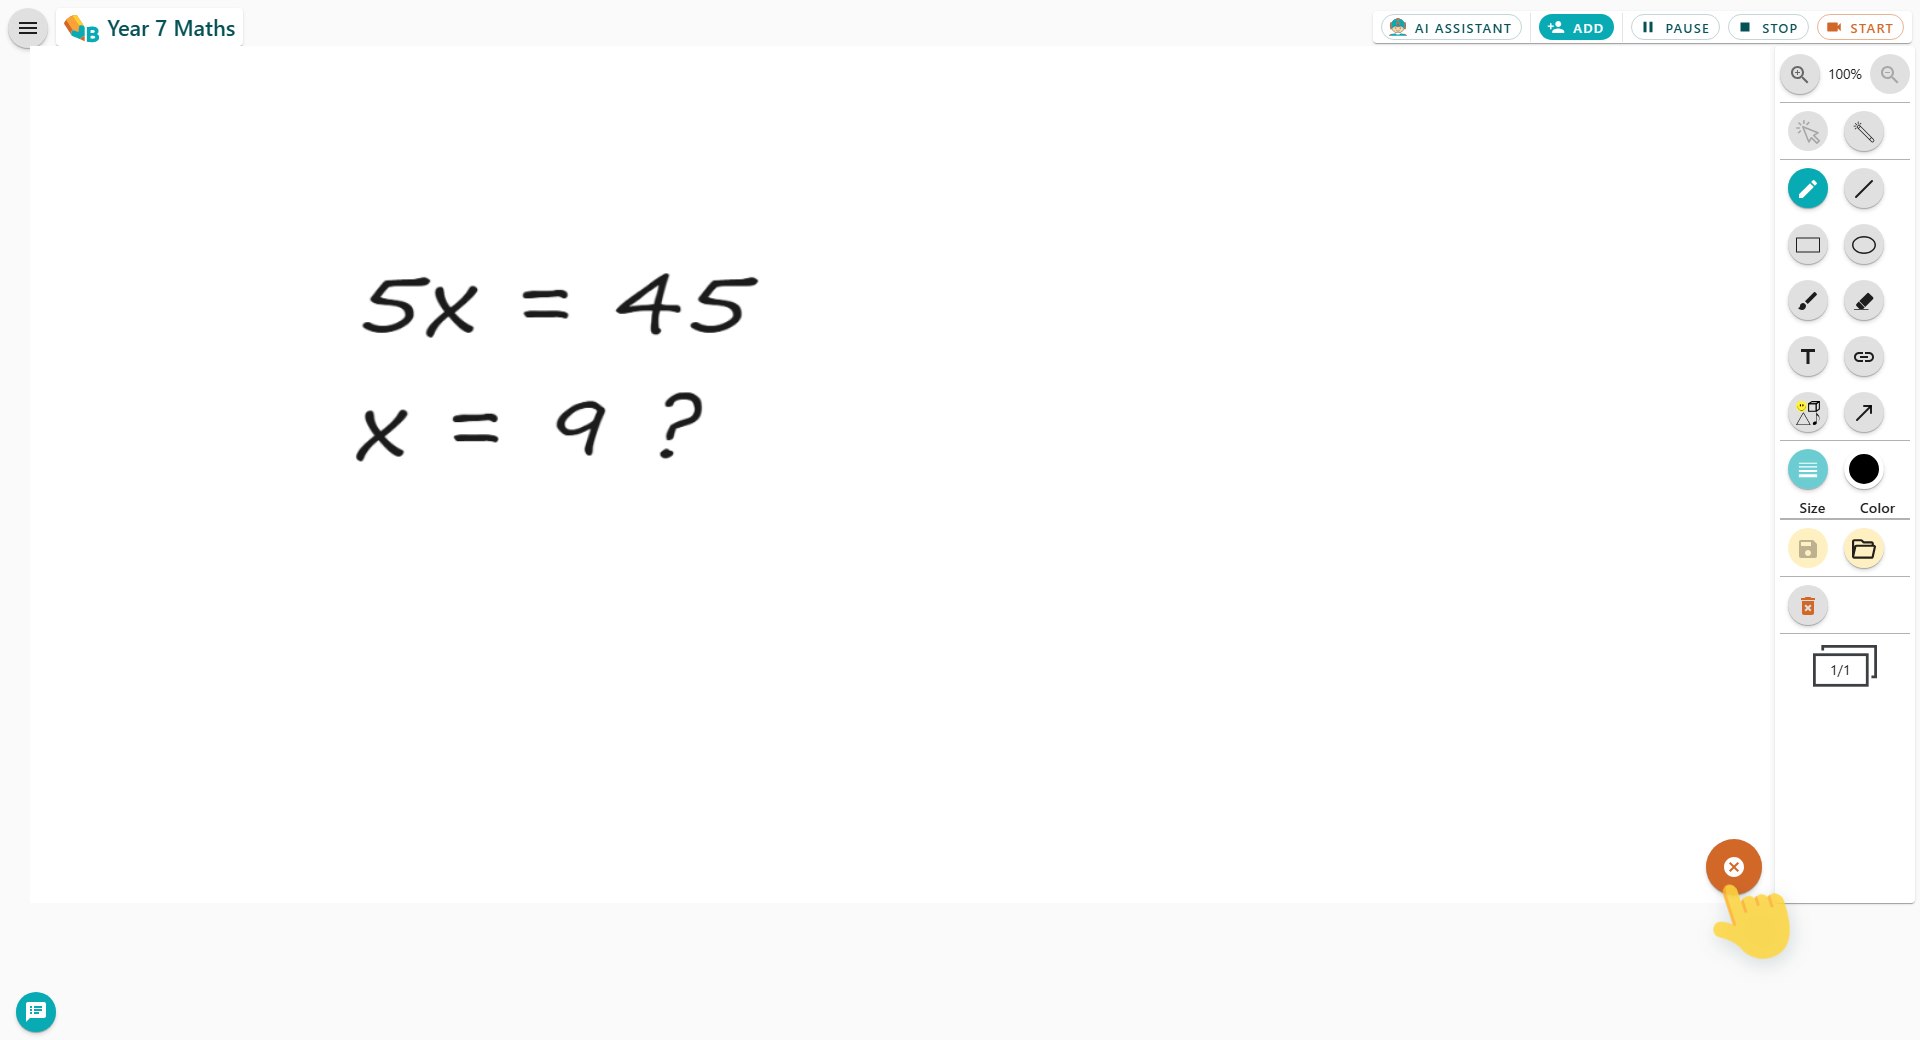
Closing individual boards
Individual boards are closed with the Stop button in the lesson’s top bar.
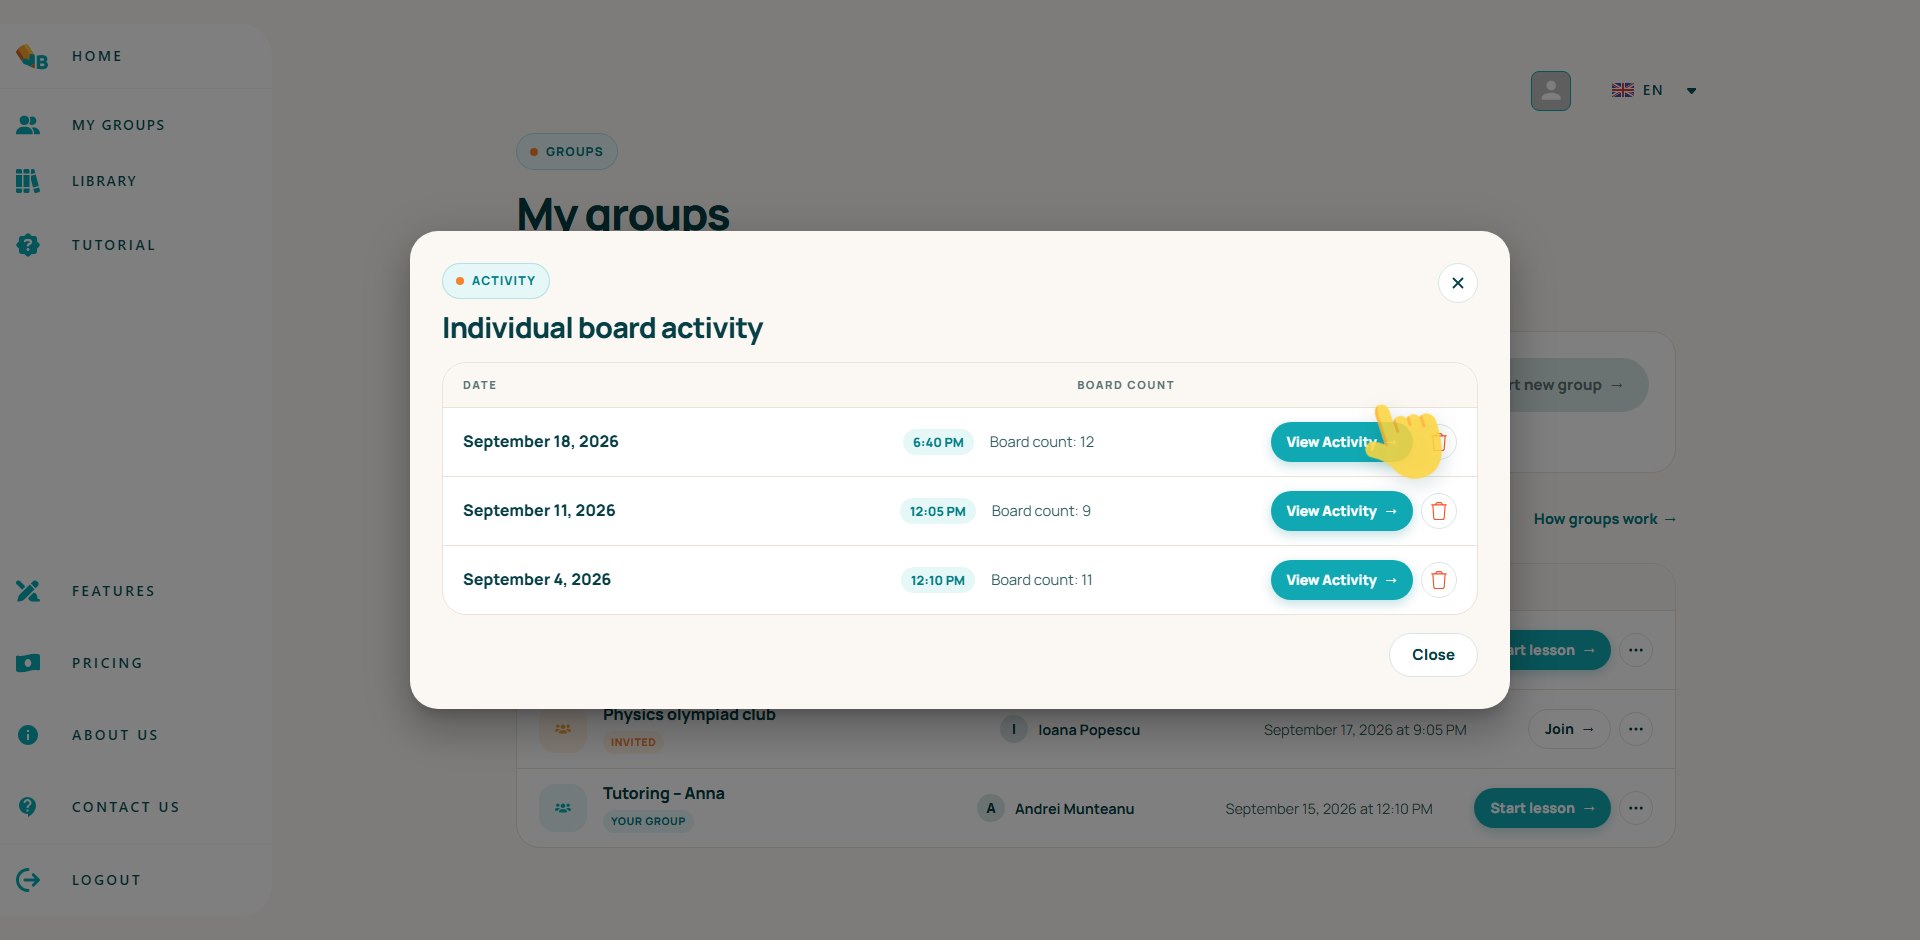
After closing the individual boards, the main menu will show a section to see all the individual board activities from the past for this class
When closing the individual boards the board returns to the shared board state
Individual board activity
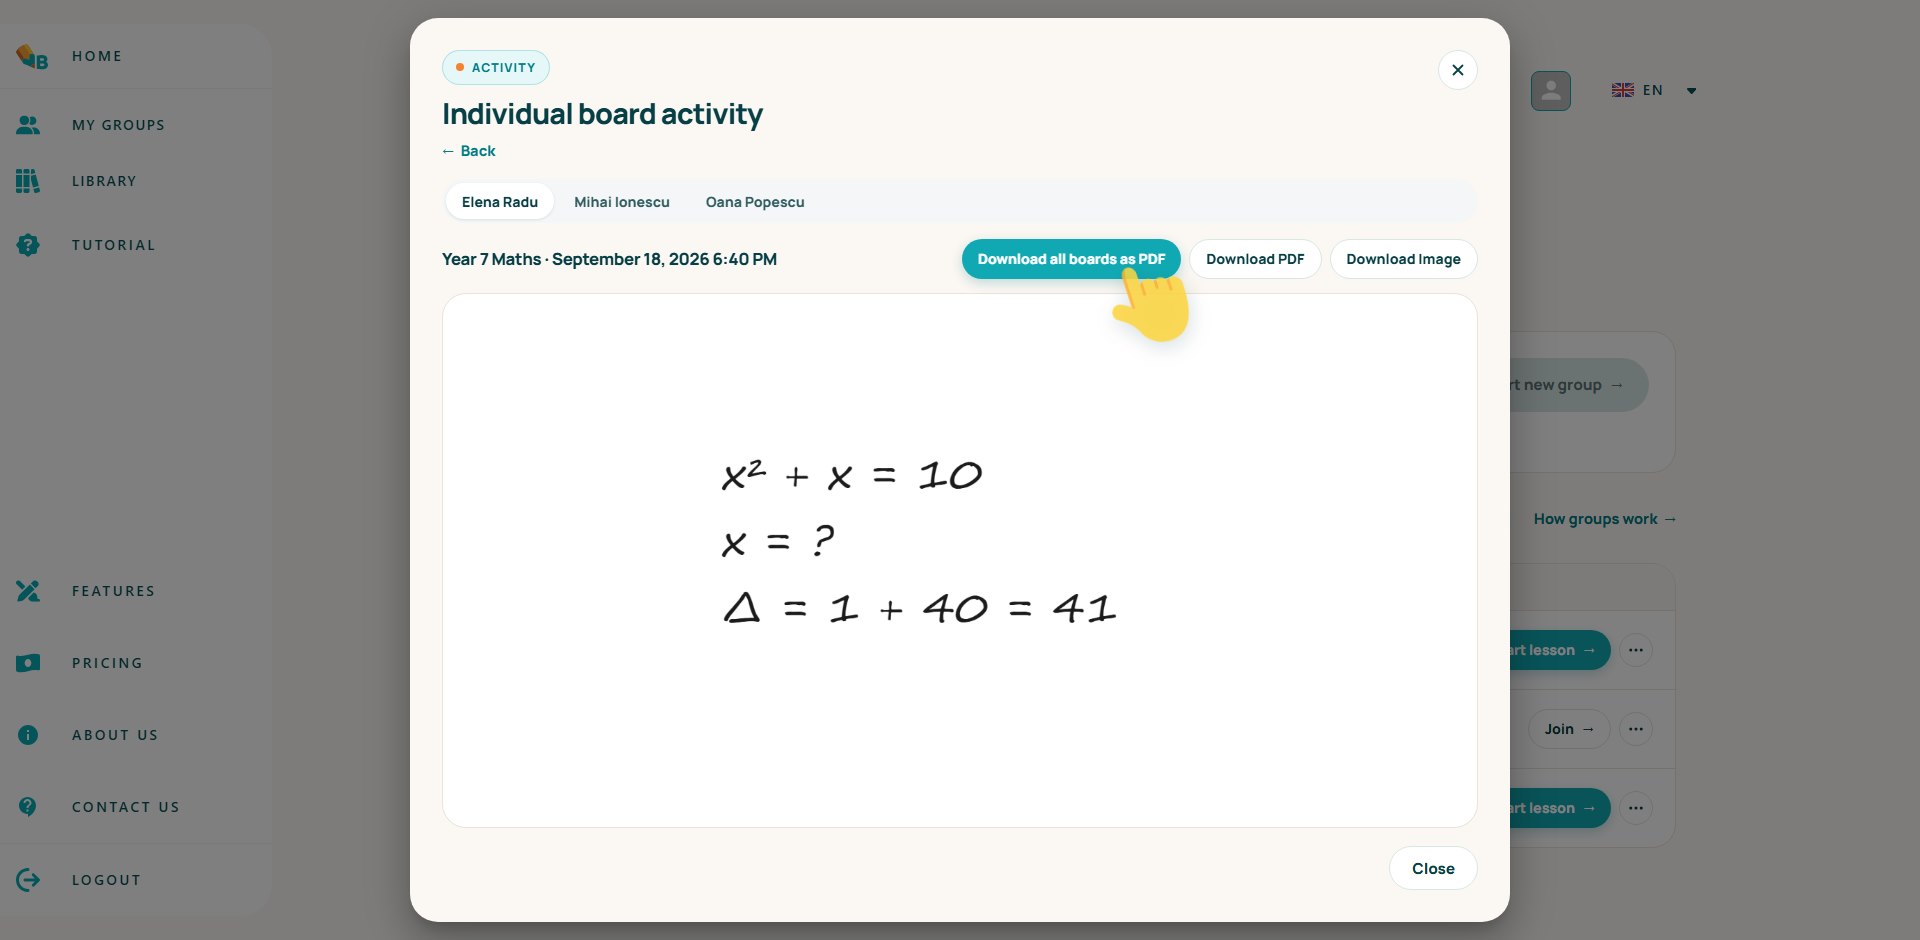
Viewing past activities will allow us to see the activity for each pupil in that session
We can download all the pupil's boards in PDF format for any of the activities
We can download or delete individually any of the boards
We can delete the entire activity
We can load any of the pupil's boards in the common board to view the results and present them to the entire class
Past activities can also be viewed when editing the group
Library management
This section will describe how to work with the library. The library is useful to prepare material ahead of time to use it in the main board or in individual board sessions
Adding boards to the library
A teacher may add any board or a set of boards to the library
Use the save menu to add boards to the library
When adding a single board you will save the current board in the library. This is useful to save simple exercises
When adding a set of boards, all boards in the current lesson will be added. This is useful for preparing complex exercises with solutions in advance or to prepare the lesson before the class starts.
Saving the boards
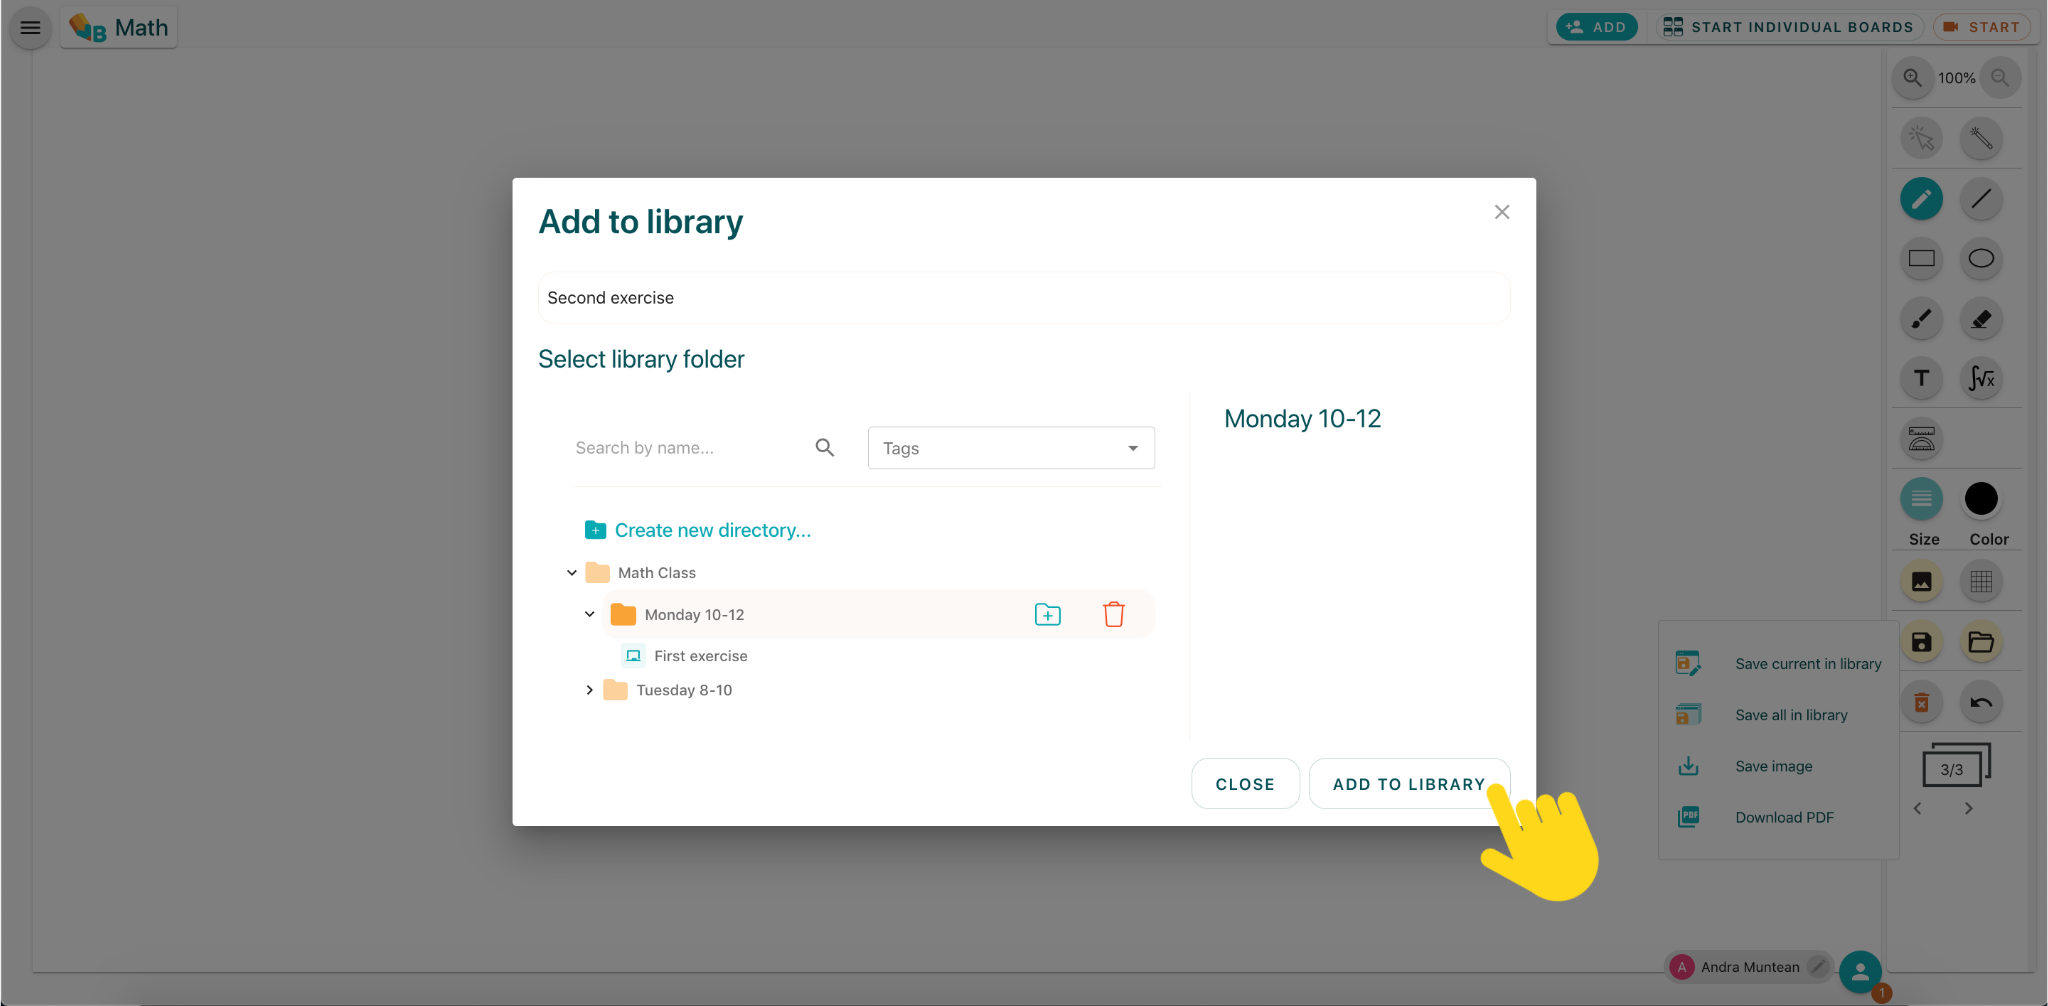
When saving a board you have several options for convenience
You may select the folder where the board or set of boards can be saved
When saving a single board, you also have the option of replacing an existing board
Not selecting a folder will save the board or board set in the root folder
Adding PDF files
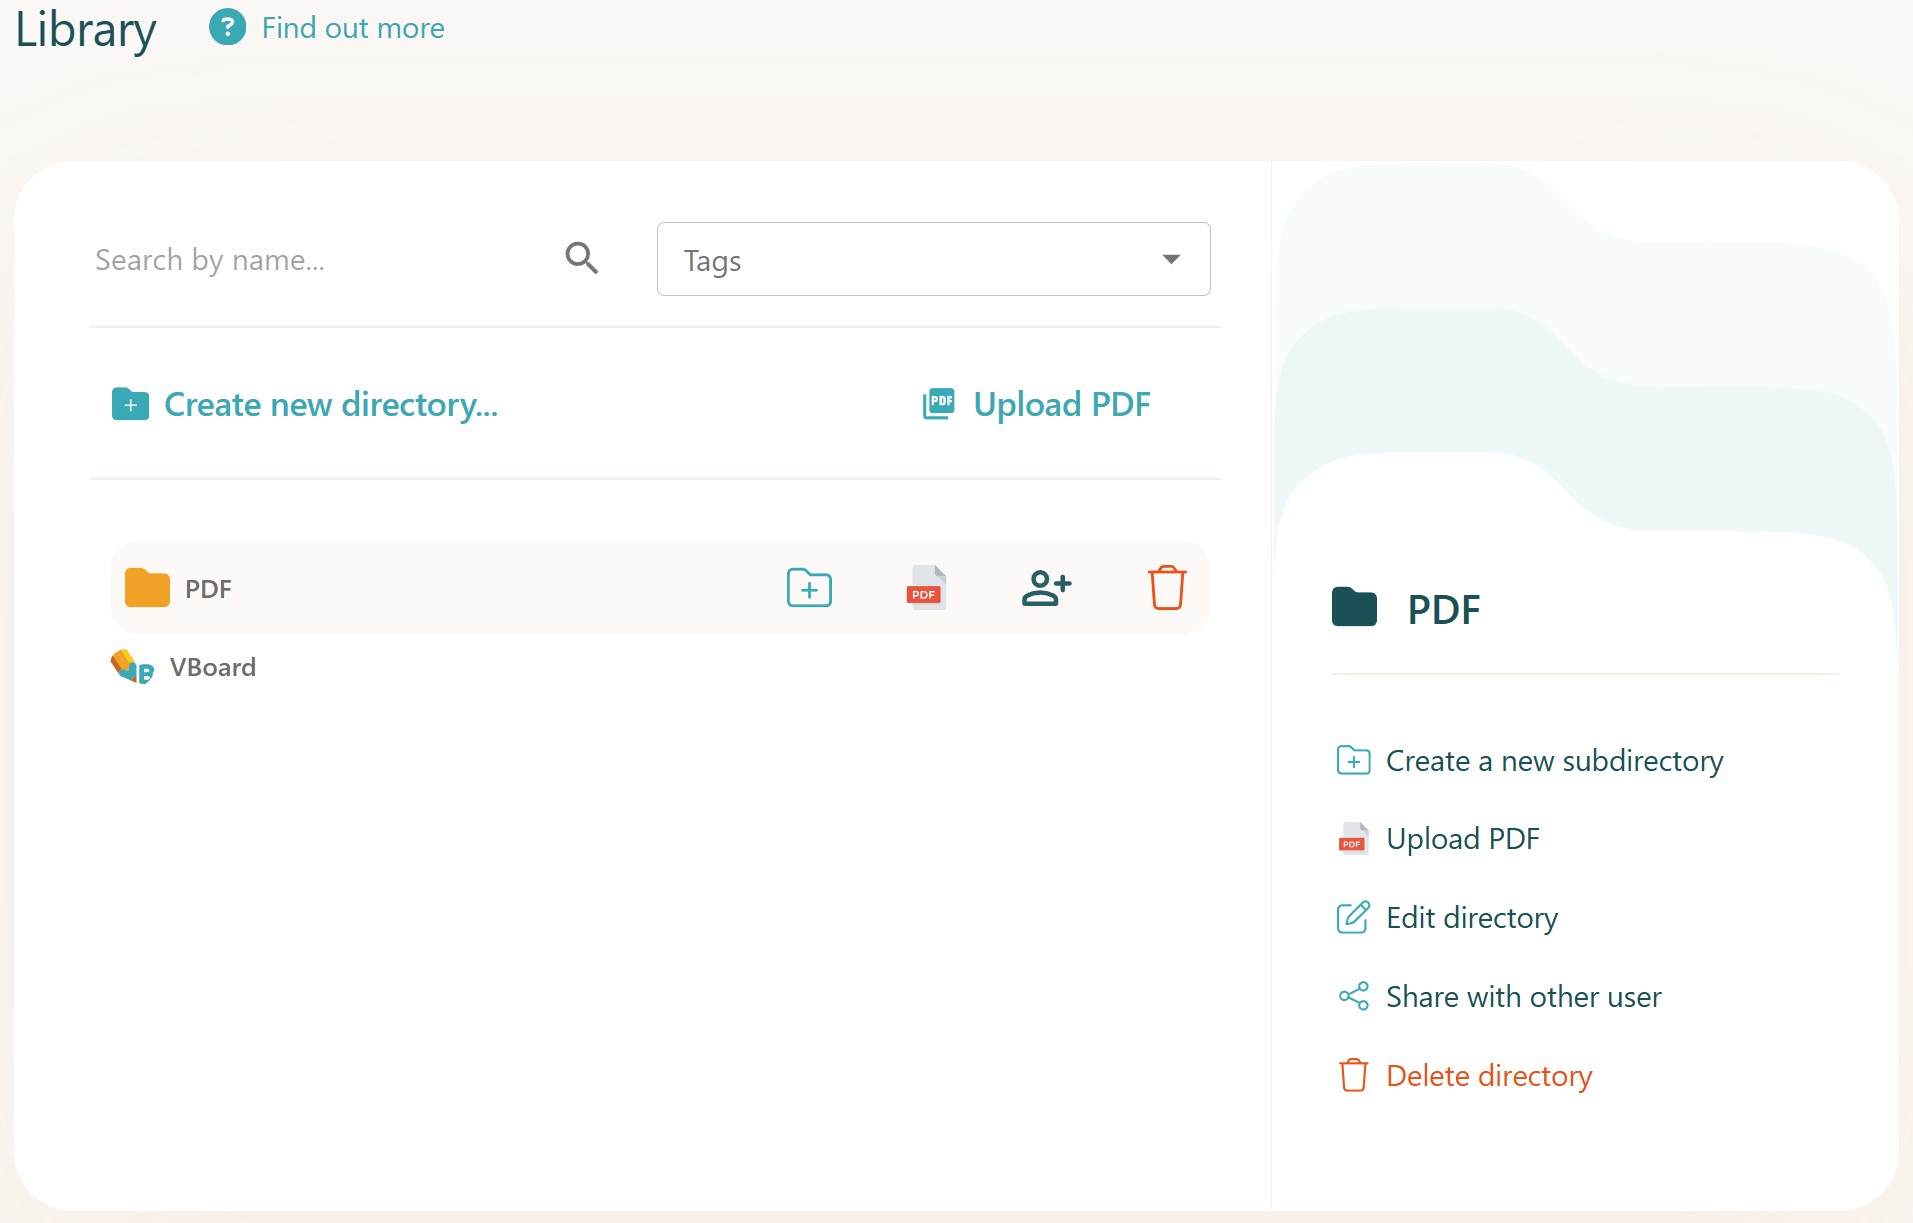
You can add PDF files to the library for later use in lessons and sharing with other teachers
Use the open menu to load a PDF file during a lesson. The PDF will be converted into individual boards, one for each page
Opening any page from the PDF allows you to crop any piece of it and add it to the whiteboard
Save all boards to the library using the save menu. This preserves the PDF content for future lessons and allows sharing with other teachers
Loading boards
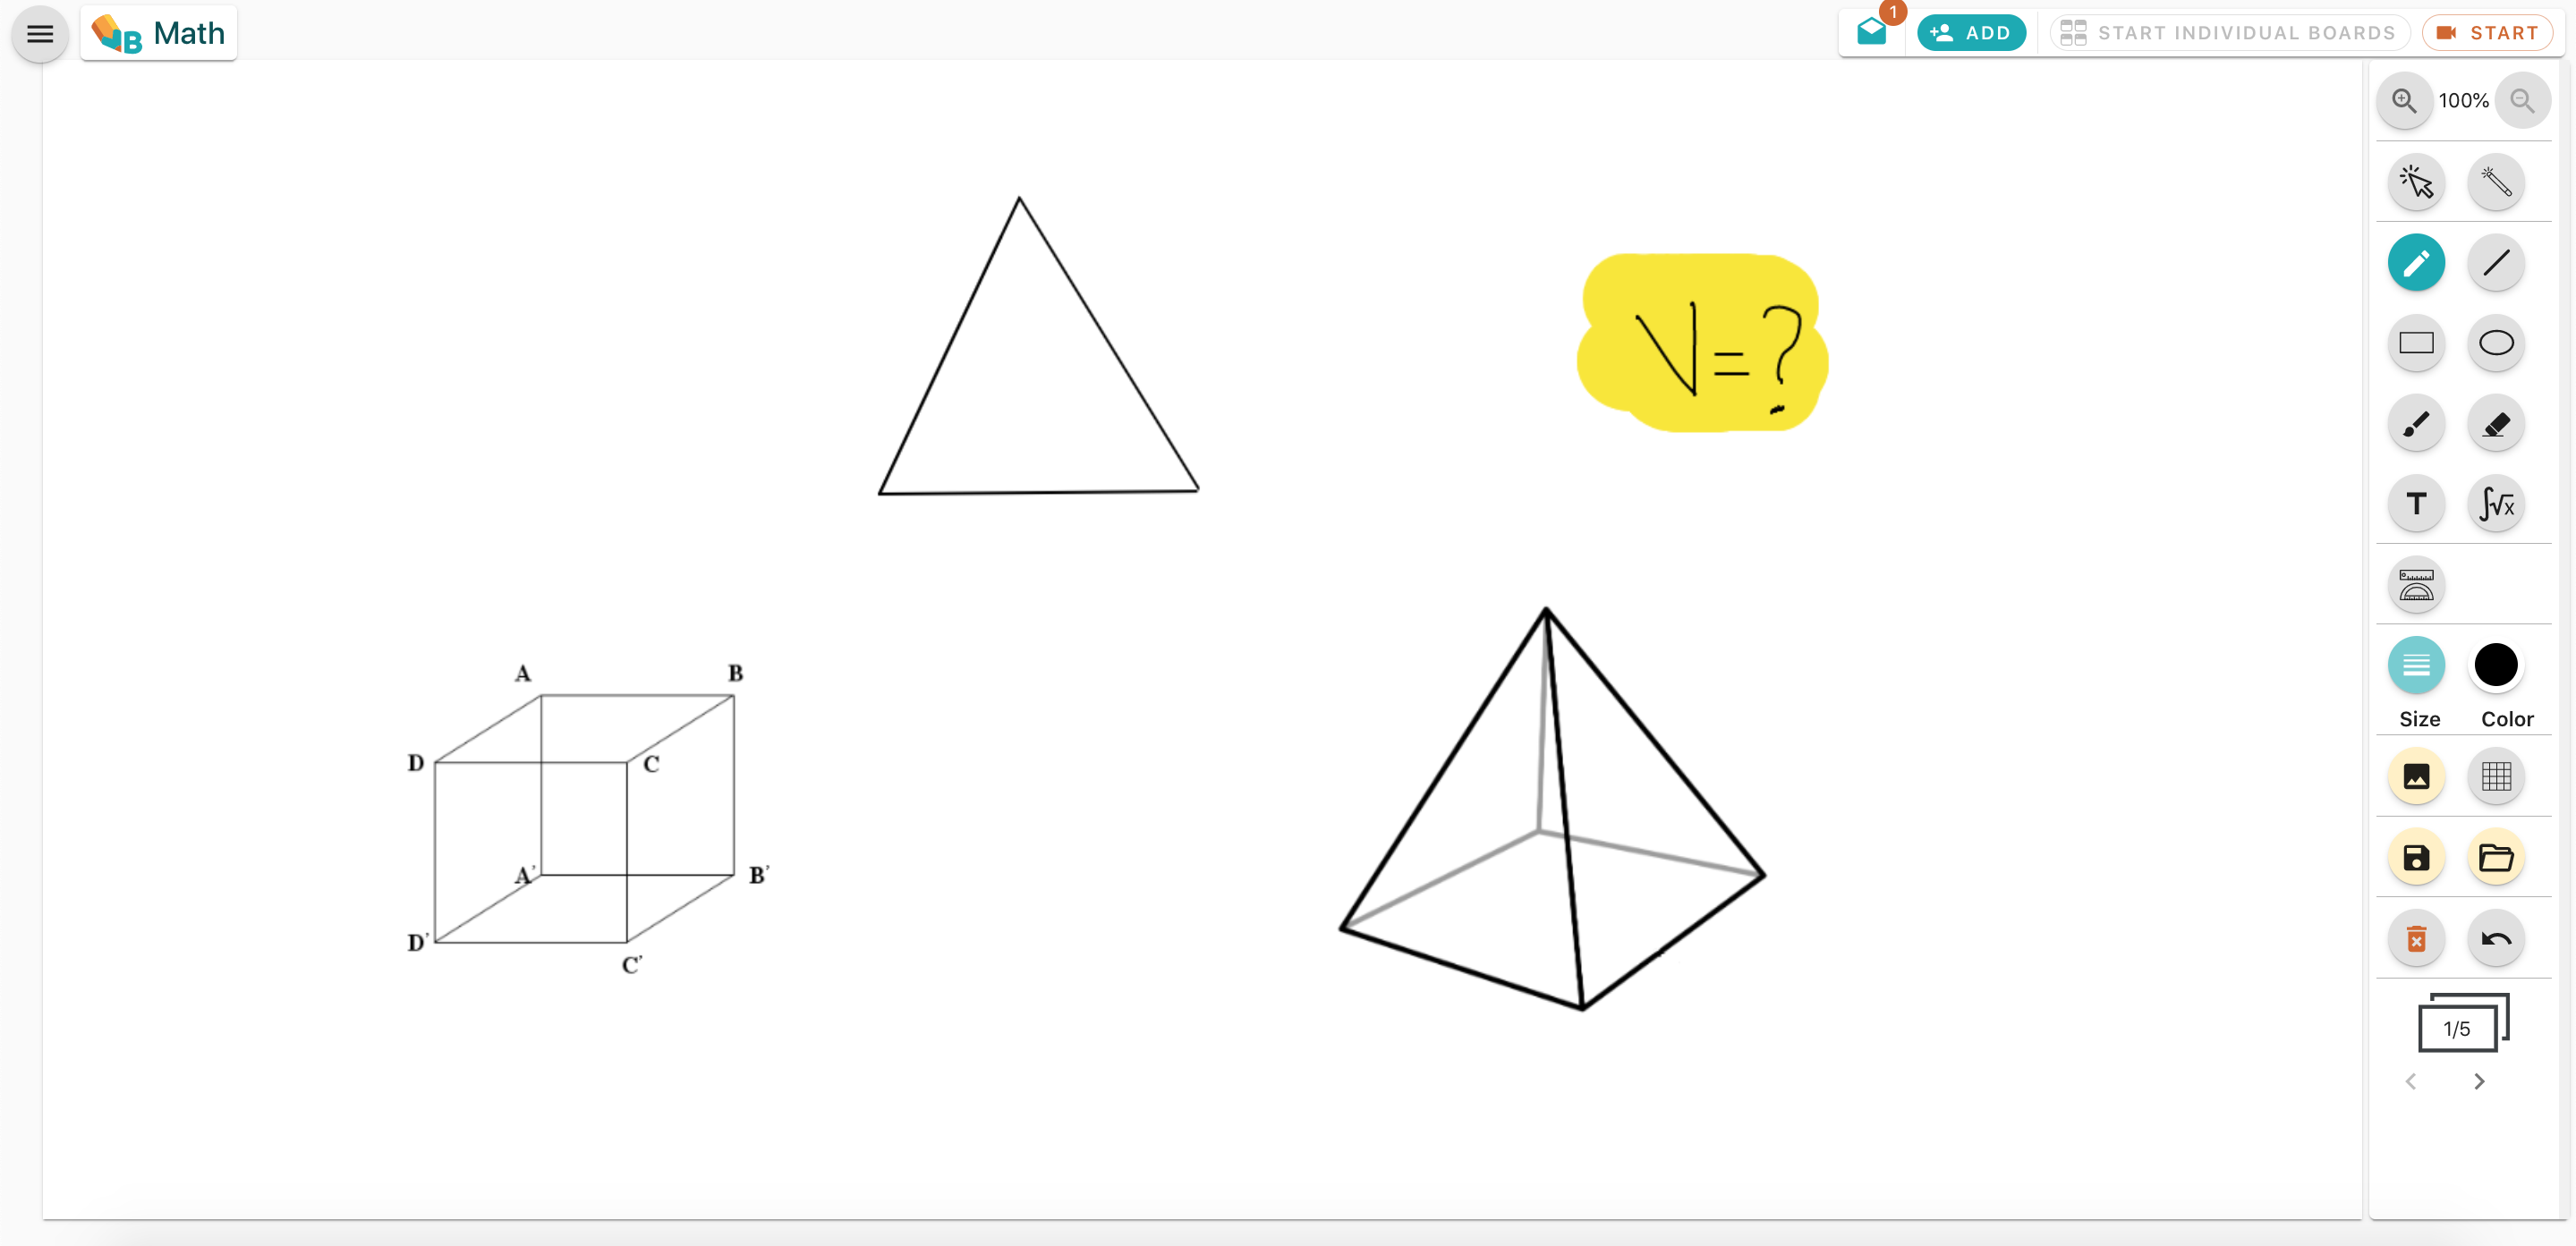
You may load boards or sets of from the library at any time. This can be done during a normal session or an individual board session.
Opening a single board or a board set will place the boards at the end of the current board list
Selecting a folder will add all the boards in the folder and all the sub-folders to the current lesson
Opening a board or board set in the individual boards will load them the selected individual only
Manage the library
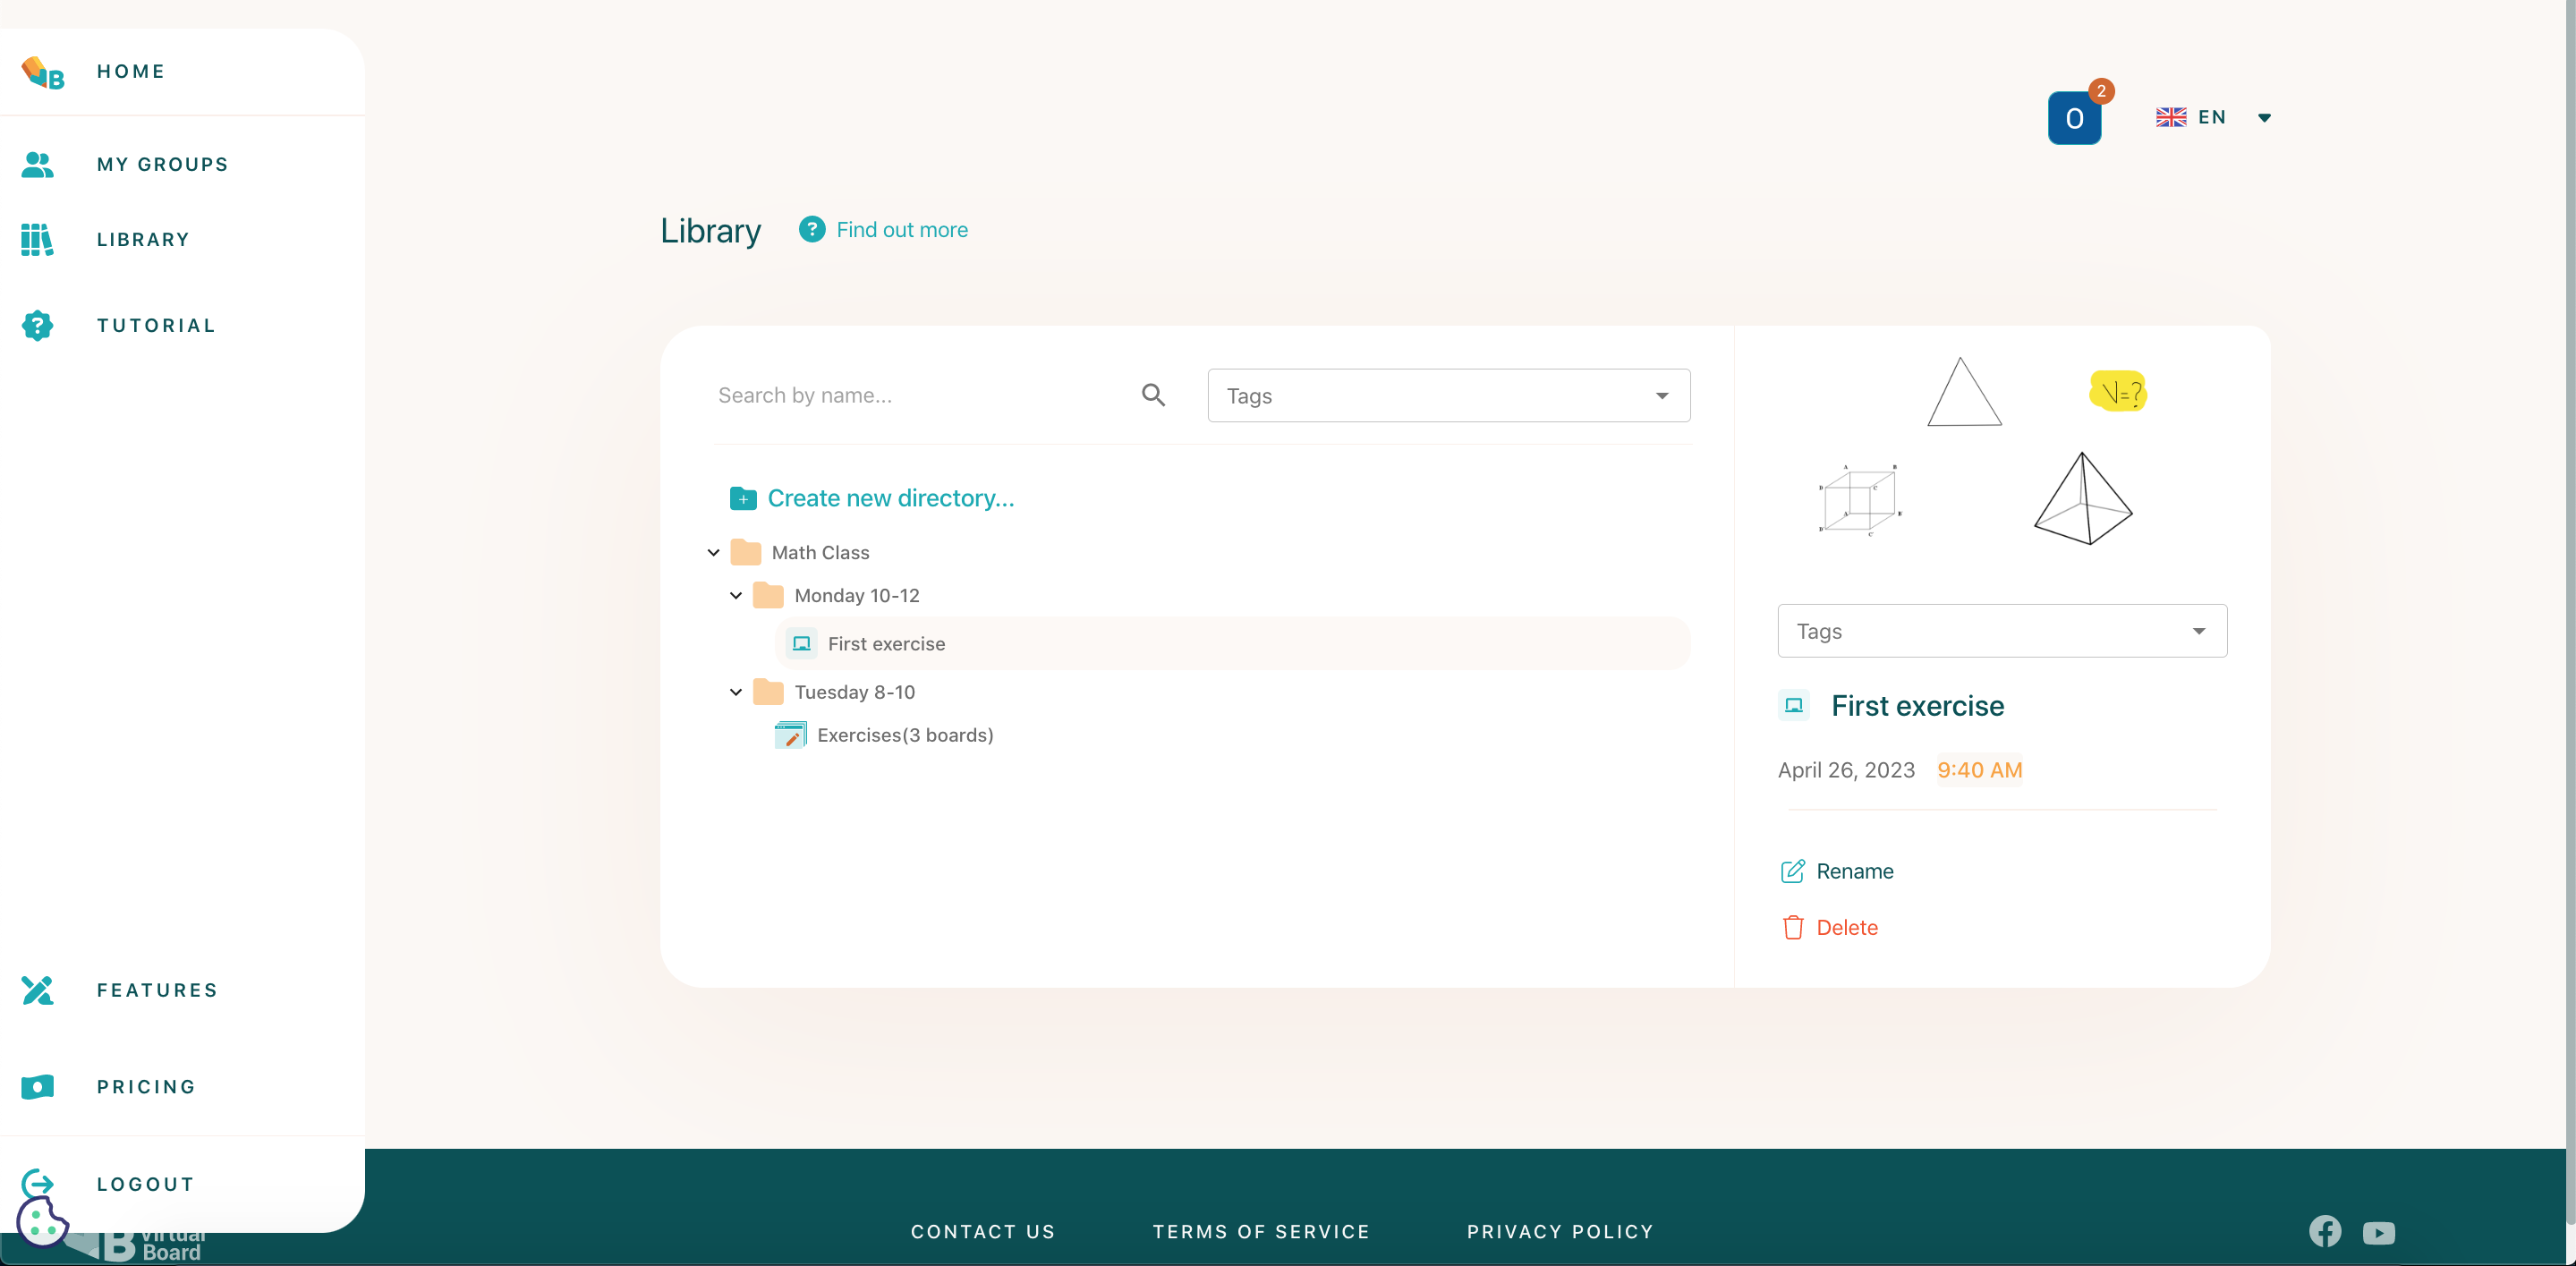
Managing the library allows teaches to better organise their boards into folders and sub-folders
Boards or board sets can be moved with drag and drop between folders
Folders can be moved with drag and drop
We can create sub-folders in each folder
We can tag individual boards to make them easier to find
We can remove boards and folders when we no longer use them
Library sharing
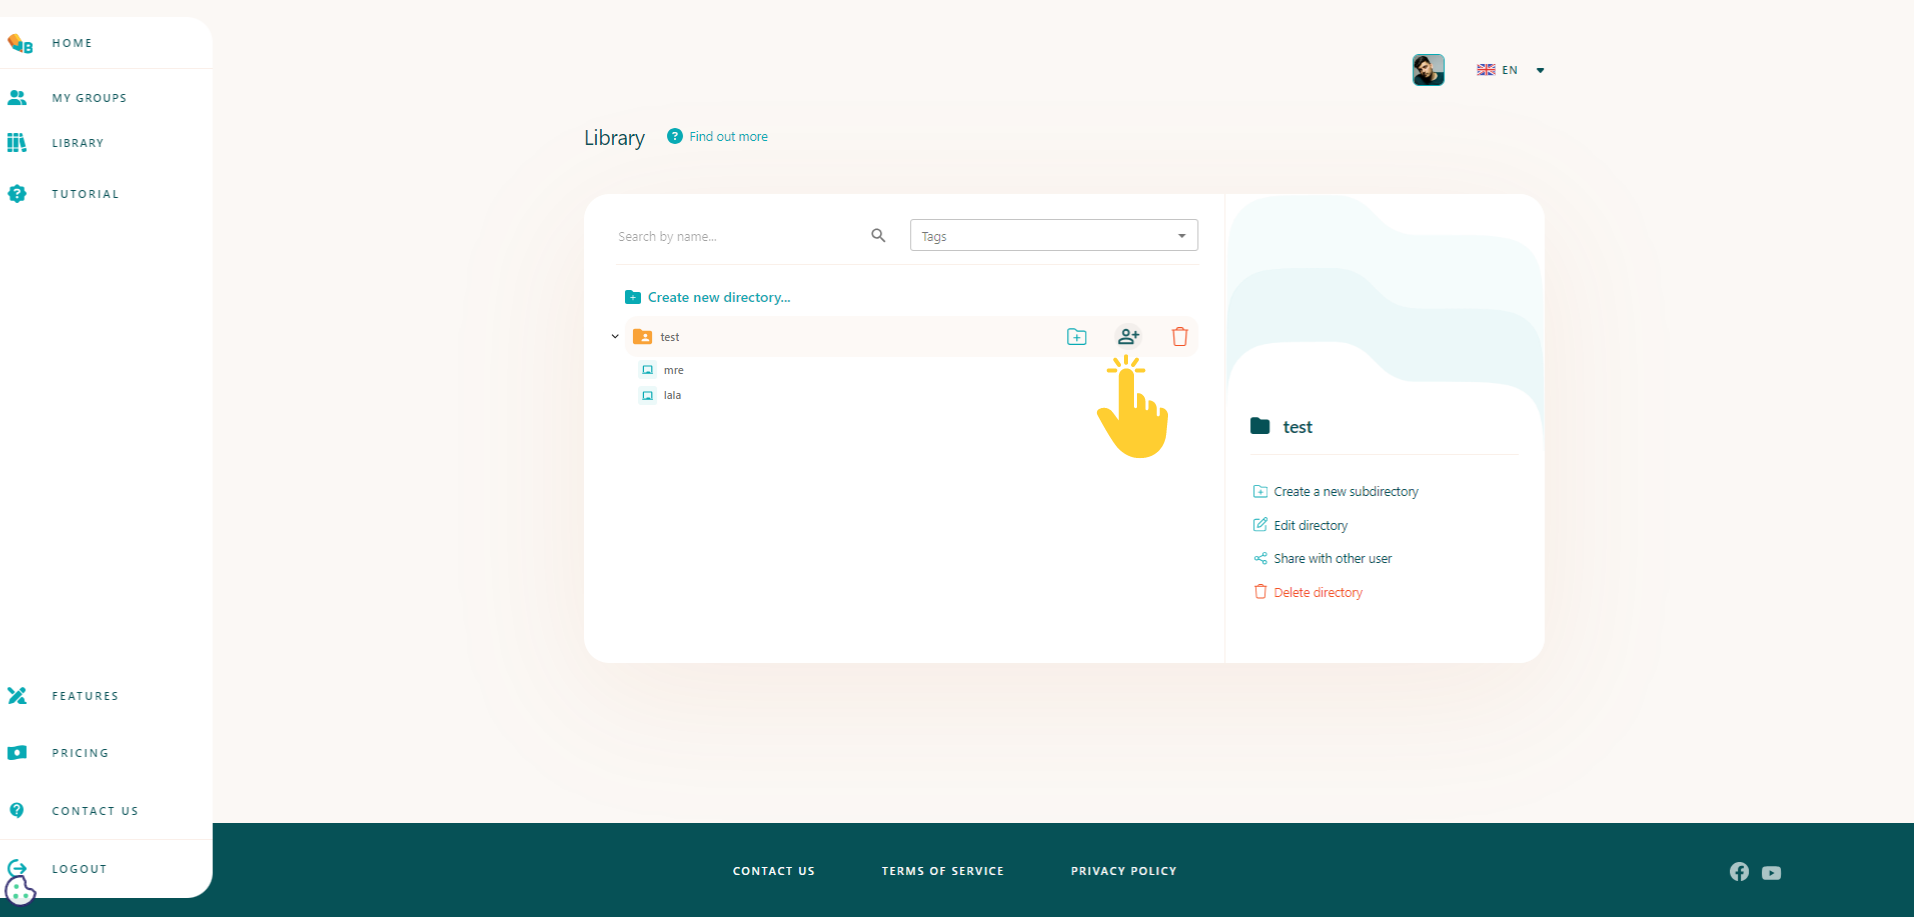
Library sharing allows teachers to share library materials with other teachers
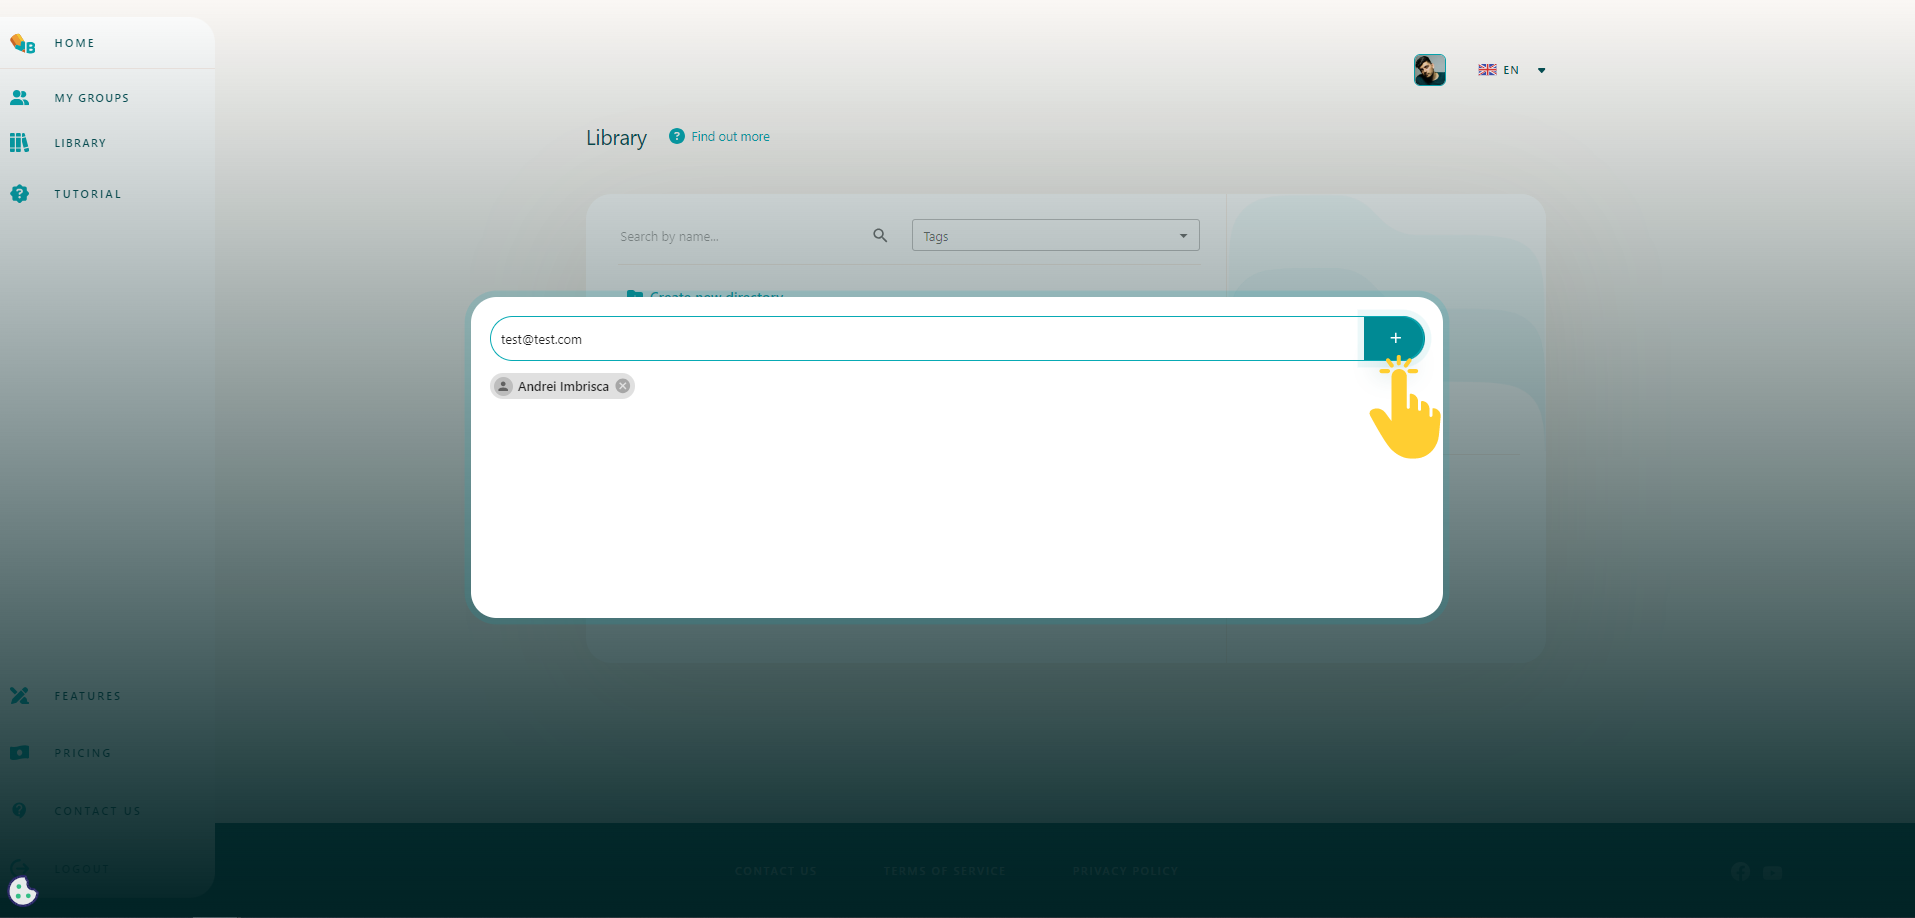
By simply pressing the plus button, a window for entering the email address of the recipient
Folders can be distributed by simply entering the email address of the recipient
The recipient teacher will receive an email notification to access the shared board.
Mobile optimized
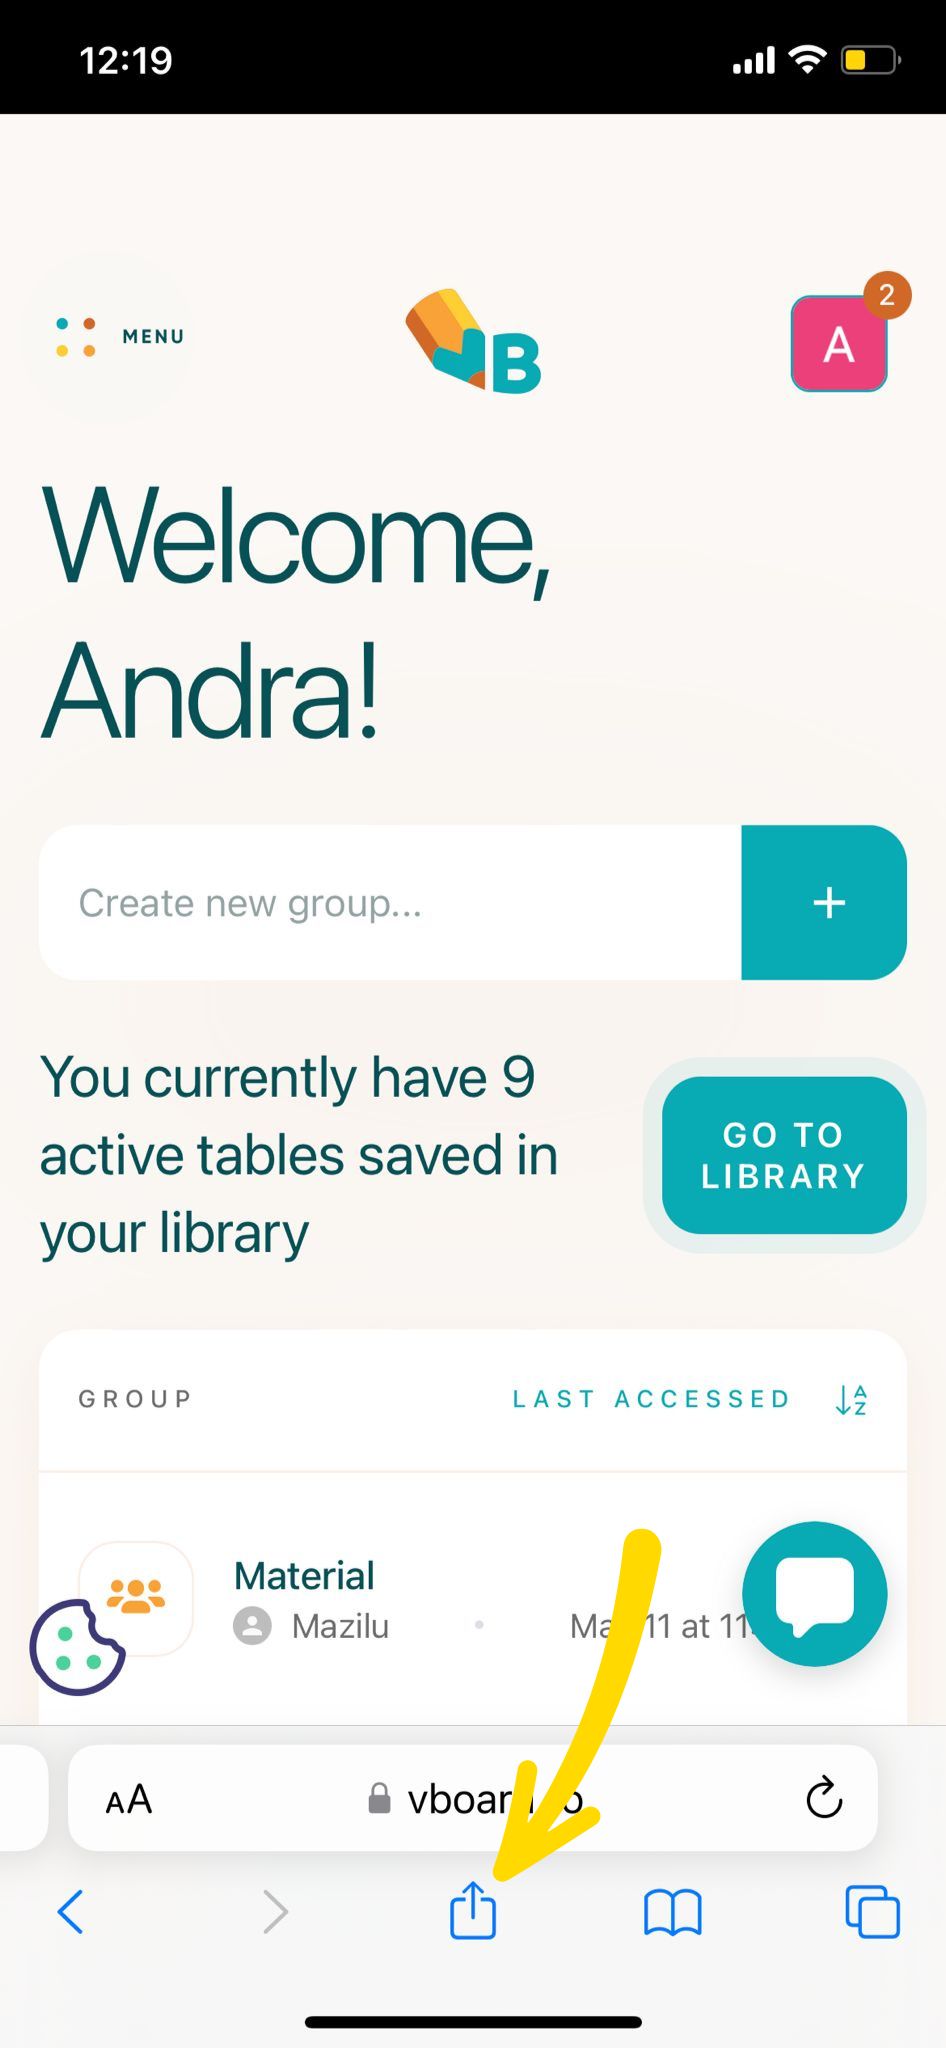
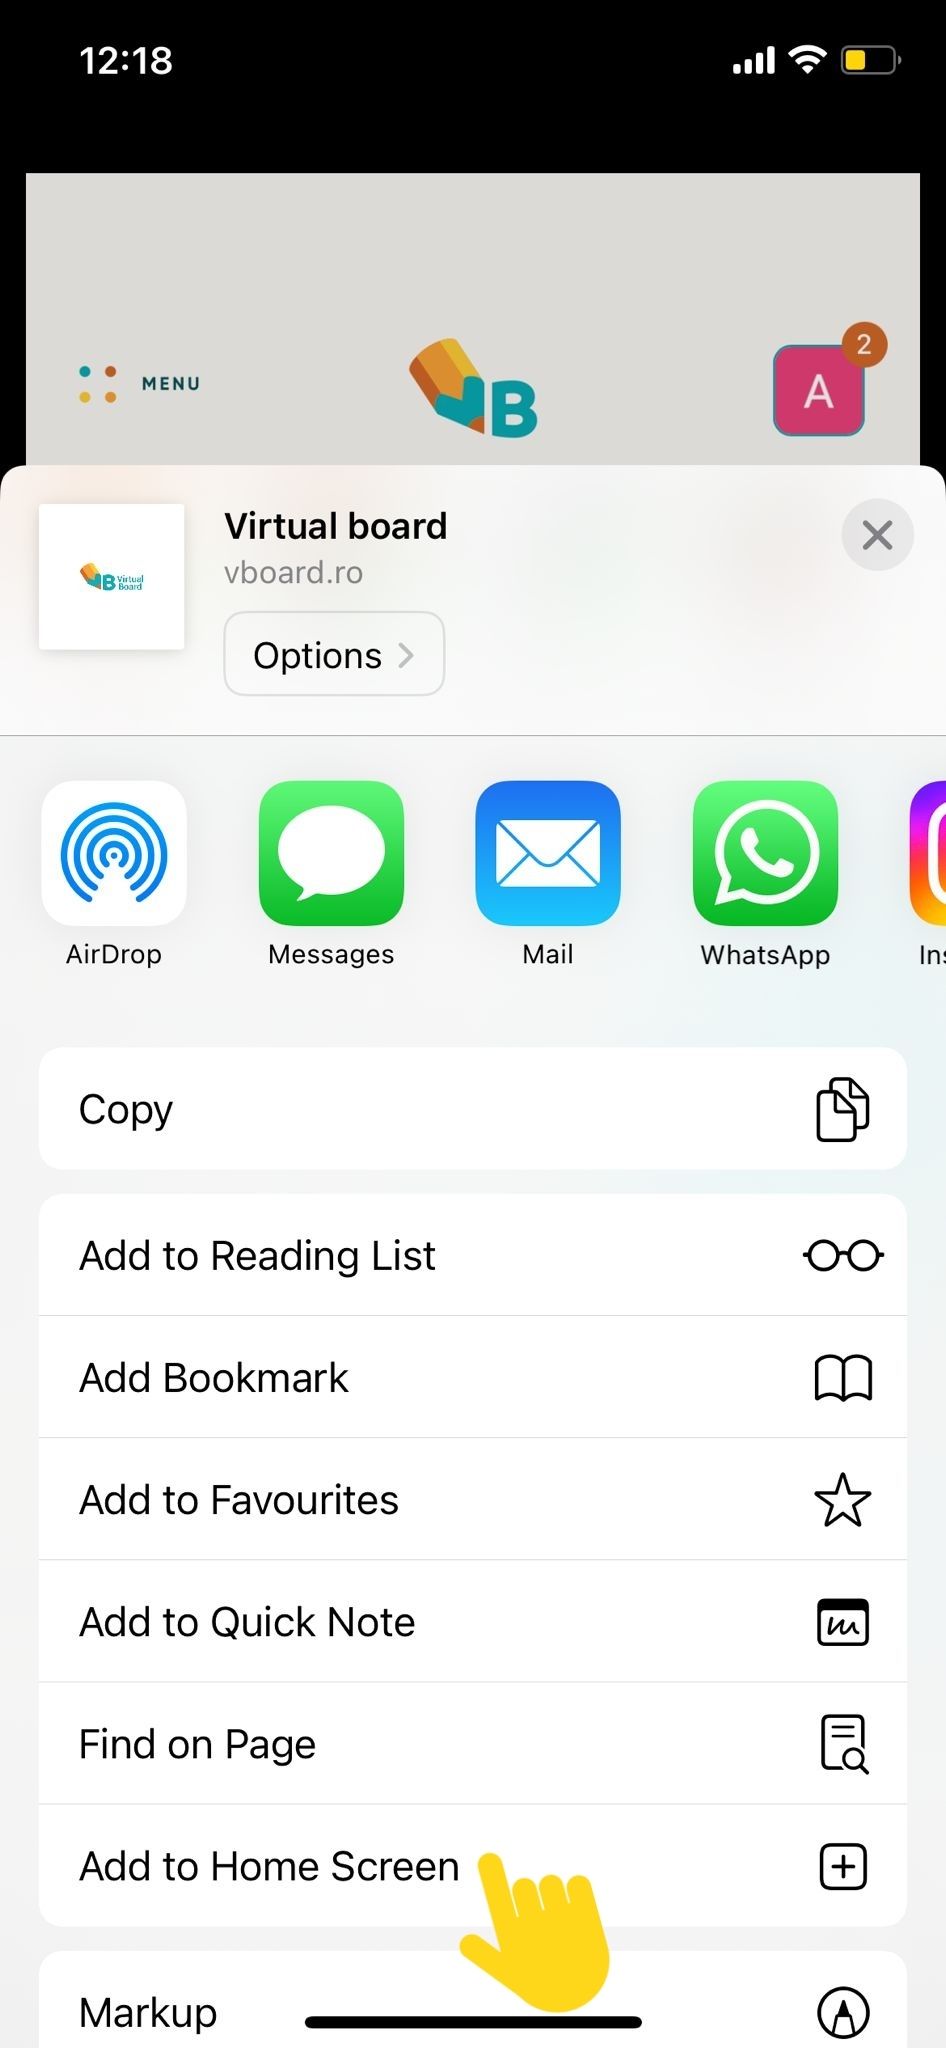
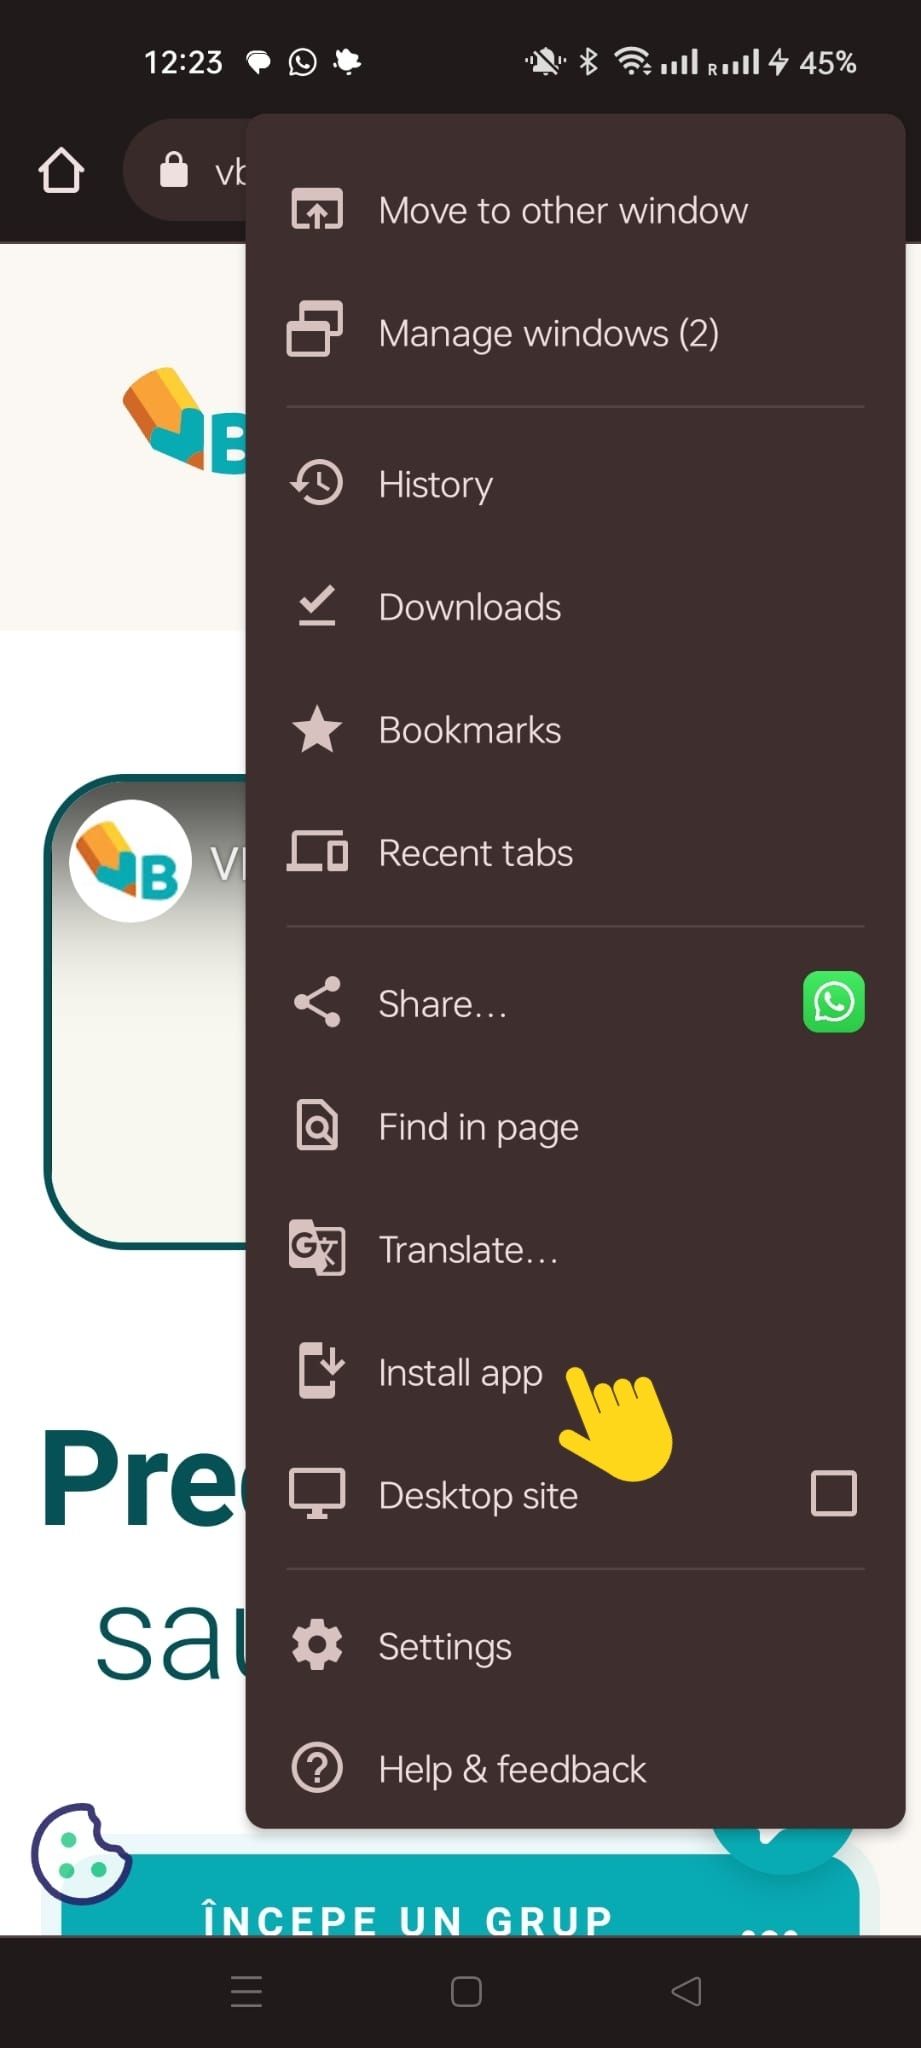
For mobile devices you can have a better mobile experience by using the following steps:
Mobile Friendly
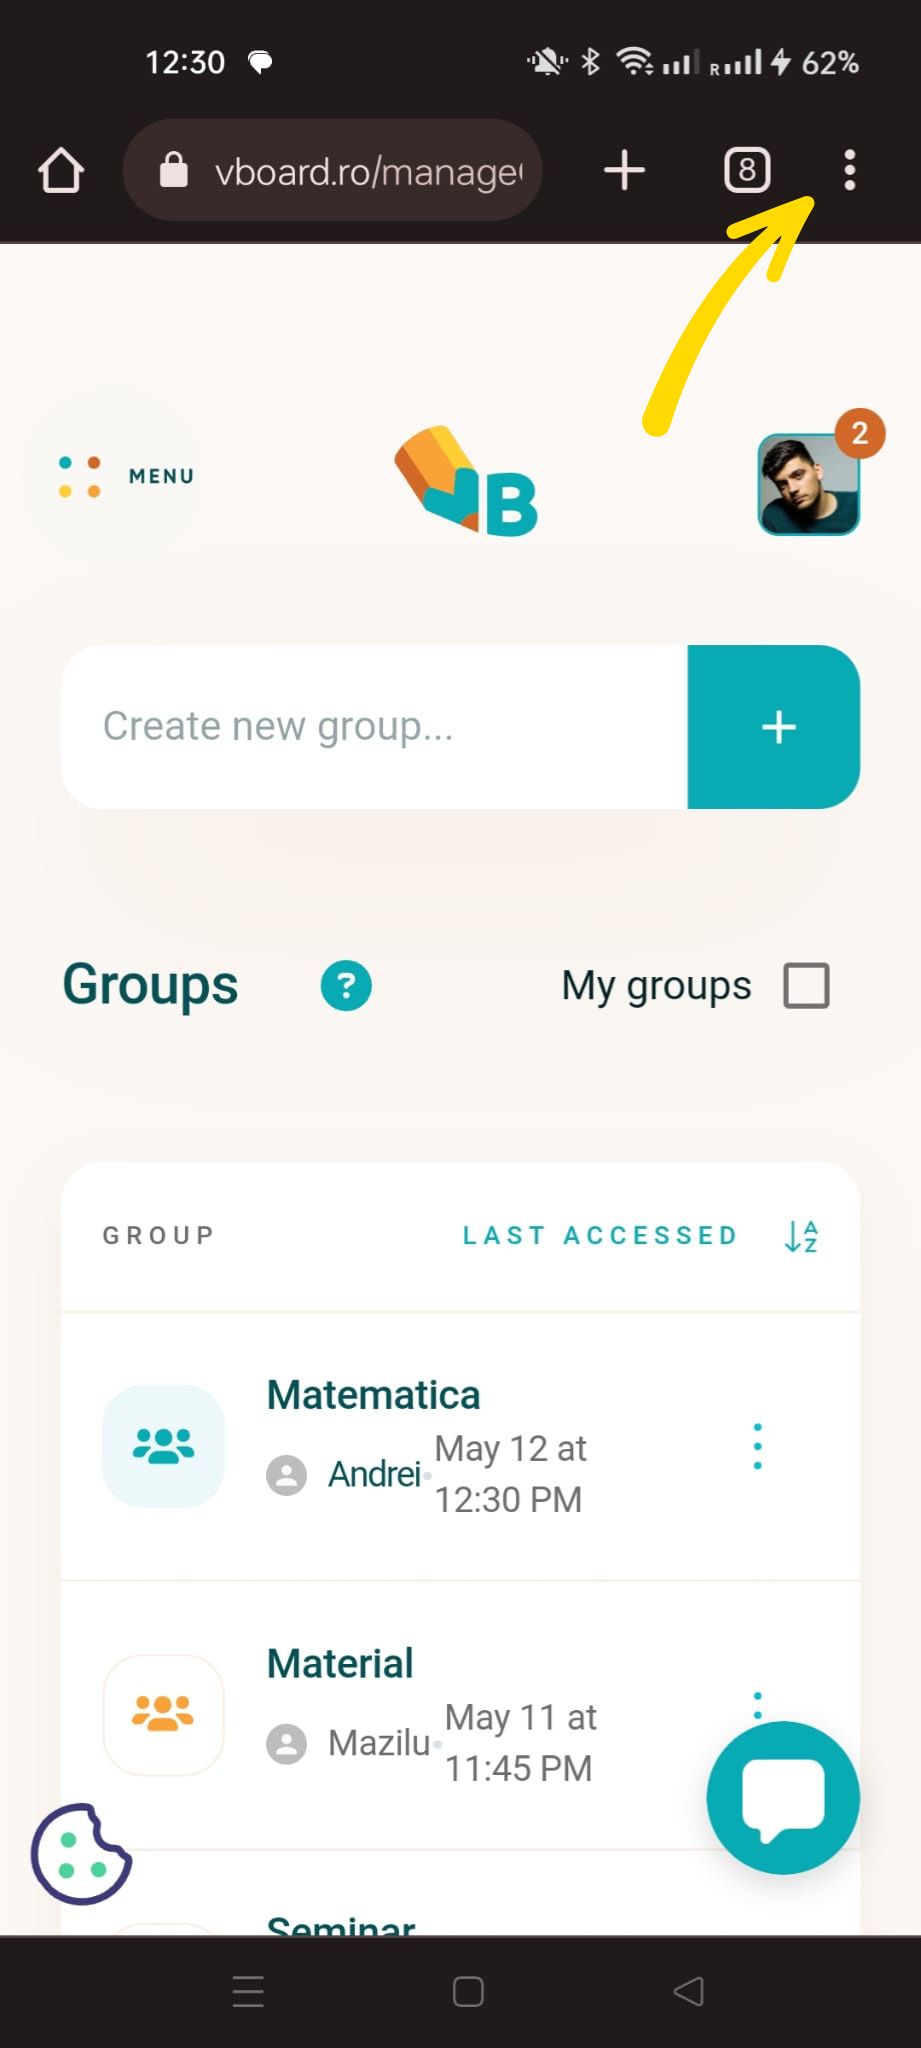
Open a mobile browser (preferably Chrome)
Navigate to https://vboard.ro
Click on the browser menu
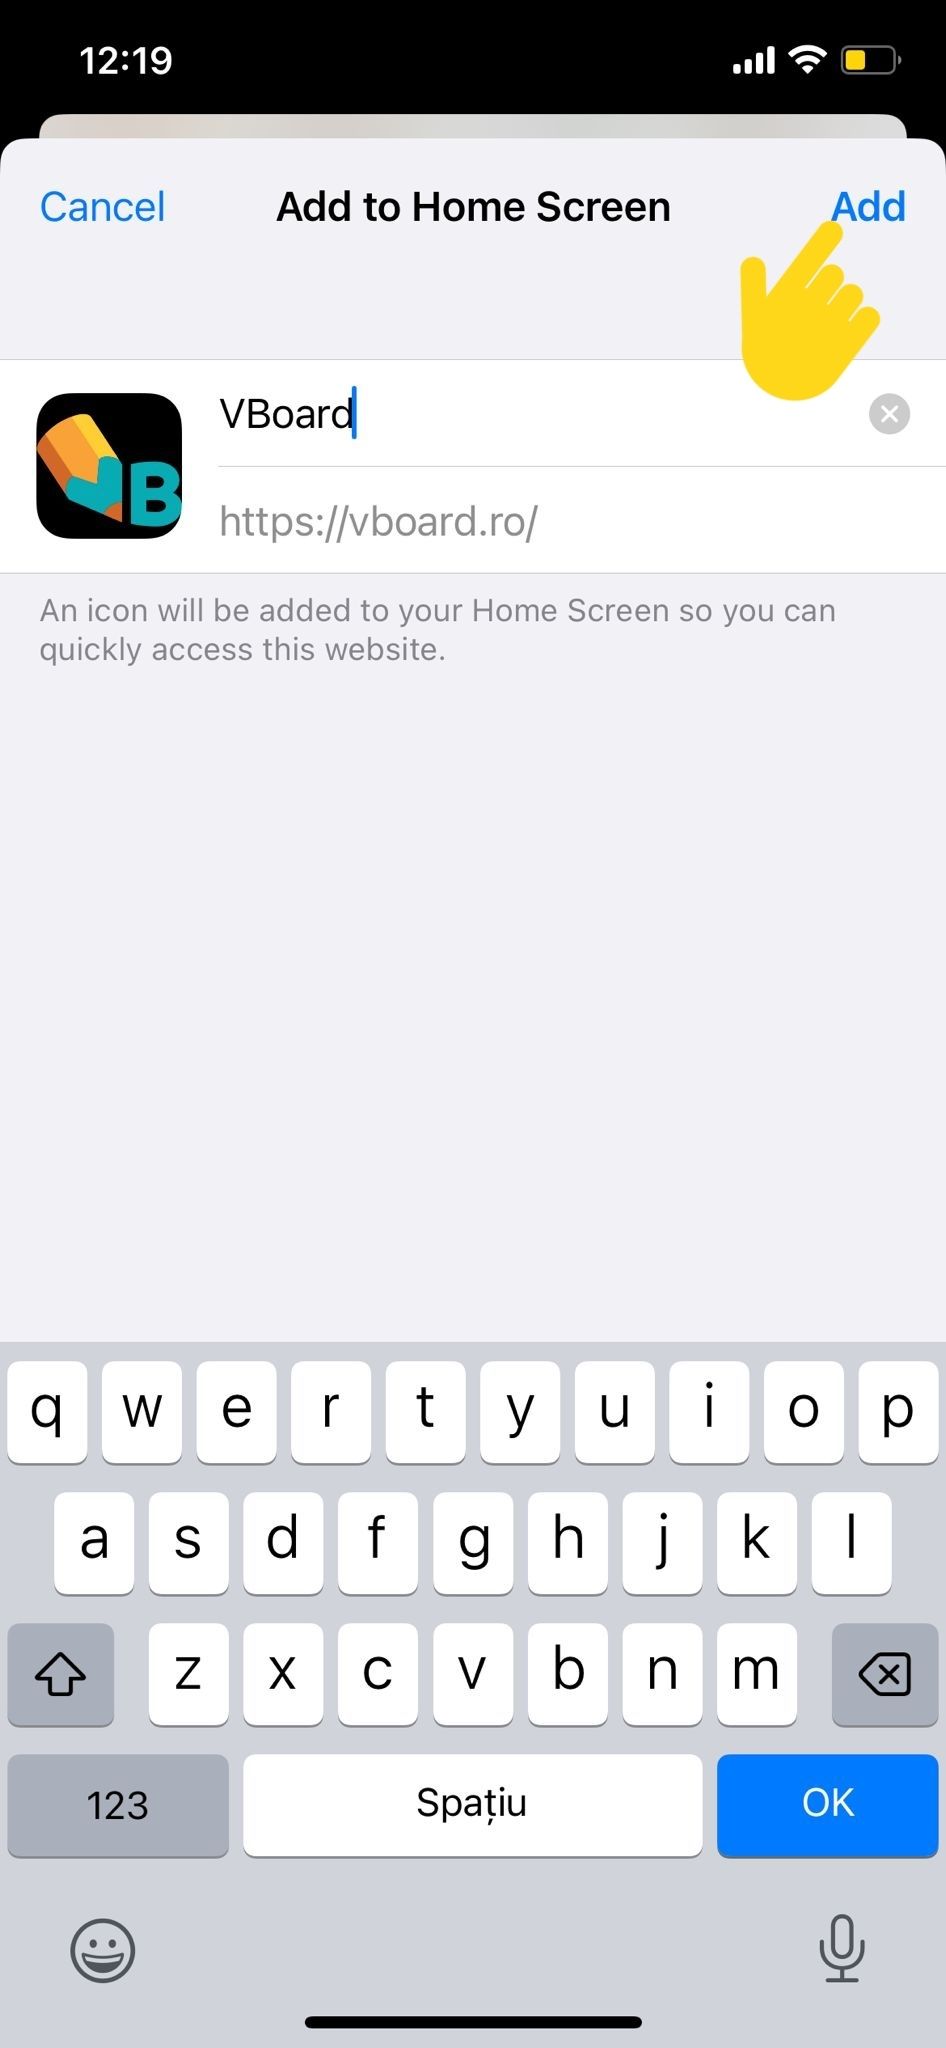
Click Add to home screen or Install app
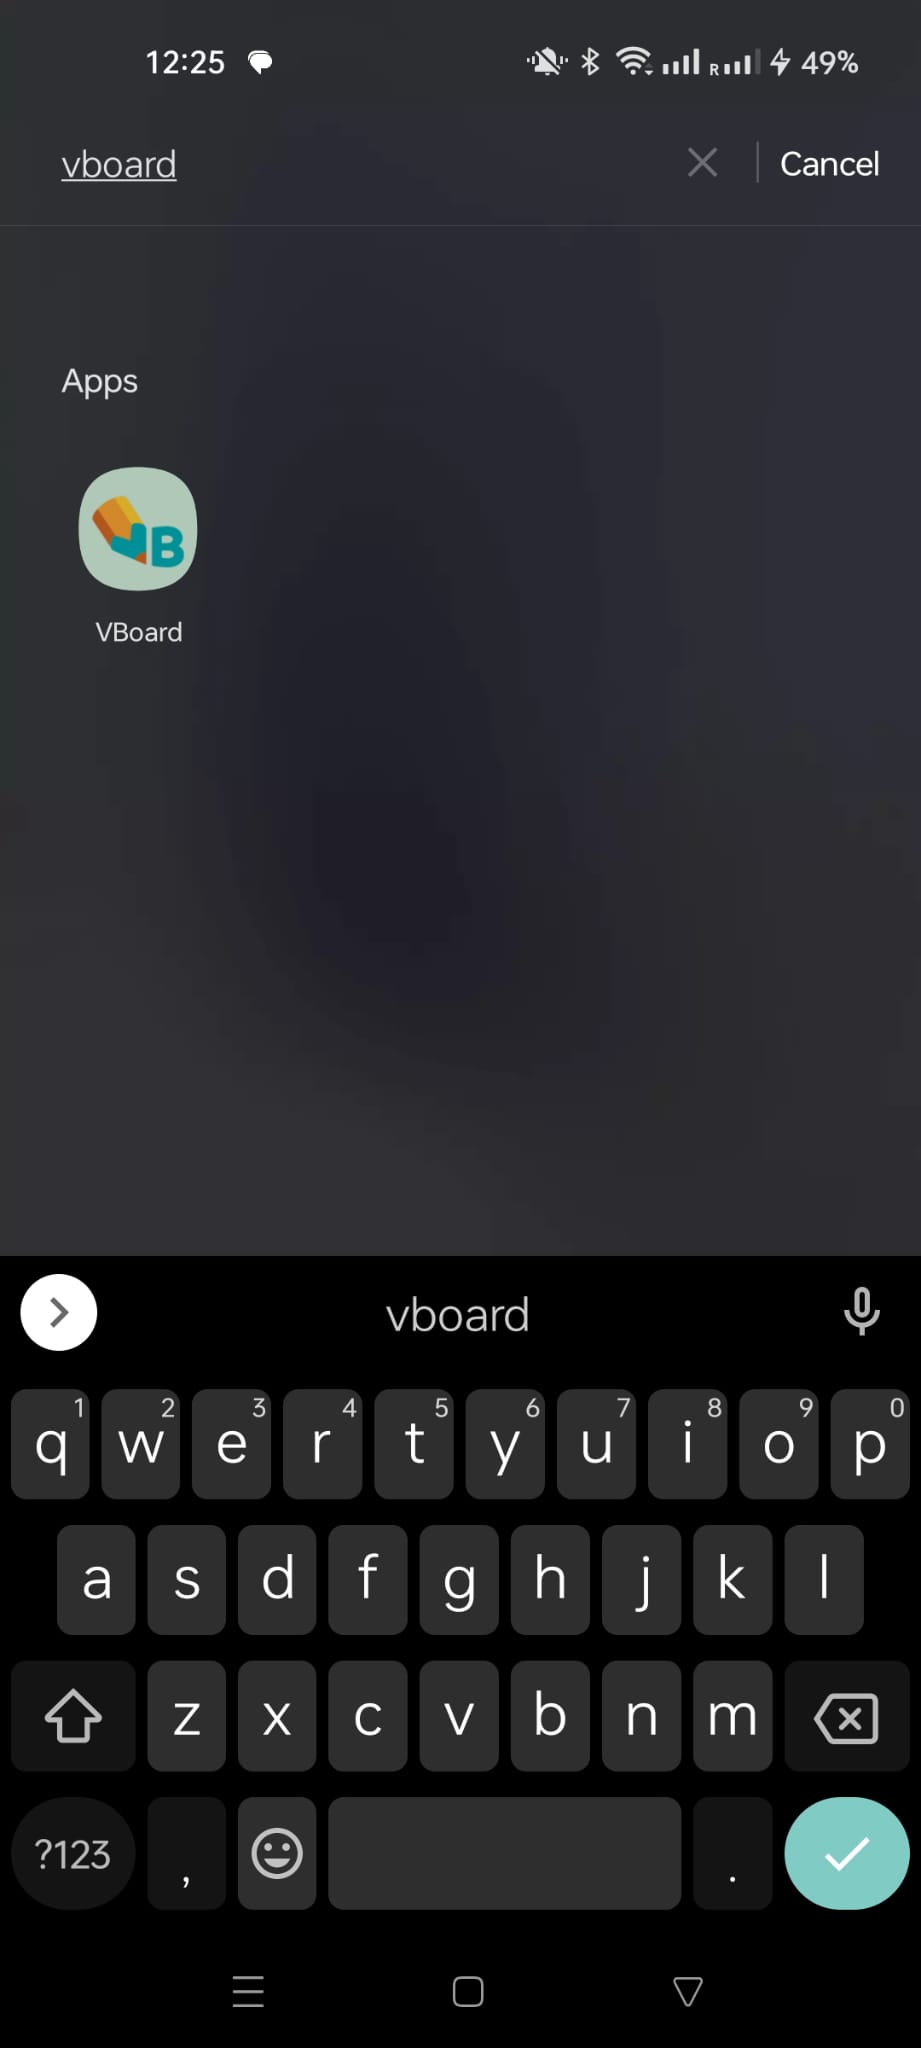
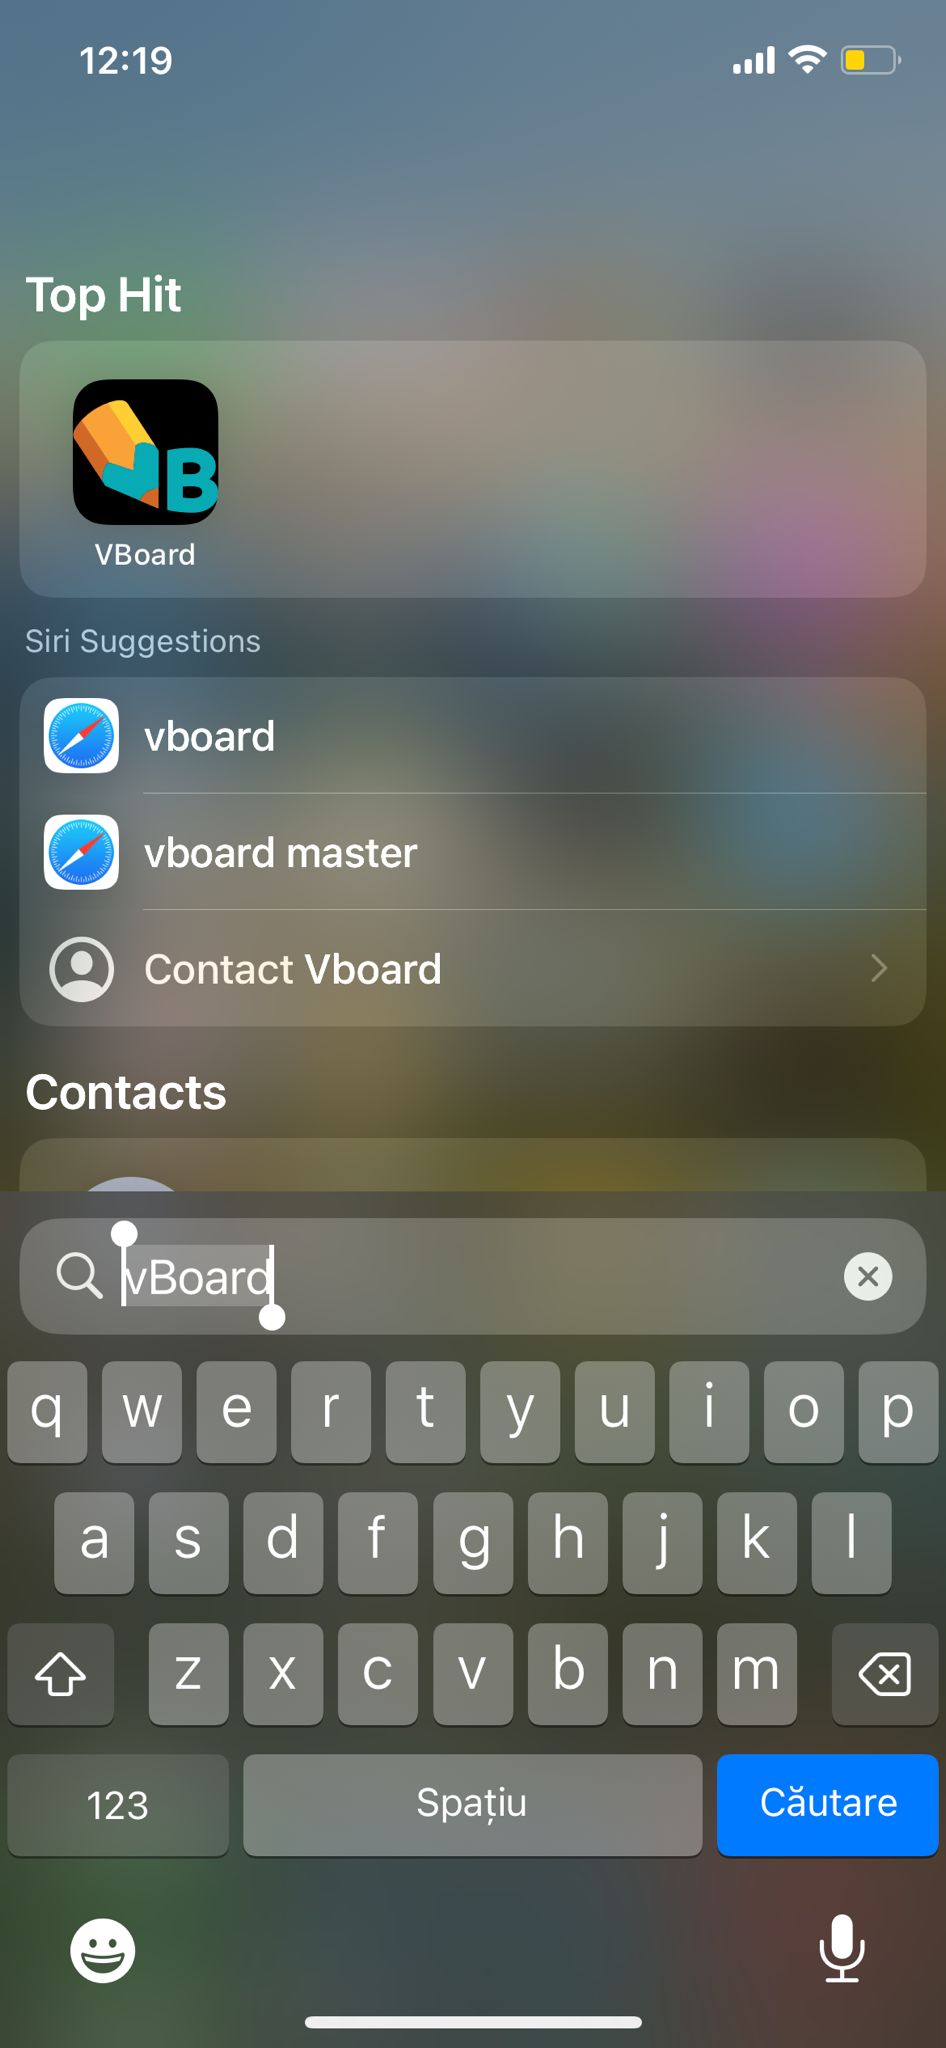
Find your VBoard app in the phone
Guest access
You can use VBoard without creating an account. Guest access lets you start a lesson or join an ongoing one by simply providing your name.
Joining as a guest
On the sign-in screen, choose Continue as guest and enter your name. You can also open a lesson link shared by a teacher and pick the guest option there.
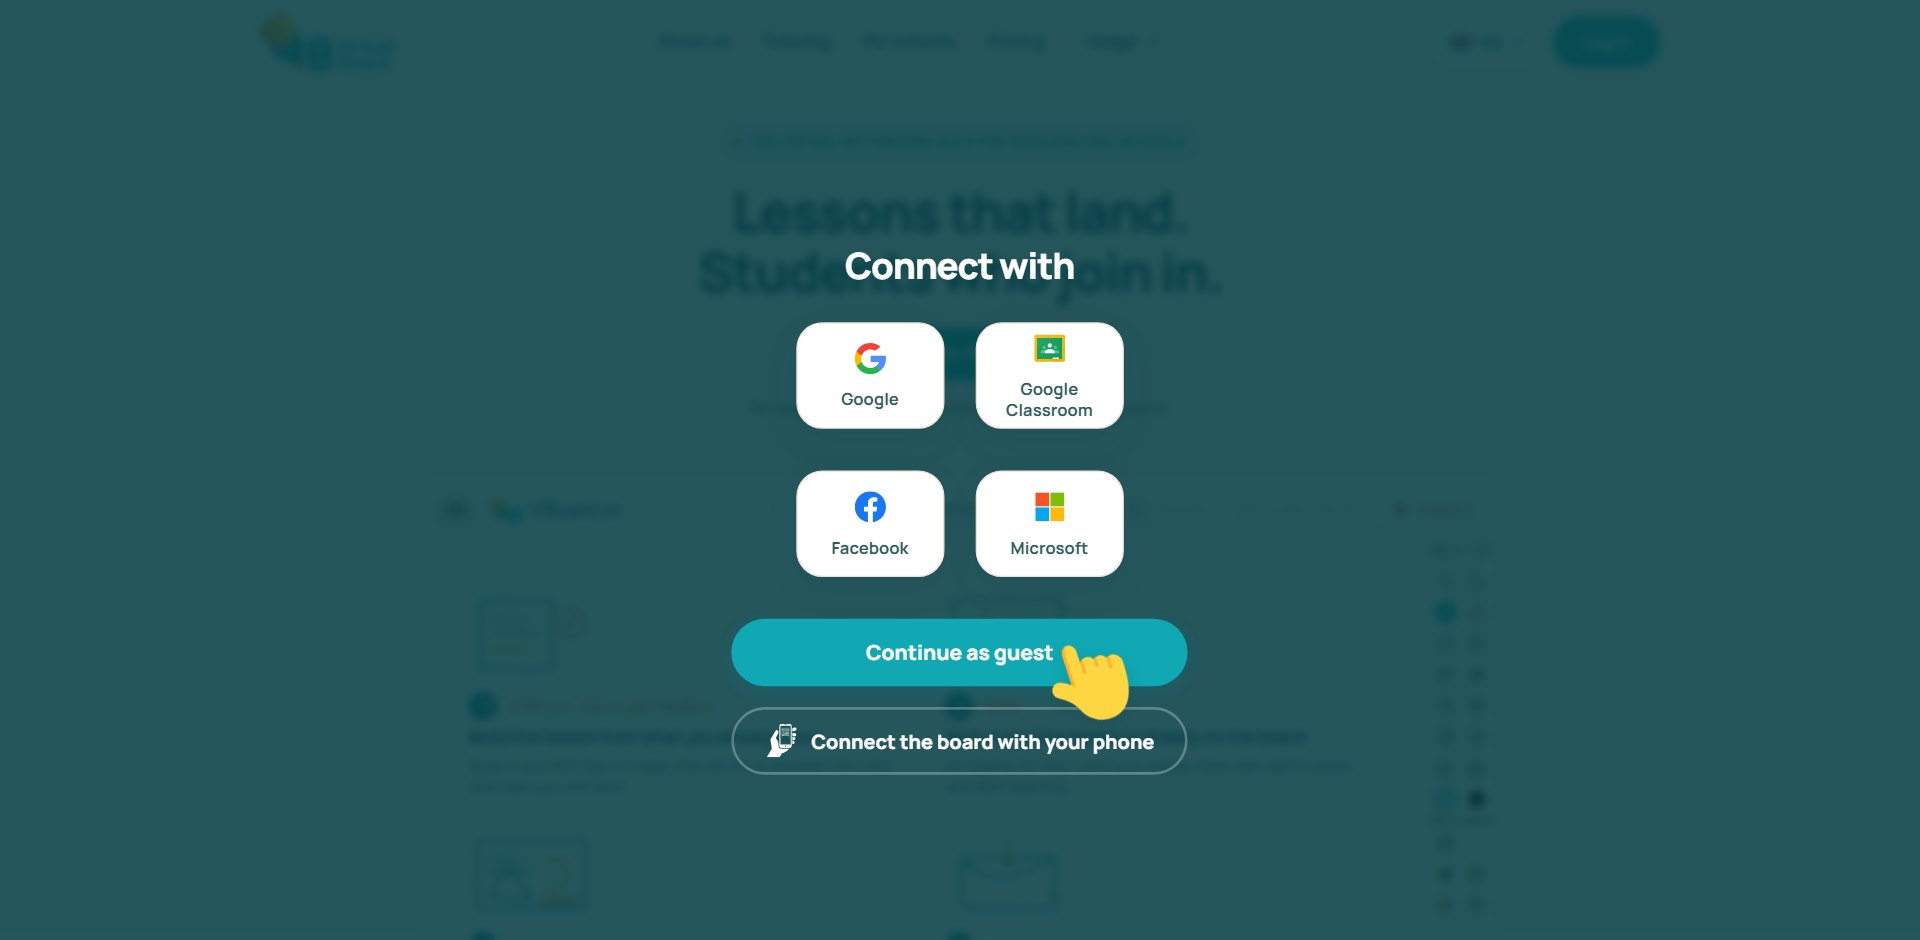
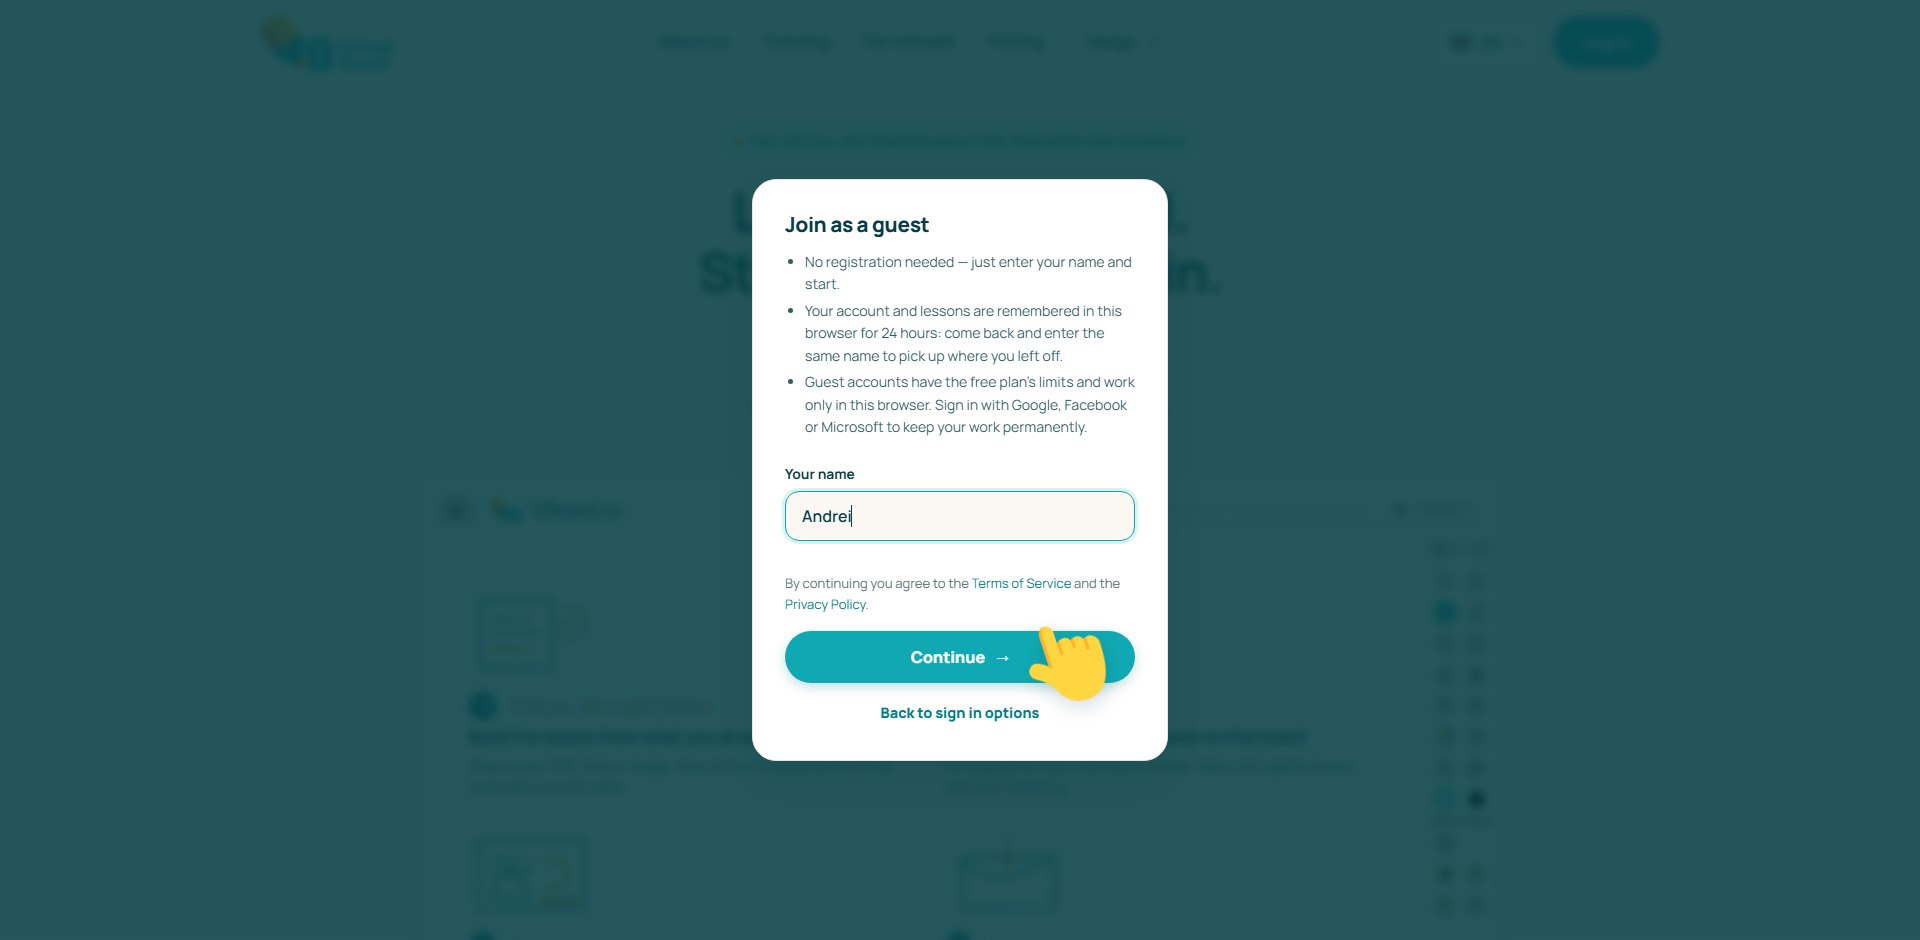
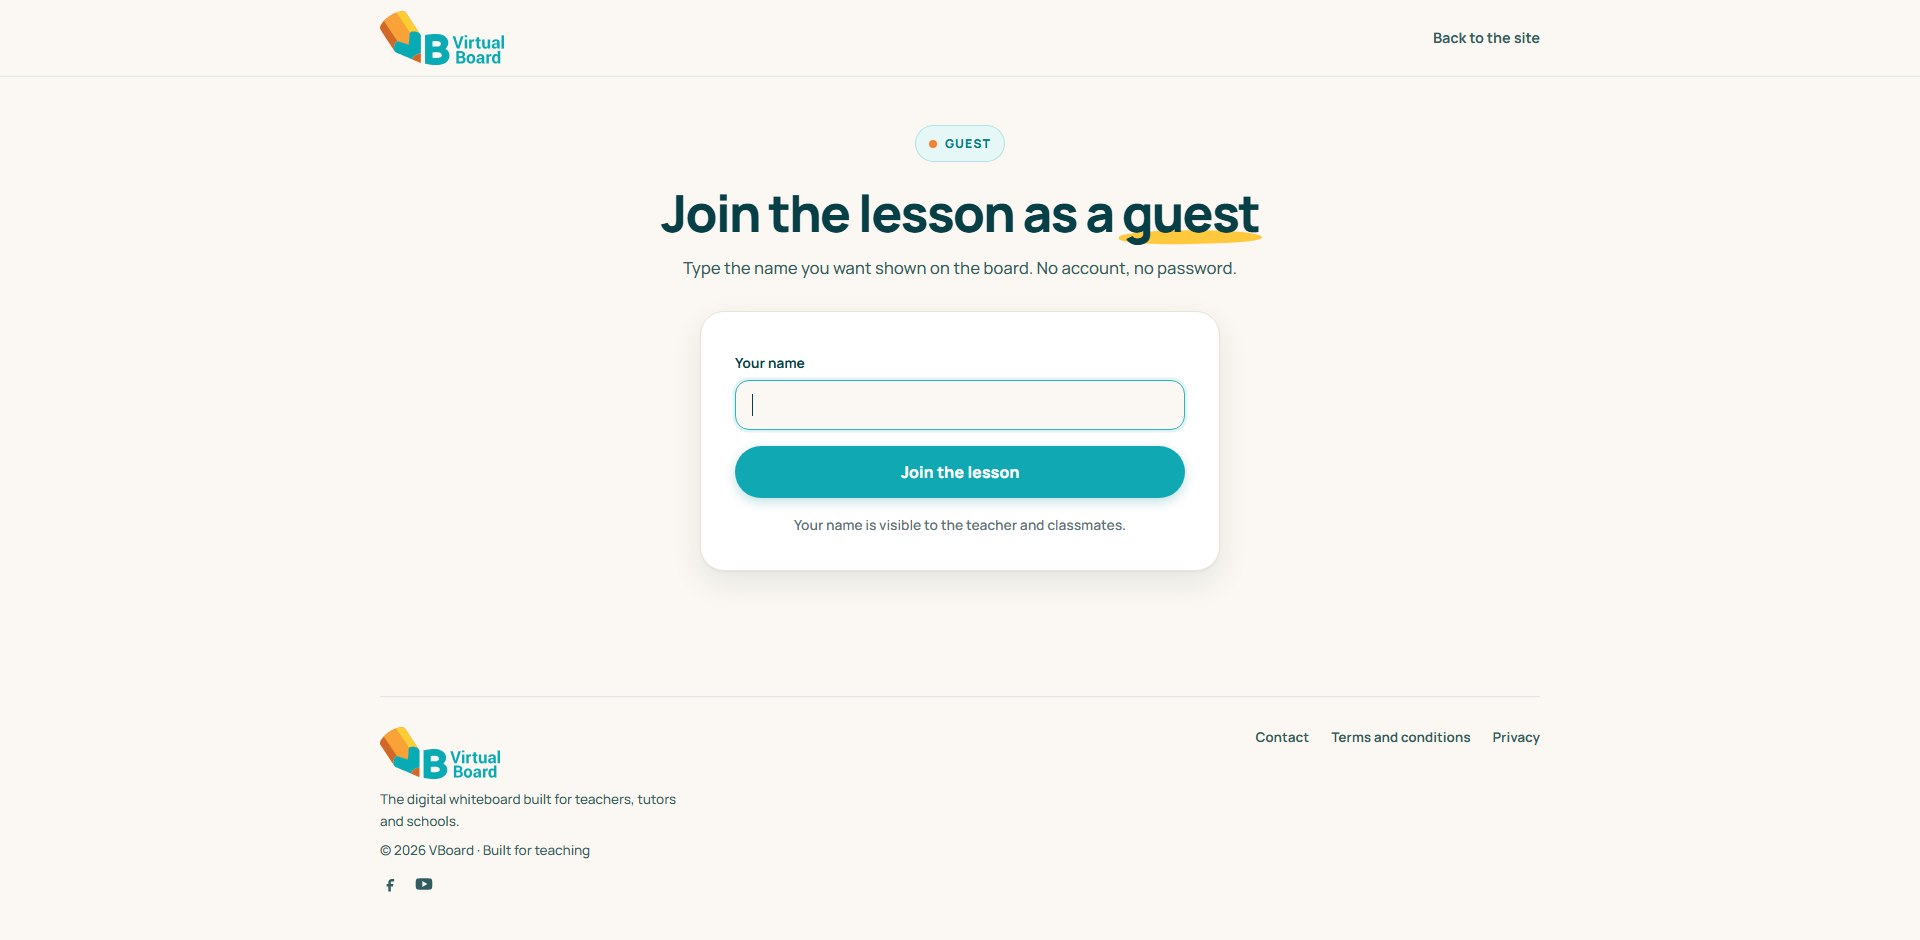
As a guest you can create your own lessons or send a join request to an ongoing lesson, just like a regular user.
Coming back later
Your guest account is remembered in your browser. If you come back from the same browser and enter the same name, you will be signed back into the same guest account together with your lessons.
This works for 24 hours after your last visit. Clearing your browser data or using another device starts a fresh guest account.
Several people can share the same browser: each name keeps its own guest account. Entering a name already used on this browser signs you back into that account, while a new name creates a new guest account.
Guest account limits
Guest accounts have the same limits as the free plan.
Guest accounts cannot start a trial or be upgraded to a paid subscription. To subscribe, sign in with Google, Facebook or Microsoft and create a full account.